photoshop合成雪中女王
2022-12-25 21:45:12
來源/作者: /
己有:44人學(xué)習(xí)過
Take now Sponge Tool to decolorize the girl's picture except her scarf on her neck. Increase then the layer's brightness, applying Image -Adjustments -Curves (ctrl+m).
使用海綿工具將MM脫色,圍巾除外,之后點擊圖像-調(diào)整-曲線(ctrl+m)將圖像調(diào)亮一點。

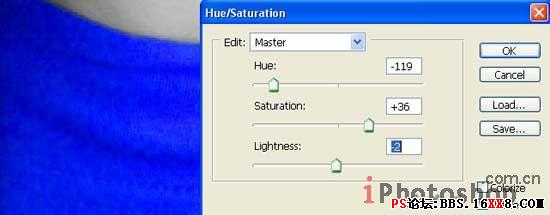
Change the scarf's color on blue one: Image -Adjustments -Hue/Saturation (ctrl+u)
點擊圖像-調(diào)整-色相/飽和度進行如下調(diào)整將MM的圍巾顏色變成藍色~
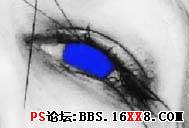
Create now a new layer: Layer -New Layer and make use of Brush Tool to paint the eyes in the same color of the scarf.
新建層,使用畫刷工具將MM的眼睛涂成圍巾相同的藍色~
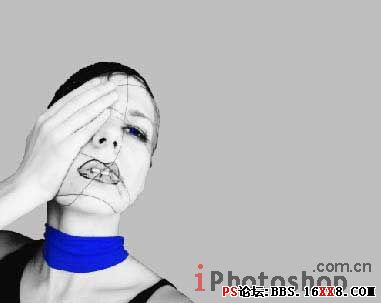
Change the layer's type on Overlay and combine it with the previous one: Layer -Merge Down (ctrl+e). Then increase the picture's size, using Crop Tool. Create a new layer now for the background and place it out lower then the girl's layer. Paint it after that in a neutral color, applying Paint Bucket Tool.
將圖層類型設(shè)置為覆蓋,并合并到MM層里面去(圖層-合并圖層ctrl+e)。使用裁剪工具擴大畫布,新建層放在MM層下面當(dāng)作背景,使用油漆桶工具隨便填充一種顏色。
標(biāo)簽(TAG) 照片合成
下一篇:噴濺效果,制作噴濺效果的人像
相關(guān)推薦

簡易畫貓頭鷹的步驟 畫貓頭鷹的簡

幼兒簡筆畫烏鴉的畫法 教你如何畫

如何簡單的畫一條魚 5步畫魚簡筆畫

ps cs6做鉚釘效果文字

如何用PS把渾濁的風(fēng)景照片調(diào)出通透清晰

PS商業(yè)修圖師對人物頭發(fā)進行精修教程

如何用PS打造出明亮而有神的眼睛效果

PS商業(yè)修圖給人像增強光影質(zhì)感的方法介紹


