photoshop合成雪中女王
2022-12-25 21:45:12
來源/作者: /
己有:44人學習過
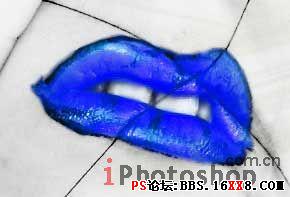
Mark out and copy the girl's lips, place them on a new layer on the same place they were situated before. Change their color with Image ?Adjustments ?Curves (ctrl+m).
使用多邊形套索工具選出MM的嘴唇,扣出來放到新層中,位置不變,點擊圖像-調整-曲線,將嘴唇變成藍色。
Now it's possible to combine all the layers: Layer Merge Visible (shift+ctrl+e). Insert everything in a frame, applying Crop Tool and Rectangular Tool. Use the Sponge Tool to decolorize a part of the picture, that one from the right side.
下面將所有圖層合并(圖層-合并可見圖層shift+ctrl+e),使用裁剪工具和矩形工具擴大畫布并將圖片右側的顏色進行脫色。
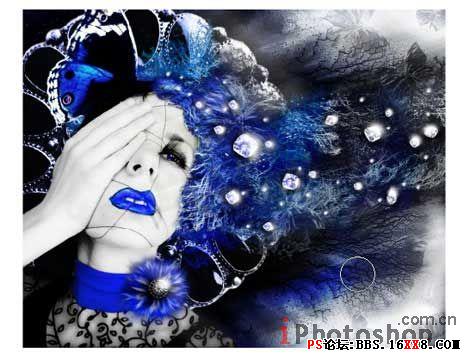
Finishing the features, add the ready brushes' set representing the stars (they may be downloaded here: http://www.deviantart.com/deviation/30000107/
?qo=20&q=by%3Aanarasha&qh=sort%3Atime+-in%3Ascraps).
The brushes representing the frost may be downloaded on this address http://www.deviantart.com/deviation/27149678/
?qo=16&q=Ice&qh=in%3Aresources%2Fapplications%2Fpsbrushes+sort%3Atime
使用以下兩種畫刷對圖片進行邊緣優化:畫刷1( http://www.deviantart.com/deviation/30000107/?qo=20&q=by%3Aanarasha&qh=sort%3Atime+-in%3Ascraps)
畫刷2(http://www.deviantart.com/deviation/27149678/?qo=16&q=Ice&qh=in%3Aresources%2Fapplications%2Fpsbrushes+sort%3Atime )

效果完成~希望這篇教程對你有幫助~^_^。
標簽(TAG) 照片合成
上一篇:利用相關素材制作鬼魅效果
下一篇:噴濺效果,制作噴濺效果的人像
相關推薦

簡易畫貓頭鷹的步驟 畫貓頭鷹的簡

幼兒簡筆畫烏鴉的畫法 教你如何畫

如何簡單的畫一條魚 5步畫魚簡筆畫

ps cs6做鉚釘效果文字

如何用PS把渾濁的風景照片調出通透清晰

PS商業修圖師對人物頭發進行精修教程

如何用PS打造出明亮而有神的眼睛效果

PS商業修圖給人像增強光影質感的方法介紹


