photoshop字體效果教程:幾種質感字
2022-12-25 14:50:33
來源/作者: /
己有:3人學習過
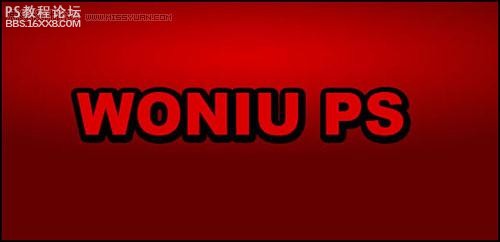
以下 是效果
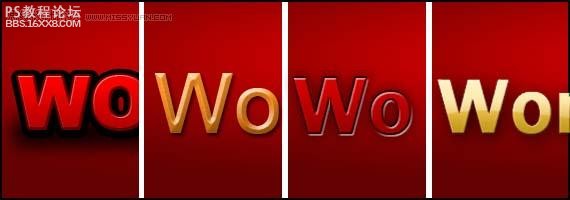
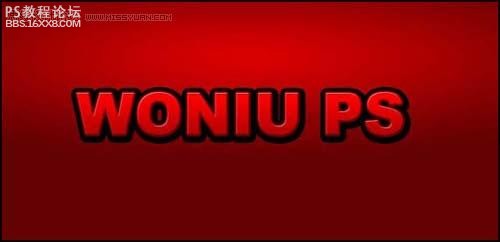
第一種:粗體
第一步:
先制作如下的背景
新建一個任意大小的文件,填充背景色為深紅色:RGB(99,1,1)
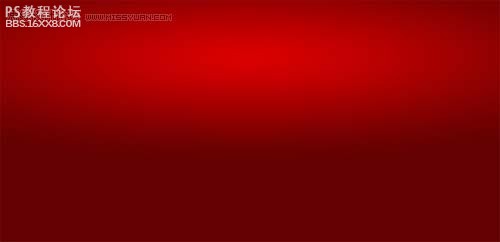
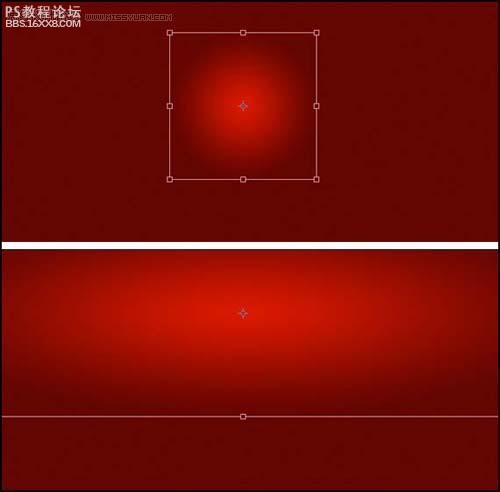
第二步:
新建一圖層,選擇漸變工具-徑向漸變,調整顏色為紅色(218,0,0)到透明色的漸變,快捷鍵ctrl+t選取,橫向拖動達到下面效果:
第三步:
輸入紅色文字字體顏色為(218,0,0),字體選粗寫的,我選擇是Arial Black
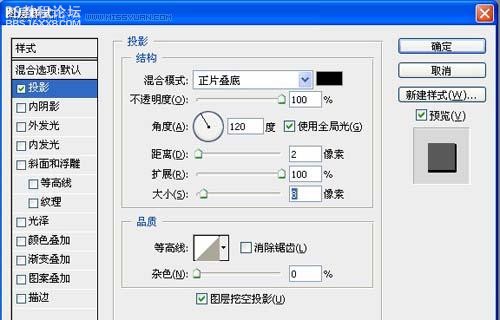
第四步:
設置字體樣式,點擊-添加圖層樣式-投影
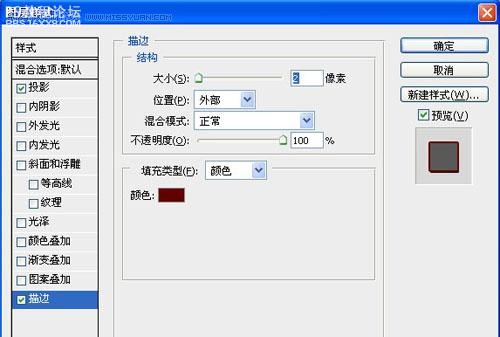
第五步:
圖層樣式-2像素深紅色描邊
, 第六步:
漸變疊加效果:
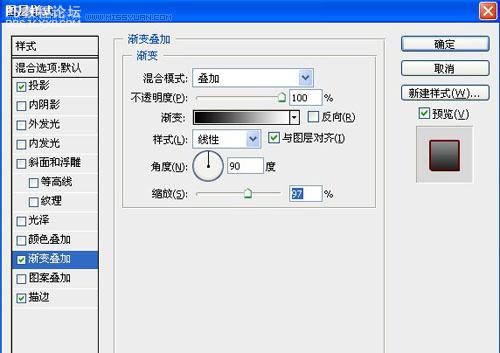
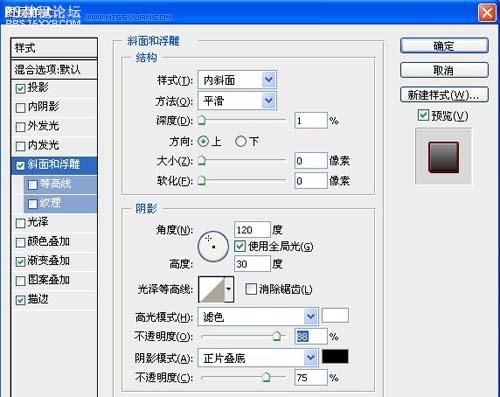
第七步:
斜面浮雕效果:
第八步:制作投影
文字下面建一圖層填充黑色

模糊--高斯模糊,參數如下
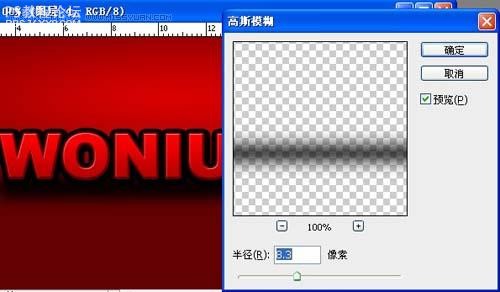
第九步:拉伸投影使兩頭都有做種效果:

訪問更多photoshop教程
第一種:粗體
第一步:
先制作如下的背景
新建一個任意大小的文件,填充背景色為深紅色:RGB(99,1,1)
第二步:
新建一圖層,選擇漸變工具-徑向漸變,調整顏色為紅色(218,0,0)到透明色的漸變,快捷鍵ctrl+t選取,橫向拖動達到下面效果:
第三步:
輸入紅色文字字體顏色為(218,0,0),字體選粗寫的,我選擇是Arial Black
第四步:
設置字體樣式,點擊-添加圖層樣式-投影
第五步:
圖層樣式-2像素深紅色描邊
, 第六步:
漸變疊加效果:
第七步:
斜面浮雕效果:
第八步:制作投影
文字下面建一圖層填充黑色
模糊--高斯模糊,參數如下
第九步:拉伸投影使兩頭都有做種效果:
訪問更多photoshop教程
上一篇:ps 簡單制作水晶字教程
相關推薦

彩繪藝術字, PS液化工具制作彩繪背景設計教程

Photoshop制作非常流行的金沙立體字,細膩的金沙字體,金粉字。

Photoshop制作金色的海報標題文字教程

Photoshop使用筆刷制作書法藝術字教程


