photoshop做放射光線文字
2022-12-25 14:48:14
來源/作者: /
己有:111人學習過
作者小魚 出處:UCD博客
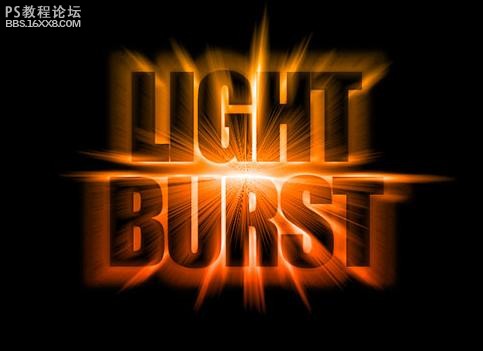
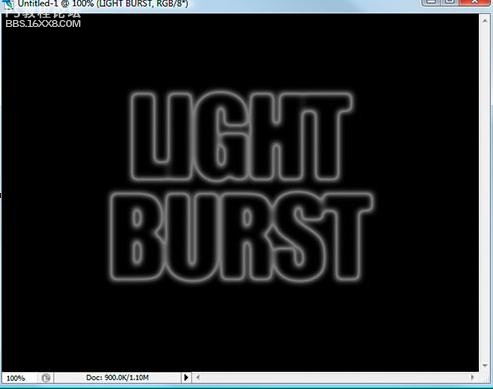
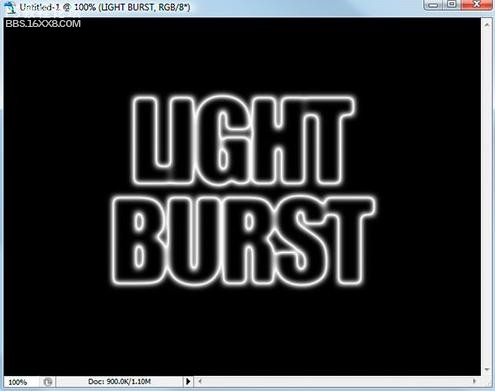
先看下效果!
以下是詳細的photoshop教程步驟:[size=2] [/size]
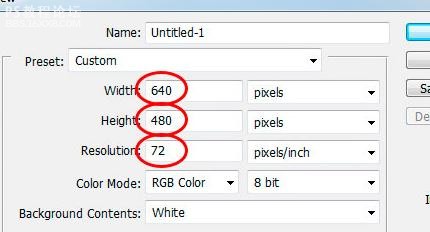
[size=2]第1步:新建文件。
[/size]
[size=2]
[/size]
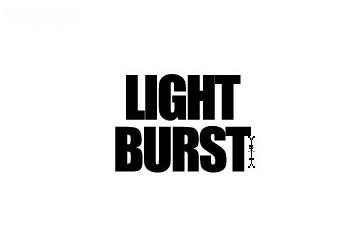
[font=宋體][size=10.5pt]第[/size][/font][size=10.5pt]2[/size][font=宋體][size=10.5pt]步:添加文字
[/size][/font]
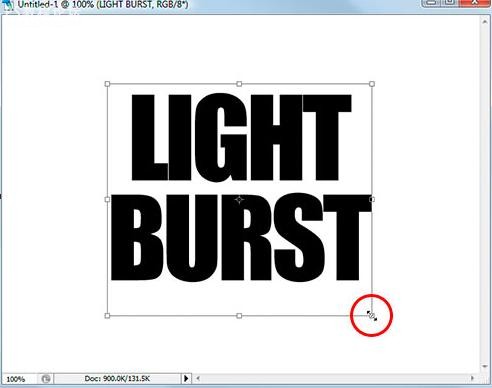
[font=宋體][size=10.5pt]第[/size][/font][size=10.5pt]3[/size][font=宋體][size=10.5pt]步:調整文字大小
[/size][/font]
[font=宋體][size=10.5pt]第[/size][/font][size=10.5pt]4[/size][font=宋體][size=10.5pt]步:文字柵格化。
[font=宋體][size=10.5pt][font=宋體][size=10.5pt]第[/size][/font][size=10.5pt]5[/size][font=宋體][size=10.5pt]步:選擇你的文字 [/size][/font]按[/size][/font][size=10.5pt]Ctrl -[/size][font=宋體][size=10.5pt]單擊文字圖層[/size][/font][size=10.5pt]” [/size][font=宋體][size=10.5pt]您的文字現在有一個選擇區(漸入選取)
[/size][/font][/size][/font][size=3] 選擇 儲存選取(保存選取)
[/size]

[font=宋體][size=10.5pt]切換到通道會多了一層“[/size][/font][size=10.5pt]Alpha 1[/size][font=宋體][size=10.5pt]”
[/size][/font]

[font=宋體][size=10.5pt]步驟[/size][/font][size=10.5pt]6 [/size][font=宋體][size=10.5pt]:選擇文字層
[/size][/font]
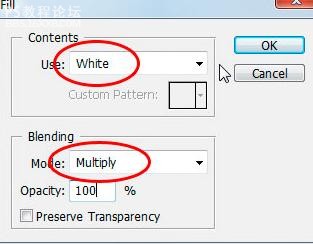
[size=10.5pt]打開“[/size][font=宋體][size=10.5pt]填充[/size][/font][size=10.5pt]”[/size][font=宋體][size=10.5pt]對話框[/size][/font][size=10.5pt]“[/size]
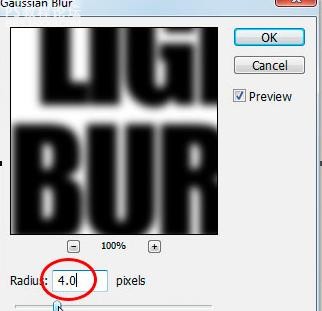
[size=10.5pt][font=宋體][size=10.5pt]第[/size][/font][size=10.5pt]7[/size][font=宋體][size=10.5pt]步:應用高斯模糊[/size][/font]
[font=宋體][size=10.5pt]輸入值[/size][/font][size=10.5pt]4[/size][font=宋體][size=10.5pt]像素(如圖)
[/size][/font][/size]
確認!
[font=宋體][size=10.5pt]第[/size][/font][size=10.5pt]8[/size][font=宋體][size=10.5pt]步:選擇風格化[/size][/font]
[font=宋體][size=10.5pt],然后選擇曝光[/size][/font]
[font=宋體][size=10.5pt]。如圖顯示[/size][/font]
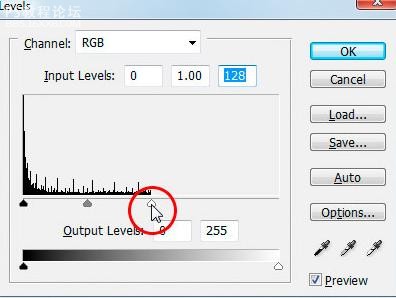
[font=宋體][size=10.5pt]步驟[/size][/font][size=10.5pt]9 [/size][font=宋體][size=10.5pt]:使用鍵盤快捷按[/size][/font][size=10.5pt]Ctrl +L
[/size]
先看下效果!
以下是詳細的photoshop教程步驟:[size=2] [/size]
[size=2]第1步:新建文件。
[/size]
[size=2]
[/size]
[font=宋體][size=10.5pt]第[/size][/font][size=10.5pt]2[/size][font=宋體][size=10.5pt]步:添加文字
[/size][/font]
[font=宋體][size=10.5pt]第[/size][/font][size=10.5pt]3[/size][font=宋體][size=10.5pt]步:調整文字大小
[/size][/font]
[font=宋體][size=10.5pt]第[/size][/font][size=10.5pt]4[/size][font=宋體][size=10.5pt]步:文字柵格化。
[font=宋體][size=10.5pt][font=宋體][size=10.5pt]第[/size][/font][size=10.5pt]5[/size][font=宋體][size=10.5pt]步:選擇你的文字 [/size][/font]按[/size][/font][size=10.5pt]Ctrl -[/size][font=宋體][size=10.5pt]單擊文字圖層[/size][/font][size=10.5pt]” [/size][font=宋體][size=10.5pt]您的文字現在有一個選擇區(漸入選取)
[/size][/font][/size][/font][size=3] 選擇 儲存選取(保存選取)
[/size]
[font=宋體][size=10.5pt]切換到通道會多了一層“[/size][/font][size=10.5pt]Alpha 1[/size][font=宋體][size=10.5pt]”
[/size][/font]
[font=宋體][size=10.5pt]步驟[/size][/font][size=10.5pt]6 [/size][font=宋體][size=10.5pt]:選擇文字層
[/size][/font]
[size=10.5pt]打開“[/size][font=宋體][size=10.5pt]填充[/size][/font][size=10.5pt]”[/size][font=宋體][size=10.5pt]對話框[/size][/font][size=10.5pt]“[/size]
[size=10.5pt][font=宋體][size=10.5pt]第[/size][/font][size=10.5pt]7[/size][font=宋體][size=10.5pt]步:應用高斯模糊[/size][/font]
[font=宋體][size=10.5pt]輸入值[/size][/font][size=10.5pt]4[/size][font=宋體][size=10.5pt]像素(如圖)
[/size][/font][/size]
確認!
[font=宋體][size=10.5pt]第[/size][/font][size=10.5pt]8[/size][font=宋體][size=10.5pt]步:選擇風格化[/size][/font]
[font=宋體][size=10.5pt],然后選擇曝光[/size][/font]
[font=宋體][size=10.5pt]。如圖顯示[/size][/font]
[font=宋體][size=10.5pt]步驟[/size][/font][size=10.5pt]9 [/size][font=宋體][size=10.5pt]:使用鍵盤快捷按[/size][/font][size=10.5pt]Ctrl +L
[/size]
相關推薦

發光字,在PS中制作一款放射光線字效

彩繪藝術字, PS液化工具制作彩繪背景設計教程

Photoshop制作非常流行的金沙立體字,細膩的金沙字體,金粉字。

Photoshop制作金色的海報標題文字教程

Photoshop使用筆刷制作書法藝術字教程


