Photoshop圖層樣式打造立體鍍銀特效文字
![](http:///1linkpic/cool.gif)
![](https://img.lvups.com/d/file/bigpic/2022/12/25/zi5cydori1c.jpg)
1、先下載這個(gè)背景圖,這讓效果更好一點(diǎn)。
![](https://img.lvups.com/d/file/bigpic/2022/12/25/lo3hnqmh5r4.jpg)
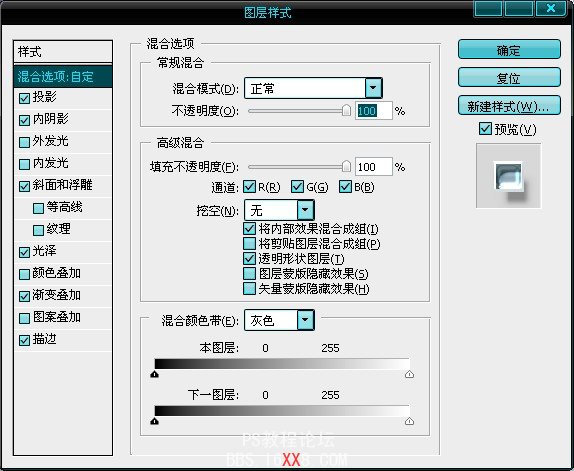
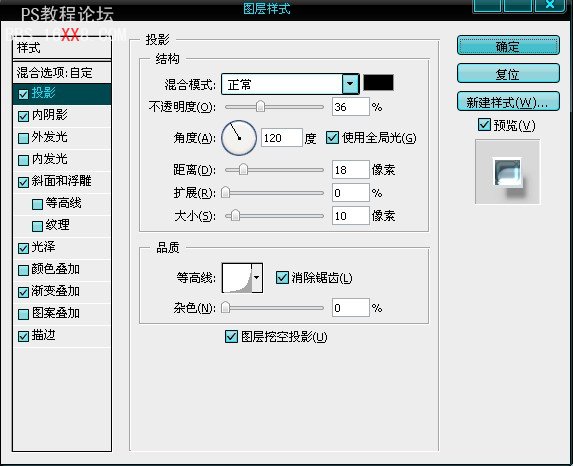
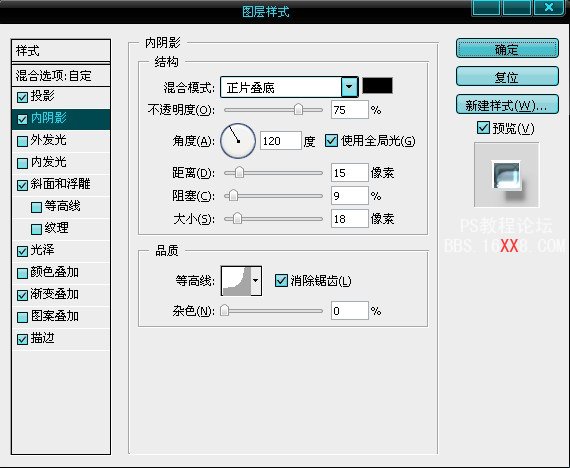
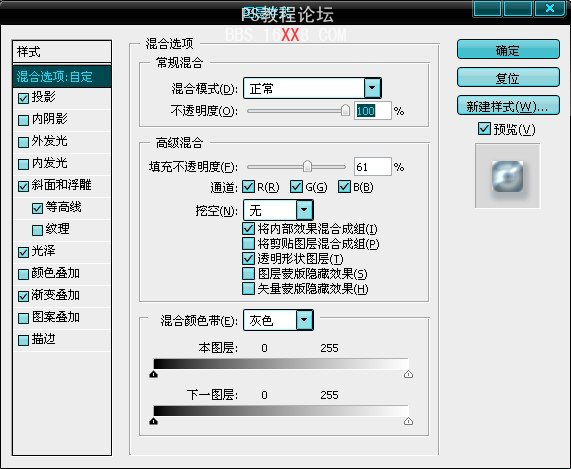
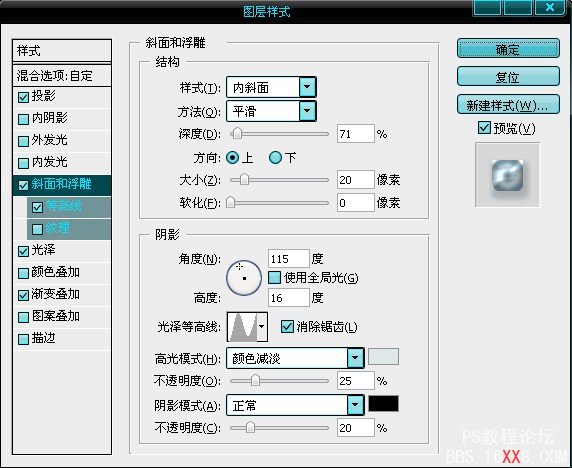
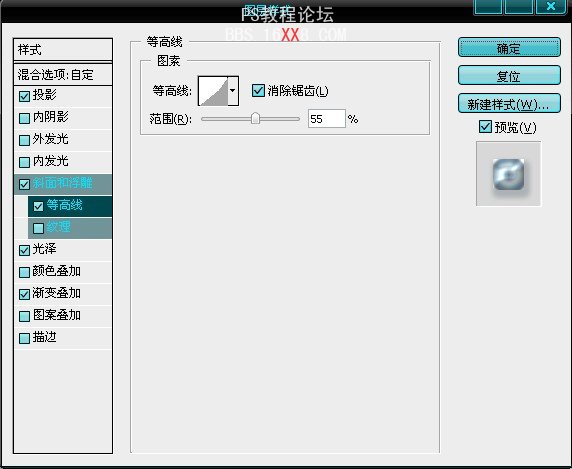
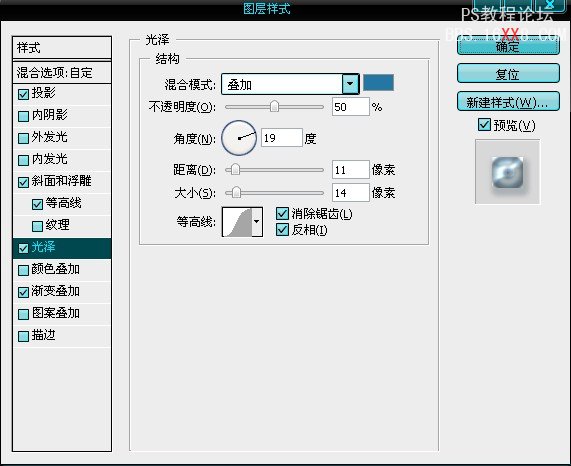
2、我們開始創(chuàng)建一個(gè)文字層,輸入文字G,并添加圖層樣式:
![](https://img.lvups.com/d/file/bigpic/2022/12/25/dke34gvgpey.jpg)
![](https://img.lvups.com/d/file/bigpic/2022/12/25/hsdaaqni0oc.jpg)
![](https://img.lvups.com/d/file/bigpic/2022/12/25/5bh3dfvbhdx.jpg)
![](https://img.lvups.com/d/file/bigpic/2022/12/25/rdxrycq3cxj.jpg)
![](https://img.lvups.com/d/file/bigpic/2022/12/25/wtgfuvupcrf.jpg)
![](https://img.lvups.com/d/file/bigpic/2022/12/25/1aotd2nulso.jpg)
![](https://img.lvups.com/d/file/bigpic/2022/12/25/br4tm34uibq.jpg)
![](https://img.lvups.com/d/file/bigpic/2022/12/25/rimb1m2mh1u.jpg)
![](https://img.lvups.com/d/file/bigpic/2022/12/25/fyvnz3bspw1.jpg)
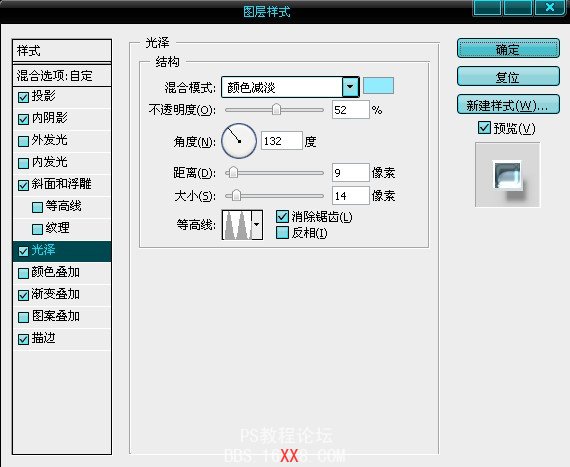
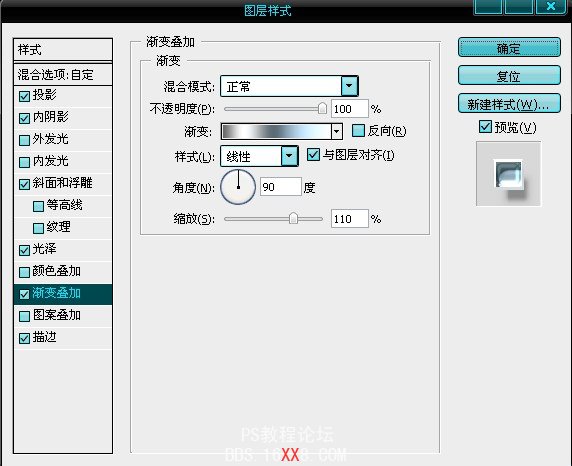
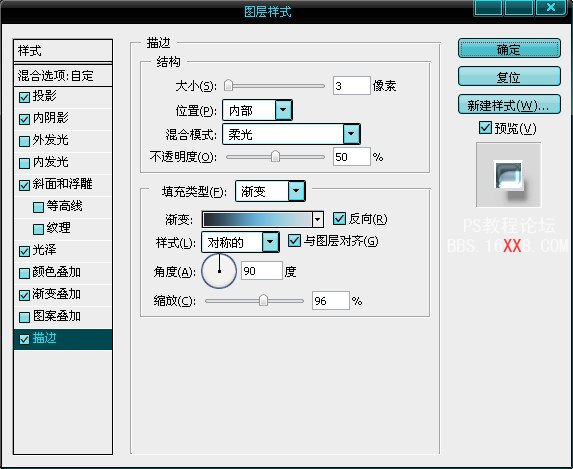
3、復(fù)制文字層G,繼續(xù)給新的文字G層添加新的圖層樣式。
![](https://img.lvups.com/d/file/bigpic/2022/12/25/qkducr2x35y.jpg)
![](https://img.lvups.com/d/file/bigpic/2022/12/25/xmnwrzcysov.jpg)
![](https://img.lvups.com/d/file/bigpic/2022/12/25/x523zh4kpuw.jpg)
![](https://img.lvups.com/d/file/bigpic/2022/12/25/uvwjznkgj1q.jpg)
![](https://img.lvups.com/d/file/bigpic/2022/12/25/eygq5quhnnj.jpg)
![](https://img.lvups.com/d/file/bigpic/2022/12/25/g3dikkbalgb.jpg)
![](https://img.lvups.com/d/file/bigpic/2022/12/25/pa3jgpxdip4.jpg)
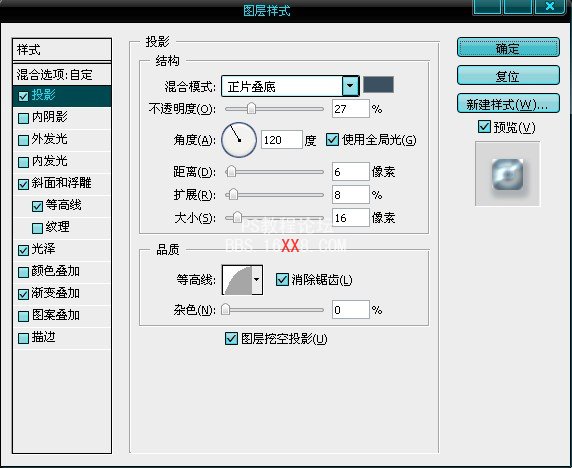
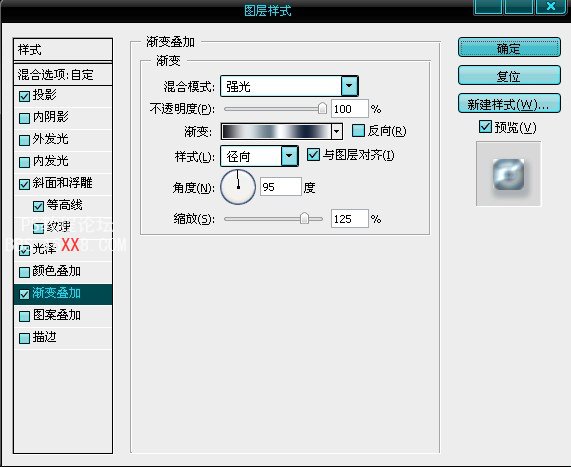
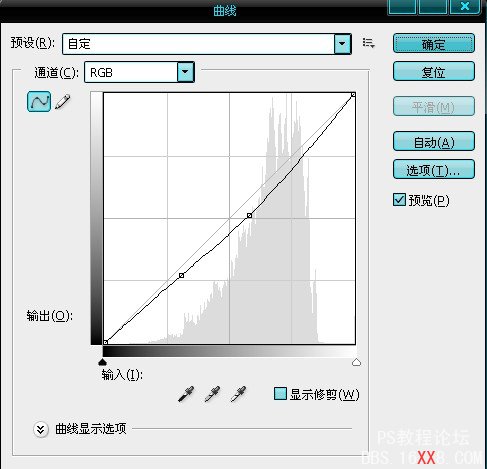
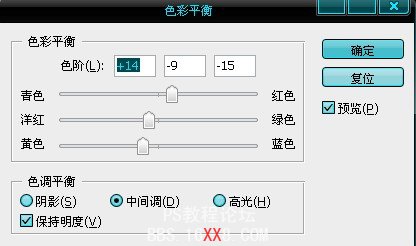
4、這樣非常逼真的鍍銀效果就出來了,我們復(fù)制2層,文字改為O,然后在頂層添加一個(gè)曲線層、色彩平衡層,完成效果圖
![](https://img.lvups.com/d/file/bigpic/2022/12/25/puj4tuz3lef.jpg)
![](https://img.lvups.com/d/file/bigpic/2022/12/25/32xm1lukl4z.jpg)
![](https://img.lvups.com/d/file/bigpic/2022/12/25/4hmxgvpdkgb.jpg)
標(biāo)簽(TAG) 3D立體字
上一篇:素描字的制作.。(適合新手)
下一篇:PS制作牛仔布紋字...。