用photoshop做韓式風格的文字標簽
2022-12-25 12:18:05
來源/作者: /
己有:25人學習過
作者河馬 出處:IT世界
效果圖:

1、創建一個新的photoshop文檔,然后輸入文字,如圖所示。

2、在文字圖層的下方創建一個新圖層,然后使用“橢圓工具”畫出一些橢圓,如圖所示。


3、回到文字的圖層,重新設置文字的顏色,并設置前景色為白色,然后選擇“漸變工具”設置由“白色—透明”的漸變效果,如圖所示。


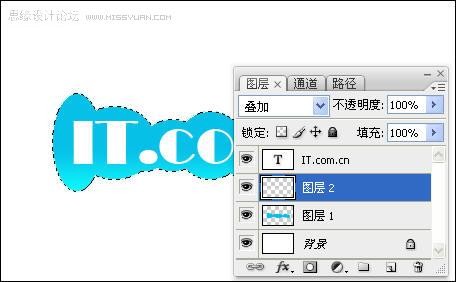
4、在文字圖層下方再創建一個新圖層,設置其混合模式為“疊加”,然后按著Ctrl鍵單擊“圖層1”載入選區,使用“漸變工具”由下向上拖動出漸變效果,如圖所示。
5、選擇“橢圓選框工具”并設置其屬性,然后編輯選區,如圖所示。


編輯選區后:

, 6、使用“漸變工具”由上向下拖動出漸變效果,如圖所示。

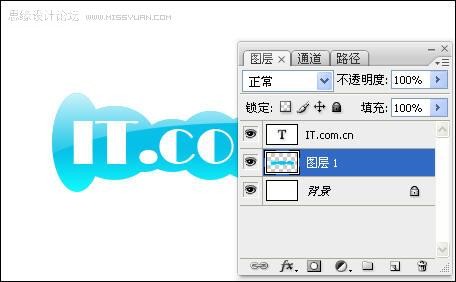
7、按下Ctrl+E快捷鍵合并文字圖層和背景圖層以外的所有圖層到“圖層1”,如圖所示。
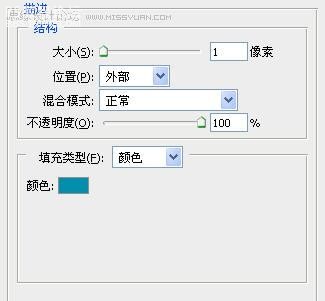
8、選擇“圖層1”,然后在菜單欄中選擇“圖層—圖層樣式—描邊”命令打開“圖層樣式”對話框,設置描邊效果,如圖所示。
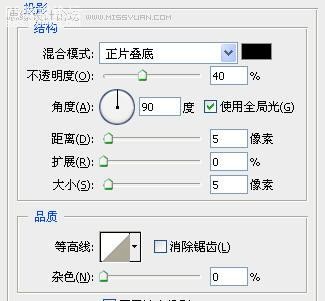
9、在“圖層樣式”對話框的左邊選擇“投影”選項,設置投影效果,如圖所示。
設置圖層樣式后的效果:

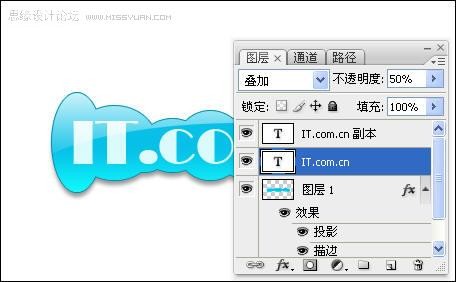
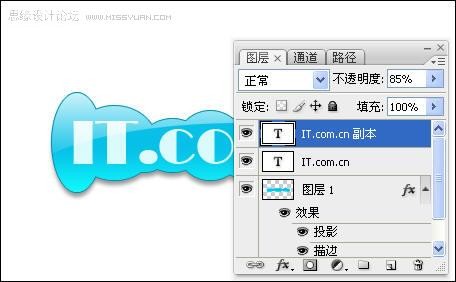
10、選擇文字圖層,按下Ctrl+J快捷復制出副本圖層,然后設置文字圖層的混合模式為“疊加”,不透明度為“50%”副本圖層的不透明度為“85%”,如圖所示。
, 11、在背景圖層的上方創建一個新圖層,然后使用“圓角矩形工具”創建一圓角矩形,如圖所示。
效果圖:
1、創建一個新的photoshop文檔,然后輸入文字,如圖所示。
2、在文字圖層的下方創建一個新圖層,然后使用“橢圓工具”畫出一些橢圓,如圖所示。
3、回到文字的圖層,重新設置文字的顏色,并設置前景色為白色,然后選擇“漸變工具”設置由“白色—透明”的漸變效果,如圖所示。
4、在文字圖層下方再創建一個新圖層,設置其混合模式為“疊加”,然后按著Ctrl鍵單擊“圖層1”載入選區,使用“漸變工具”由下向上拖動出漸變效果,如圖所示。
5、選擇“橢圓選框工具”并設置其屬性,然后編輯選區,如圖所示。
編輯選區后:
, 6、使用“漸變工具”由上向下拖動出漸變效果,如圖所示。
7、按下Ctrl+E快捷鍵合并文字圖層和背景圖層以外的所有圖層到“圖層1”,如圖所示。
8、選擇“圖層1”,然后在菜單欄中選擇“圖層—圖層樣式—描邊”命令打開“圖層樣式”對話框,設置描邊效果,如圖所示。
9、在“圖層樣式”對話框的左邊選擇“投影”選項,設置投影效果,如圖所示。
設置圖層樣式后的效果:
10、選擇文字圖層,按下Ctrl+J快捷復制出副本圖層,然后設置文字圖層的混合模式為“疊加”,不透明度為“50%”副本圖層的不透明度為“85%”,如圖所示。
, 11、在背景圖層的上方創建一個新圖層,然后使用“圓角矩形工具”創建一圓角矩形,如圖所示。
下一篇:浮雕字,打造簡單的浮雕印章
相關推薦

可愛字,設計可愛的冰淇淋字體教程

可愛字,用PS制作蜂蜜特效的藝術字

可愛字,用PS制作萌萌噠“好吃”的奶

可愛字,通過PS制作可愛的毛絨絨質感

彩繪藝術字, PS液化工具制作彩繪背景設計教程

Photoshop制作非常流行的金沙立體字,細膩的金沙字體,金粉字。

Photoshop制作金色的海報標題文字教程

Photoshop使用筆刷制作書法藝術字教程


