photoshop做火紅文字
2022-12-25 10:58:31
來源/作者: /
己有:10人學(xué)習(xí)過
作者四季輪回 出處:中國教程網(wǎng)論壇
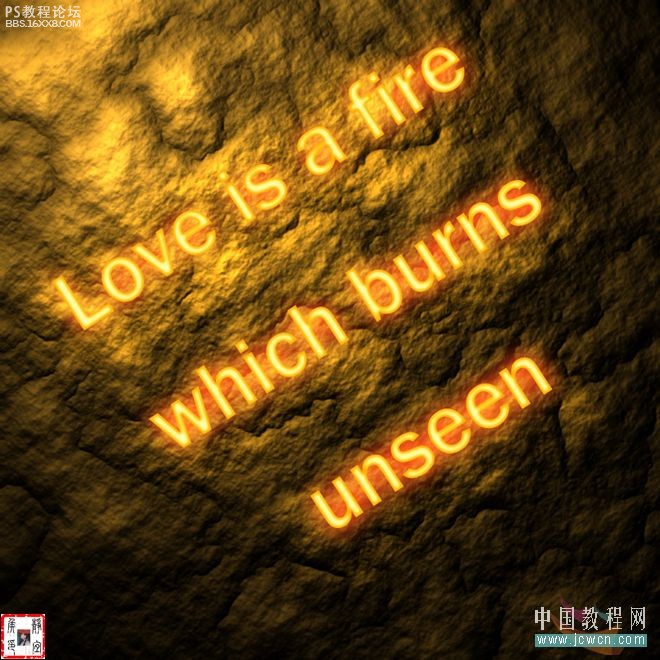
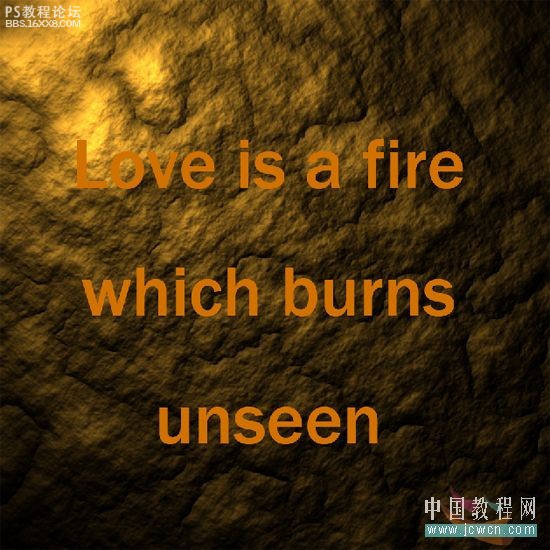
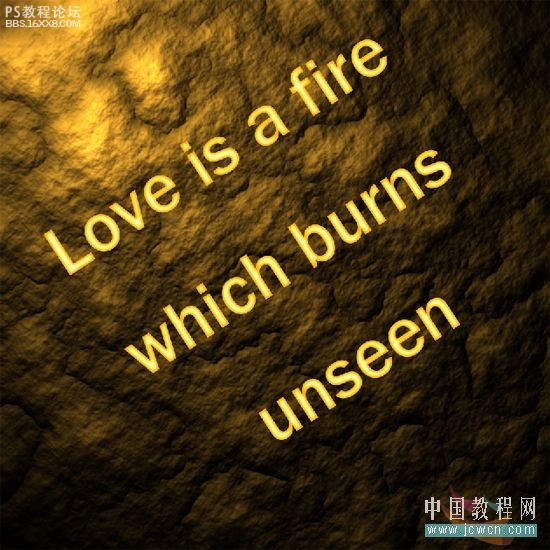
最終效果圖:
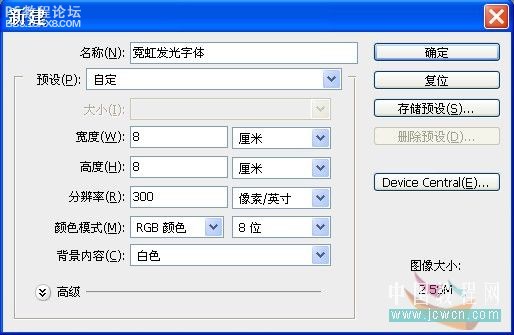
制作步驟如下: 1、按“Ctrl+N”鍵新建文件,參數(shù)設(shè)置如圖1所示:
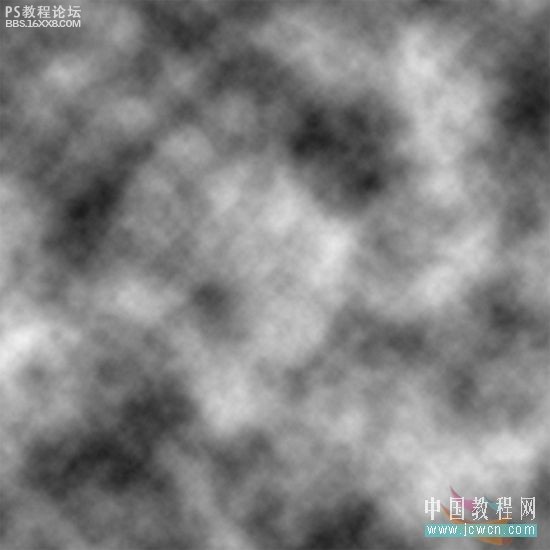
2、按“確定”鍵,得到“圖層1”,按D鍵將前景色和背景色恢復(fù)為默認(rèn)設(shè)置,選擇“濾鏡”/“渲染”/“云彩”菜單命令,效果如圖2所示:
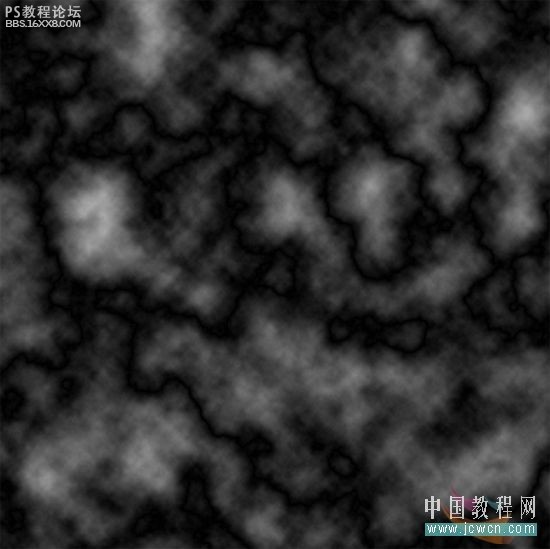
, 3、選擇“濾鏡”/“渲染”/“分層云彩”菜單命令,效果如圖3所示:
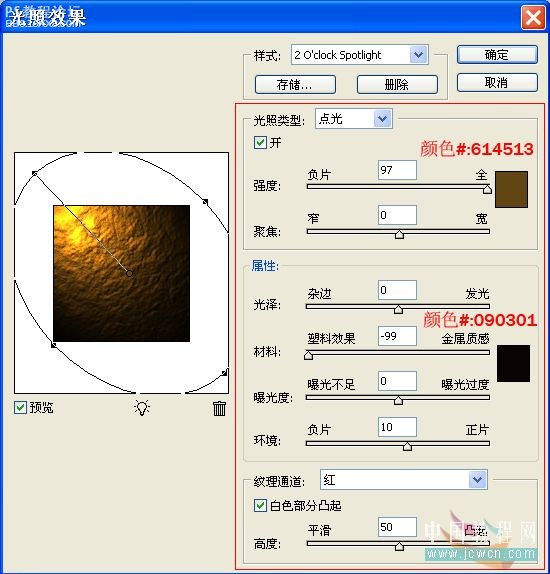
4、選擇“濾鏡”/“渲染”/“光照效果”菜單命令,參數(shù)設(shè)置如圖4A所示:
效果如圖4B所示:

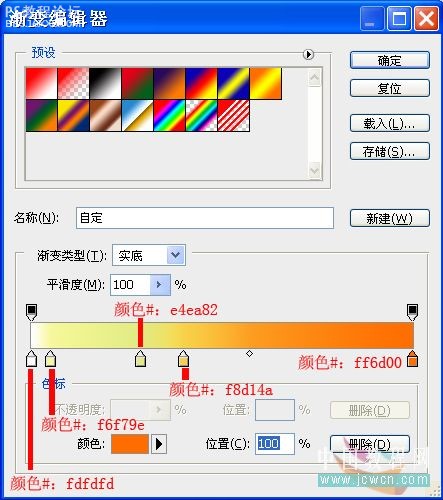
, 5、單擊工具箱中的“橫排文字工具”按鈕,在其選項(xiàng)欄中設(shè)置適當(dāng)?shù)淖煮w和字號(hào),居中對(duì)齊文本,并設(shè)置文字顏色值為(#:d17100),參數(shù)如圖5所示:

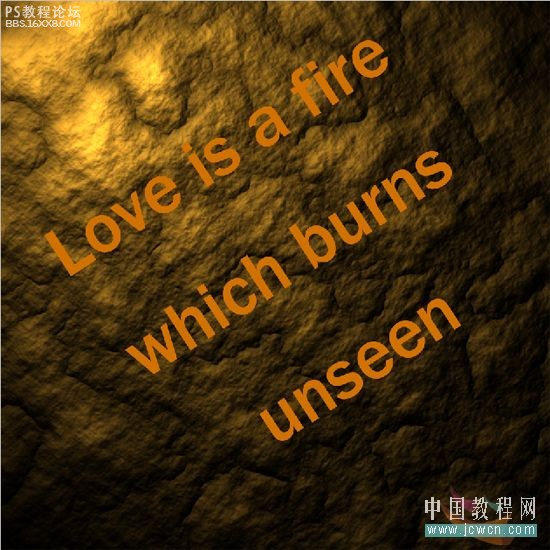
6、在制作文件中鍵入“Love is a fire which burns unseen”(愛情是無形燃燒的火焰),如圖6A所示:
按“Ctrl+T”鍵將變換控制框顯示出來,拖動(dòng)句柄旋轉(zhuǎn)角度,效果如圖6B所示:
單擊“圖層”調(diào)板底部的“添加圖層樣式”按鈕,在彈出的菜單中選擇“內(nèi)發(fā)光”命令,如圖6C所示:
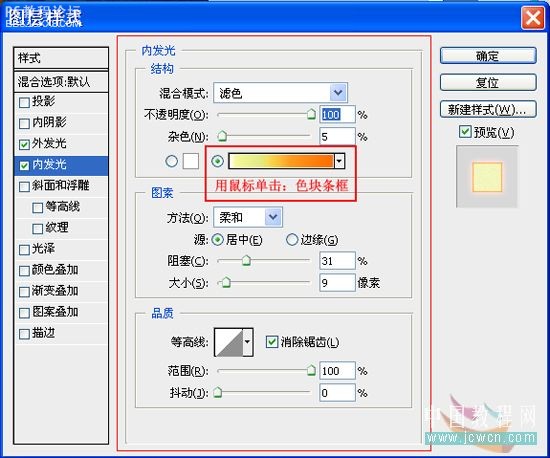
參數(shù)設(shè)置如圖6D所示:
效果如圖6E所示:
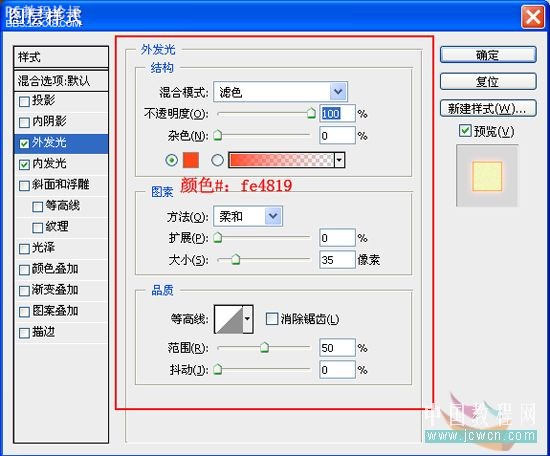
, 7、在彈出的“圖層樣式”對(duì)話框中,選擇“外發(fā)光”命令,設(shè)置參數(shù)如圖7A所示。
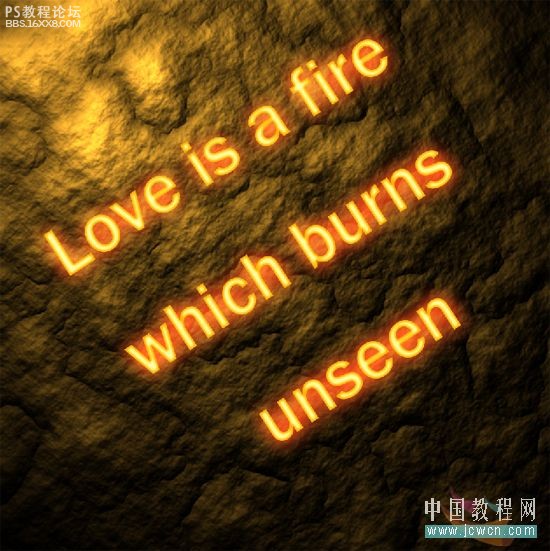
效果如圖7B所示:
8、在“圖層樣式”對(duì)話框中,選擇“投影”命令,設(shè)置參數(shù)如圖8A所示:
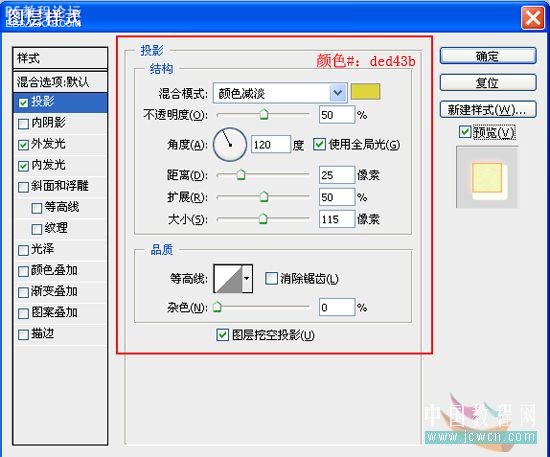
最終效果如圖8B所示:
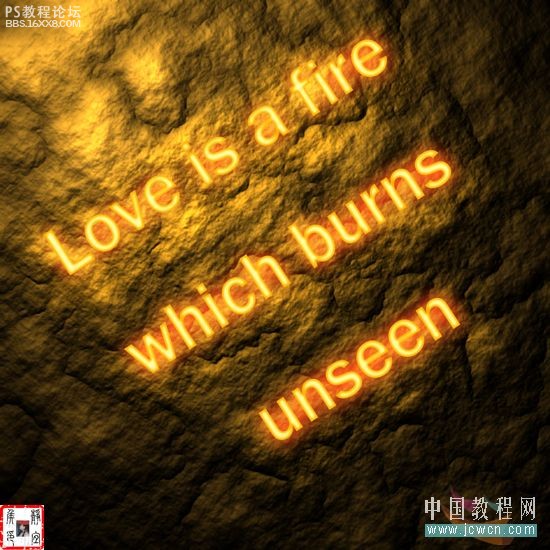
最終效果圖:
制作步驟如下: 1、按“Ctrl+N”鍵新建文件,參數(shù)設(shè)置如圖1所示:
2、按“確定”鍵,得到“圖層1”,按D鍵將前景色和背景色恢復(fù)為默認(rèn)設(shè)置,選擇“濾鏡”/“渲染”/“云彩”菜單命令,效果如圖2所示:
, 3、選擇“濾鏡”/“渲染”/“分層云彩”菜單命令,效果如圖3所示:
4、選擇“濾鏡”/“渲染”/“光照效果”菜單命令,參數(shù)設(shè)置如圖4A所示:
效果如圖4B所示:
, 5、單擊工具箱中的“橫排文字工具”按鈕,在其選項(xiàng)欄中設(shè)置適當(dāng)?shù)淖煮w和字號(hào),居中對(duì)齊文本,并設(shè)置文字顏色值為(#:d17100),參數(shù)如圖5所示:
6、在制作文件中鍵入“Love is a fire which burns unseen”(愛情是無形燃燒的火焰),如圖6A所示:
按“Ctrl+T”鍵將變換控制框顯示出來,拖動(dòng)句柄旋轉(zhuǎn)角度,效果如圖6B所示:
單擊“圖層”調(diào)板底部的“添加圖層樣式”按鈕,在彈出的菜單中選擇“內(nèi)發(fā)光”命令,如圖6C所示:
參數(shù)設(shè)置如圖6D所示:
效果如圖6E所示:
, 7、在彈出的“圖層樣式”對(duì)話框中,選擇“外發(fā)光”命令,設(shè)置參數(shù)如圖7A所示。
效果如圖7B所示:
8、在“圖層樣式”對(duì)話框中,選擇“投影”命令,設(shè)置參數(shù)如圖8A所示:
最終效果如圖8B所示:
相關(guān)推薦

金屬字,設(shè)計(jì)燒紅的金屬火焰字教程

photoshop做火焰字教程

Photoshop文字特效教程:晶格火焰字
ps制作魔幻霓虹火焰字特效的教程

彩繪藝術(shù)字, PS液化工具制作彩繪背景設(shè)計(jì)教程

Photoshop制作非常流行的金沙立體字,細(xì)膩的金沙字體,金粉字。

Photoshop制作金色的海報(bào)標(biāo)題文字教程

Photoshop使用筆刷制作書法藝術(shù)字教程


