Photoshop制作一個精細的導航按鈕
2023-12-26 17:27:12
來源/作者: /
己有:1人學習過
2、在工具箱上選擇橢圓圖標并設置如圖。
3、新建一個圖層,然后填充一個顏色。
4、在調色板上設置如下。
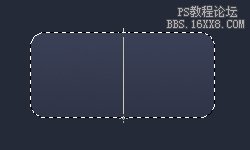
5、使用漸變拉出線性漸變,漸變效果如下。
![](https://img.lvups.com/d/file/bigpic/2022/12/26/asihft2rkp5.jpg)
![](https://img.lvups.com/d/file/bigpic/2022/12/26/tuisbr351s2.jpg)
3、新建一個圖層,然后填充一個顏色。
![](https://img.lvups.com/d/file/bigpic/2022/12/26/3bdf4o2op3l.jpg)
4、在調色板上設置如下。
![](https://img.lvups.com/d/file/bigpic/2022/12/26/qakjqjueu3f.jpg)
5、使用漸變拉出線性漸變,漸變效果如下。
![](https://img.lvups.com/d/file/bigpic/2022/12/26/asihft2rkp5.jpg)
上一篇:綠色高光透明質感按鈕