Photoshop制作一個(gè)精細(xì)的導(dǎo)航按鈕
2023-11-10 17:22:35
來(lái)源/作者: /
己有:4人學(xué)習(xí)過(guò)
2、在工具箱上選擇橢圓圖標(biāo)并設(shè)置如圖。

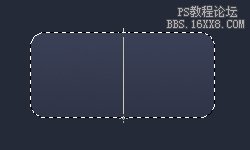
3、新建一個(gè)圖層,然后填充一個(gè)顏色。

4、在調(diào)色板上設(shè)置如下。

5、使用漸變拉出線性漸變,漸變效果如下。
3、新建一個(gè)圖層,然后填充一個(gè)顏色。
4、在調(diào)色板上設(shè)置如下。
5、使用漸變拉出線性漸變,漸變效果如下。
標(biāo)簽(TAG) 按鈕圖標(biāo) 按鈕教程
下一篇:高光按鈕制作教程
相關(guān)推薦

Ps按鈕教程-小巧黃色按鈕

ps鼠繪開關(guān)按鈕教程

Photoshop鼠繪手繪教程:Web2.0按鈕
Ps按鈕教程-小巧黃色按鈕

Photoshop制作清涼的水中展示網(wǎng)頁(yè)

Photoshop制作大氣的網(wǎng)頁(yè)設(shè)計(jì)主頁(yè)

陰影教程,超詳細(xì)的各種陰影的制作方法

Photoshop制作炫酷的PK類網(wǎng)站Banner


