photoshop做金屬質感圖標
2022-12-26 14:50:30
來源/作者: /
己有:37人學習過
最終效果圖

一、新建一個300x300象素的photoshop文檔,填充黑色背景色。
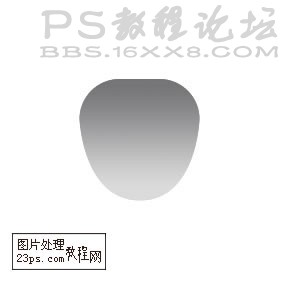
二、新建一層畫一個這樣的形狀如下圖:(形狀按個人喜歡去定義,一開始做的話用圓形更為合適) 填充漸變;(不要取消選擇)
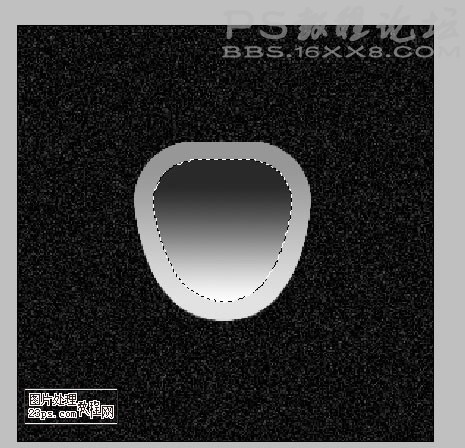
三、復制形狀那個圖層,然后縮小到80%;拉個垂直黑白漸變;如下圖:一、新建一個300x300象素的文檔,填充黑色背景色。

一、新建一個300x300象素的photoshop文檔,填充黑色背景色。
二、新建一層畫一個這樣的形狀如下圖:(形狀按個人喜歡去定義,一開始做的話用圓形更為合適) 填充漸變;(不要取消選擇)
三、復制形狀那個圖層,然后縮小到80%;拉個垂直黑白漸變;如下圖:一、新建一個300x300象素的文檔,填充黑色背景色。
標簽(TAG) logo教程 學photoshop
下一篇:ps設計綠毛怪UI圖標教程
相關推薦

新手學Photoshop的批處理的快捷操

ps cs6設計龍主題LOGO教程

photoshop制作logo教程:鋼盔

photoshop制作國外彩虹Logo教程

Photoshop制作清涼的水中展示網頁

Photoshop制作大氣的網頁設計主頁

陰影教程,超詳細的各種陰影的制作方法

Photoshop制作炫酷的PK類網站Banner


