Photoshop制作精美燈槽
2022-12-26 08:32:06
來源/作者: /
己有:3人學習過
Photoshop制作精美燈槽(作者:oz006 來源:火星時代動畫) 1、我們首先打開一個帶燈槽的文件,并新建立一個圖層。

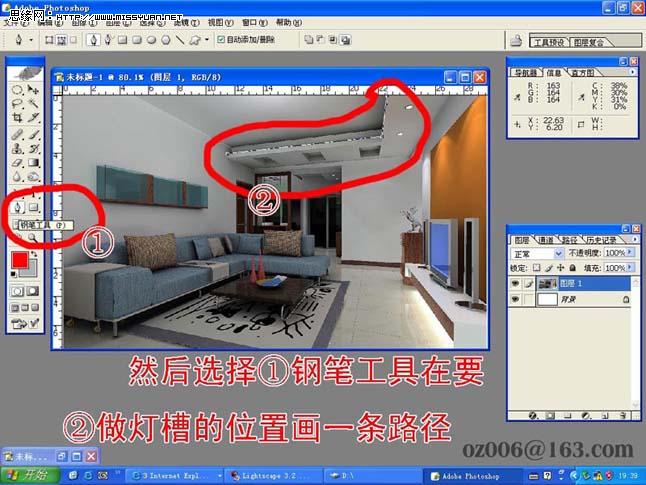
2、然后在工具欄中選擇鋼筆工具,并在制作燈槽的位置畫一條路徑。
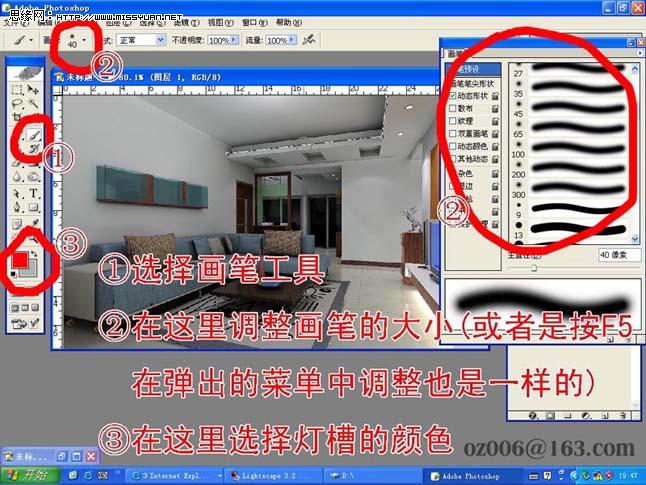
3、在工具欄中選擇畫筆工具,并將其大小改為40,并設(shè)置燈槽的顏色,如圖。
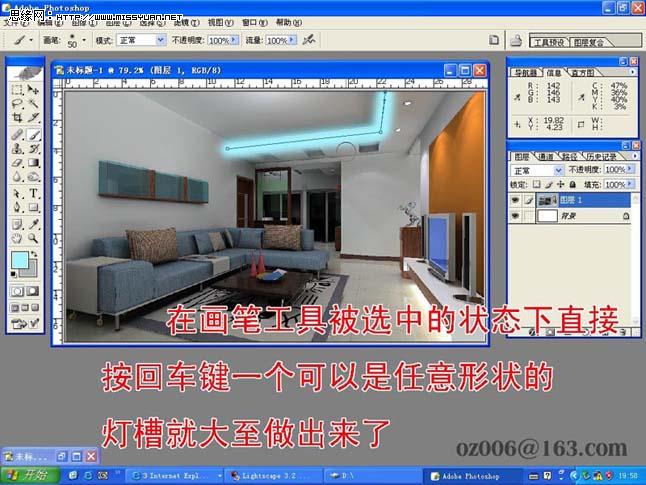
4、在畫筆工具被選擇的狀態(tài)下直接按回車鍵。
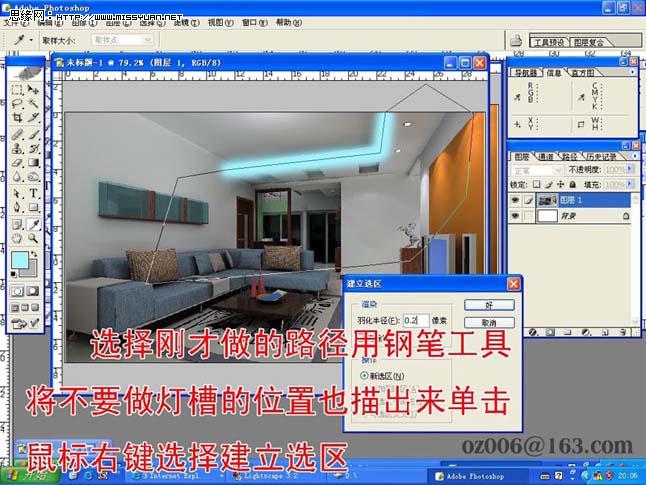
5、選擇剛才用鋼筆工具制作的路徑,并用鋼筆工具將不要燈槽的位置也描出來。
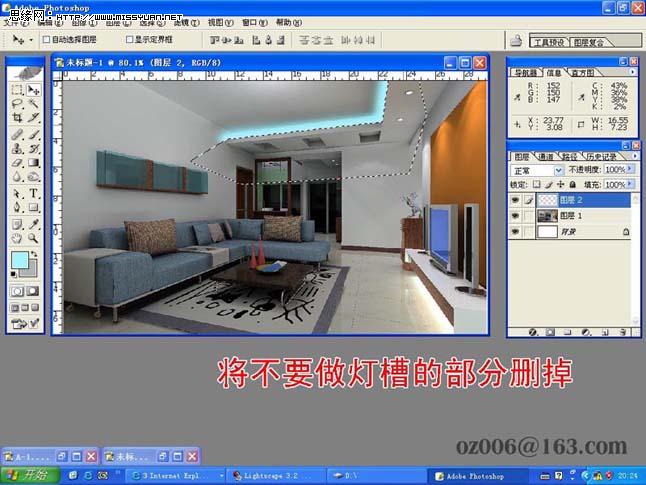
6、將不要燈槽的部分刪除。
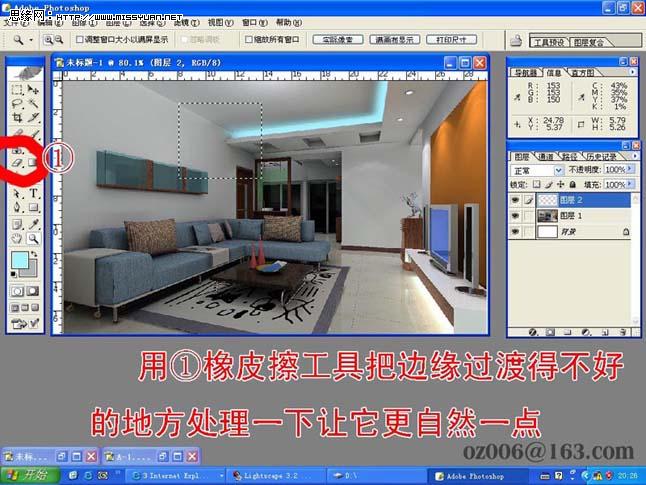
7、用橡皮擦工具修飾一下邊緣。
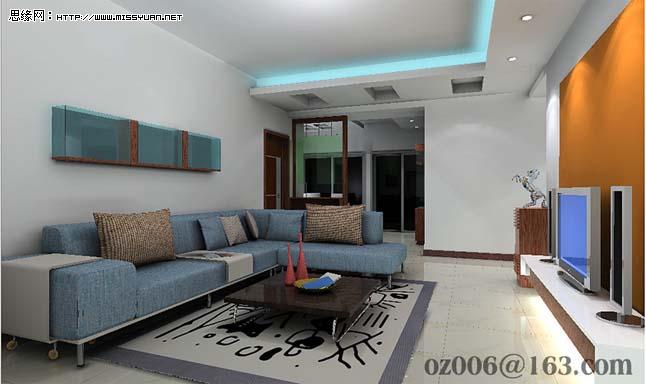
8、得到的效果如圖。
![]()
2、然后在工具欄中選擇鋼筆工具,并在制作燈槽的位置畫一條路徑。
3、在工具欄中選擇畫筆工具,并將其大小改為40,并設(shè)置燈槽的顏色,如圖。
4、在畫筆工具被選擇的狀態(tài)下直接按回車鍵。
5、選擇剛才用鋼筆工具制作的路徑,并用鋼筆工具將不要燈槽的位置也描出來。
6、將不要燈槽的部分刪除。
7、用橡皮擦工具修飾一下邊緣。
8、得到的效果如圖。
相關(guān)推薦

ps CS4 工具學習之——
ps CS4 工具學習之——
ps CS4 工具學習之——
ps CS4  工具學習(4

圖片變清晰,使用PS讓模糊圖片變清晰的方法教程

PS調(diào)出晶瑩潔白膚色商業(yè)人像照片效果

PS調(diào)出唯美金黃色樹葉背景甜美女生照片

調(diào)出高清質(zhì)感暗色草原風景圖片的PS教程


