Photoshop制作唯美的生態礦泉水海報
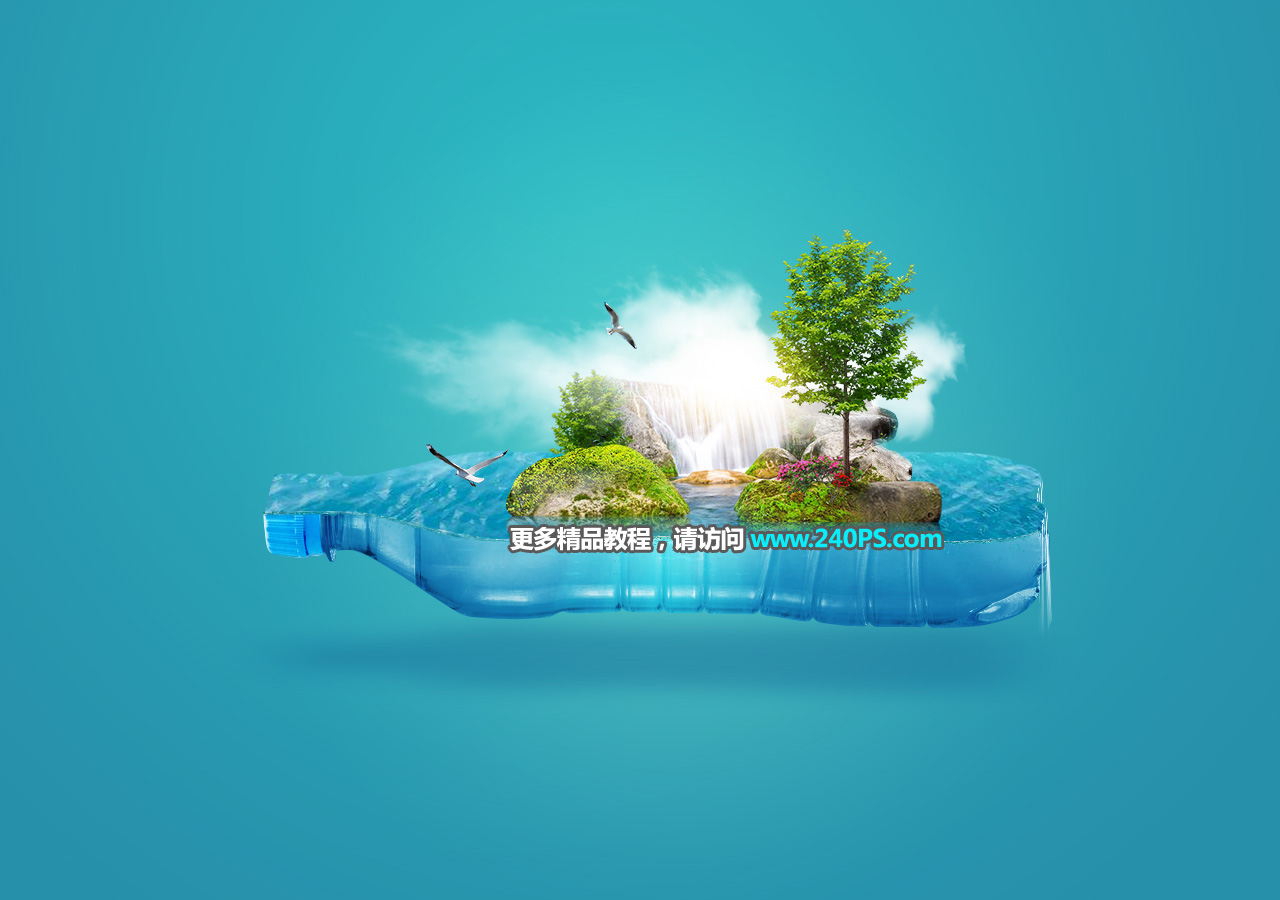
本文的實例把純天然的水源與礦泉水瓶結合起來,用合成的方式展示出礦泉水的純凈水質。制作的時候需要找一些生態相關的素材,如:瀑布、樹木、飛鳥、水流等;再把這些加入到礦泉水瓶的切面部分。最終效果
![](https://img.lvups.com/d/file/bigpic/190423/23/jc190102_1.jpg)
1、新建文件。打開PS軟件,新建文件,尺寸為1280 * 900像素,分辨率為72像素/英寸,然后點確定。
![](https://img.lvups.com/d/file/bigpic/190423/23/jc190102_2.jpg)
2、添加漸變背景。在工具箱選擇“漸變工具”,點擊漸變色設置漸變,然后選擇“徑向漸變”,然后由畫布中心向邊角拉出漸變。
![](https://img.lvups.com/d/file/bigpic/190423/23/jc190102_3.jpg)
![](https://img.lvups.com/d/file/bigpic/190423/23/jc190102_4.jpg)
![](https://img.lvups.com/d/file/bigpic/190423/23/jc190102_5.jpg)
3、新建一個組,命名為“瓶底”,如下圖。
![](https://img.lvups.com/d/file/bigpic/190423/23/jc190102_6.jpg)
4、加入水底素材。把下面的海底素材保存到本機,然后用PS打開,用移動工具拖到新建的組里面,并調整好位置。
![](https://img.lvups.com/d/file/bigpic/190423/23/jc190102_7.jpg)
![](https://img.lvups.com/d/file/bigpic/190423/23/jc190102_8.jpg)
![](https://img.lvups.com/d/file/bigpic/190423/23/jc190102_9.jpg)
5、加入礦泉水瓶。打開下面的礦泉水瓶素材,用自己熟悉的方法摳出來。
![](https://img.lvups.com/d/file/bigpic/190423/23/jc190102_10.jpg)
6、用移動工具把摳好的礦泉水瓶素材拖進來,選擇菜單:編輯 > 變換 > 逆時針旋轉90度,再調整好位置,如下圖。
![](https://img.lvups.com/d/file/bigpic/190423/23/jc190102_11.jpg)
7、微調水底明暗。創建曲線調整圖層,增加明暗對比,參數及效果如下圖。
![](https://img.lvups.com/d/file/bigpic/190423/23/jc190102_12.jpg)
![](https://img.lvups.com/d/file/bigpic/190423/23/jc190102_13.jpg)
![](https://img.lvups.com/d/file/bigpic/190423/23/jc190102_14.jpg)
8、摳出瓶底部分。在工具箱選擇“鋼筆工具”,在屬性欄選擇“路徑”。
![](https://img.lvups.com/d/file/bigpic/190423/23/jc190102_15.jpg)
9、用鋼筆工具勾出瓶底部分選區,如下圖。
![](https://img.lvups.com/d/file/bigpic/190423/23/jc190102_16.jpg)
10、點擊蒙版按鈕,給當前組添加圖層蒙版,如下圖。
![](https://img.lvups.com/d/file/bigpic/190423/23/jc190102_17.jpg)
11、現在來制作切面部分。新建一個組,命名為“切面”。
![](https://img.lvups.com/d/file/bigpic/190423/23/jc190102_18.jpg)
12、勾出切面的選區。用鋼筆根據透視原理,勾出切面的大致選區,如下圖。
![](https://img.lvups.com/d/file/bigpic/190423/23/jc190102_19.jpg)
13、給當前組添加圖層蒙版。
![](https://img.lvups.com/d/file/bigpic/190423/23/jc190102_20.jpg)
14、打開下面的海面素材,用移動工具拖到組里面,調整好大小和位置,如下圖。
![](https://img.lvups.com/d/file/bigpic/190423/23/jc190102_21.jpg)
![](https://img.lvups.com/d/file/bigpic/190423/23/jc190102_22.jpg)
15、微調切面部分的明暗。創建曲線調整圖層,把暗部稍微壓暗一點,參數及效果如下圖。