photoshop三步修復嚴重偏紅的美女照片
2022-12-26 02:12:38
來源/作者: /
己有:106人學習過
從原圖和效果對比一下可以看出,作者完成了一次不可能完成的效果。而且修復的過程就3個步驟。可見作者的調色功底非常強悍。
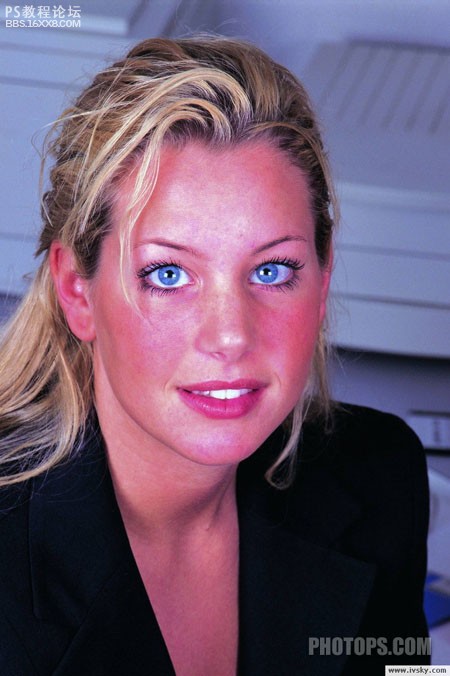
原圖
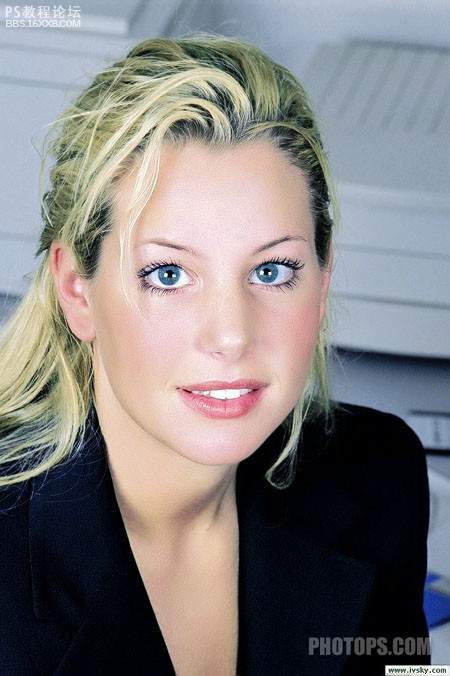
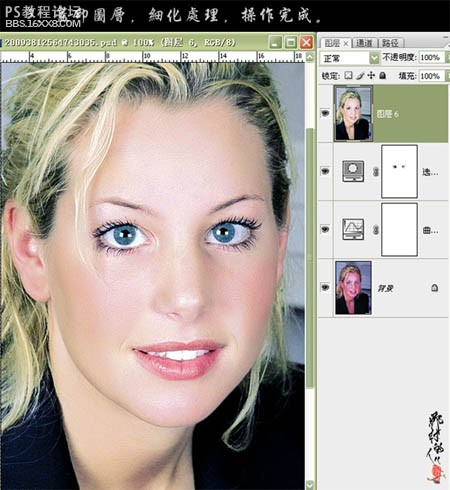
最終效果
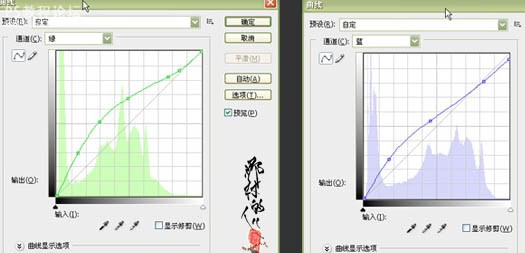
1、打開原圖素材,創建曲線調整圖層,對各通道進行調整,參數及效果如下圖。這一步主要是消除照片中的紅色。

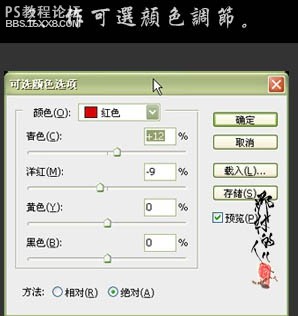
2、創建可選顏色調整圖層,對紅色、青色、洋紅進行調整,參數及效果如下圖。這一步操作是要消除人物膚色上一些多余的雜色。

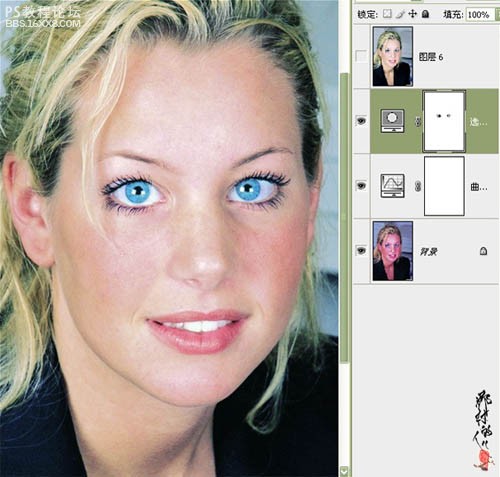
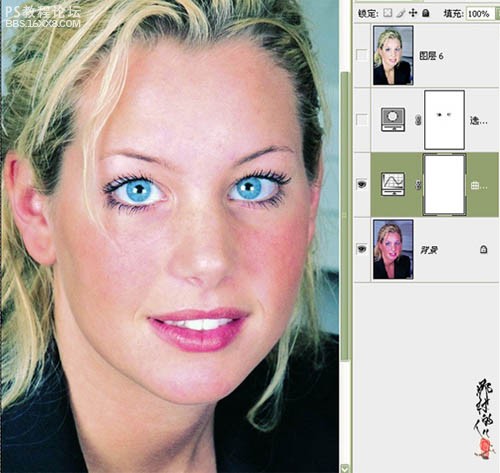
3、新建一個圖層,按Ctrl + Alt + Shift + E 蓋印圖層,適當的用磨皮軟件磨皮及增強質感,完成最終效果。
作者:文/那村的人兒 出處:照片處理網
原圖
最終效果
1、打開原圖素材,創建曲線調整圖層,對各通道進行調整,參數及效果如下圖。這一步主要是消除照片中的紅色。
2、創建可選顏色調整圖層,對紅色、青色、洋紅進行調整,參數及效果如下圖。這一步操作是要消除人物膚色上一些多余的雜色。
3、新建一個圖層,按Ctrl + Alt + Shift + E 蓋印圖層,適當的用磨皮軟件磨皮及增強質感,完成最終效果。
作者:文/那村的人兒 出處:照片處理網
相關推薦

Photoshop快速校正偏色調的室內圖

PS調色教程:修復嚴重偏紅色人物照

ps給偏紅色舞臺照校色

修復偏紅色彩并調成柔美照片效果的

一起來學習PS魔棒(魔術棒)摳圖原理
四種PS摳圖完全攻略教程

Photoshop通道摳圖入門通俗講解

PS怎么用通道摳出超細頭發教程


