photoshop設(shè)計(jì)黑色網(wǎng)站導(dǎo)航
2022-12-26 14:42:56
來(lái)源/作者: /
己有:19人學(xué)習(xí)過(guò)
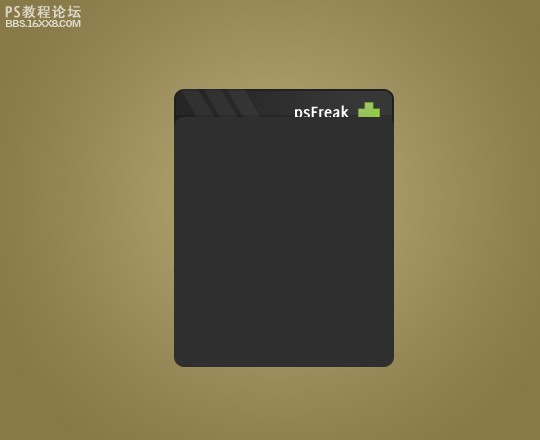
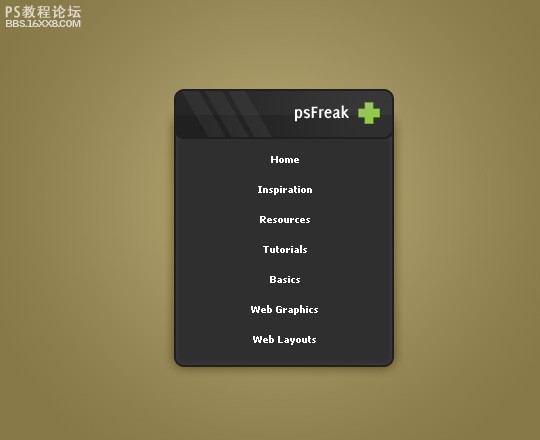
出處:UCD博客 版權(quán)所有 轉(zhuǎn)載請(qǐng)注明出處 鏈接先看看小樣吧!:)

以下是詳細(xì)的photoshop教程步驟:
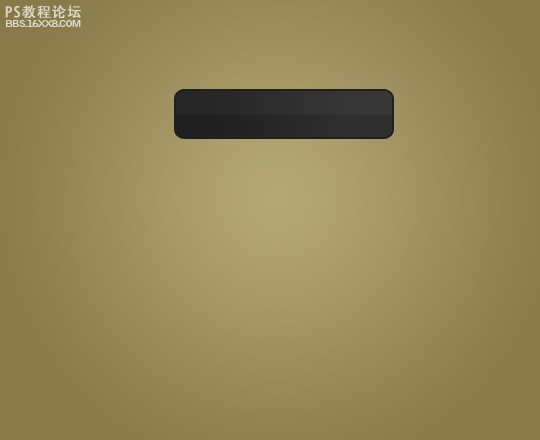
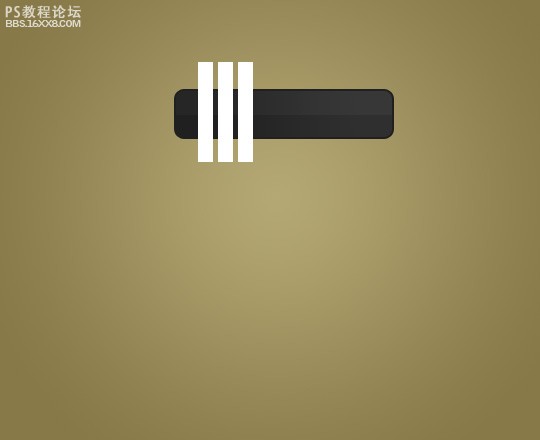
第一步:新建文件,選擇徑向漸變,設(shè)置前景顏色為#b3a773,背景顏色為#877948。效果如圖:

第二步:創(chuàng)建圓角矩形(半徑為10px)大小為220x50px,顏色#212121,如圖:

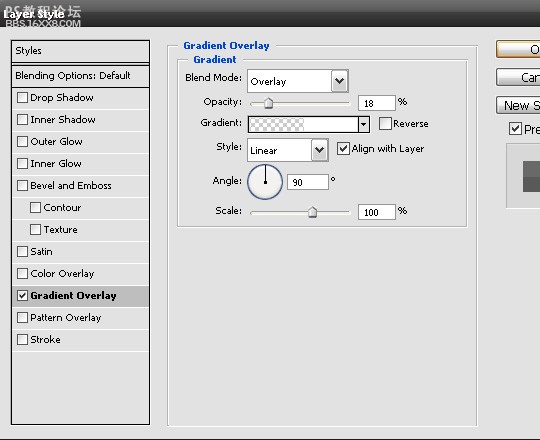
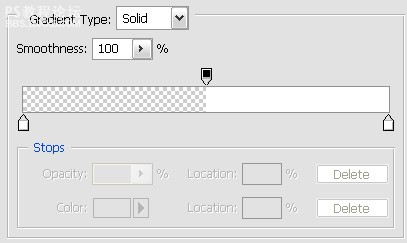
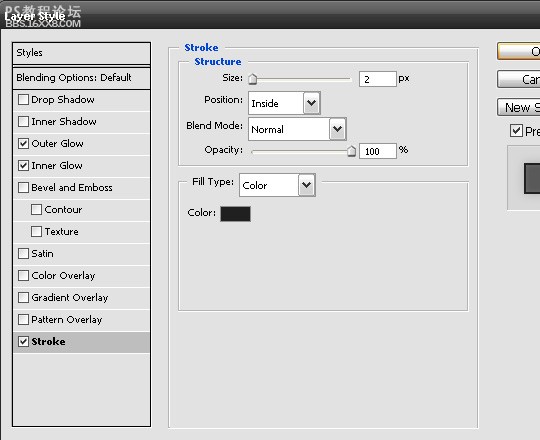
第三步:選擇圖層樣式 漸變 描邊,效果如圖


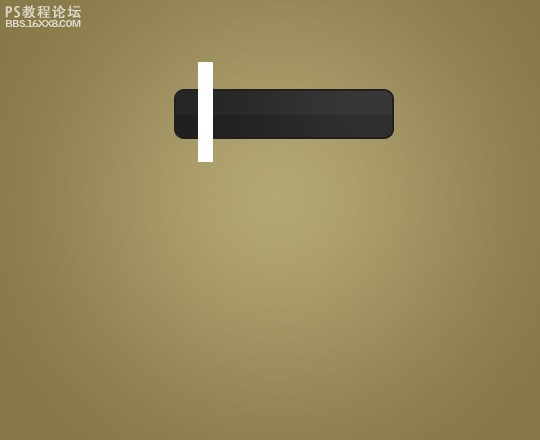
,第四步:新建層,選擇選區(qū)工具(快捷鍵M)大小為15x100px,填充白色,效果如圖:
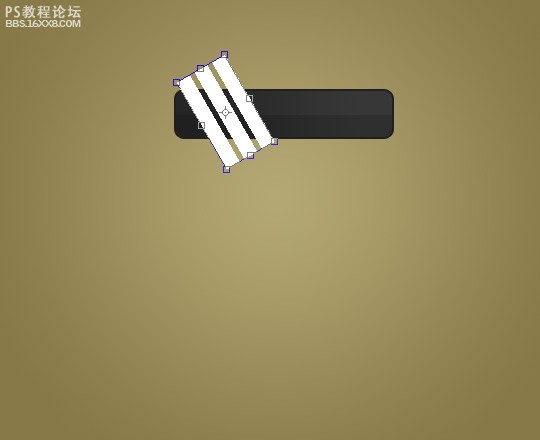
第五步:復(fù)制白色線條層2次(快捷鍵ctrl+J),移動(dòng)20px,合并3個(gè)白線層,效果如圖:
第六步:選擇變換(快捷鍵ctrl+T)
第七步:載入圓角矩形選區(qū)(按ctrl+鼠標(biāo)點(diǎn)擊圓角矩形層),選擇白線層,反選(快捷鍵shift+ctrl+i),刪除多余白線。
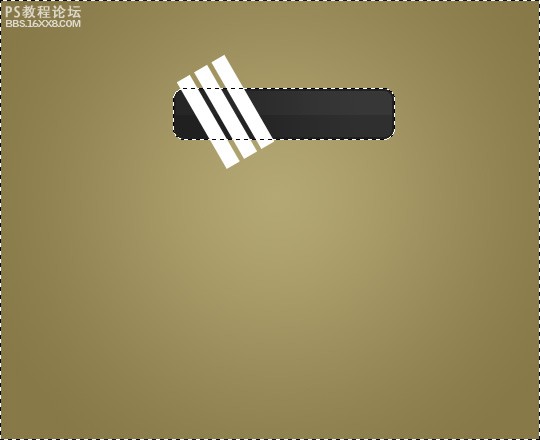
第八步:設(shè)置還層不透明為5%

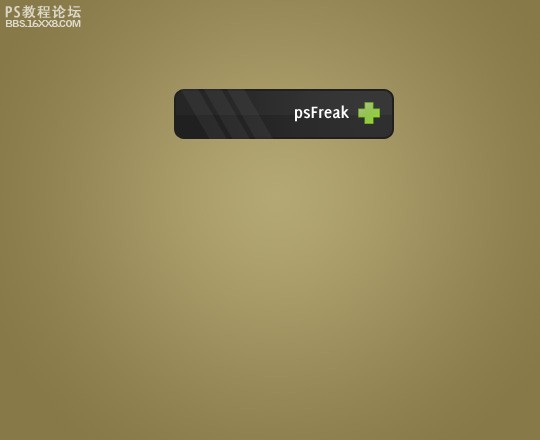
第九步:添加自喜歡的文字和圖標(biāo):
第十步:選擇圓角矩形,半徑為10 px,顏色為#2f2f2f,如圖:
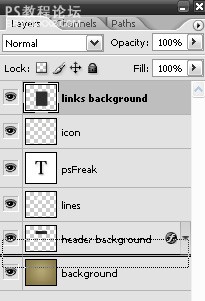
第十一步:調(diào)整圖層的順序。
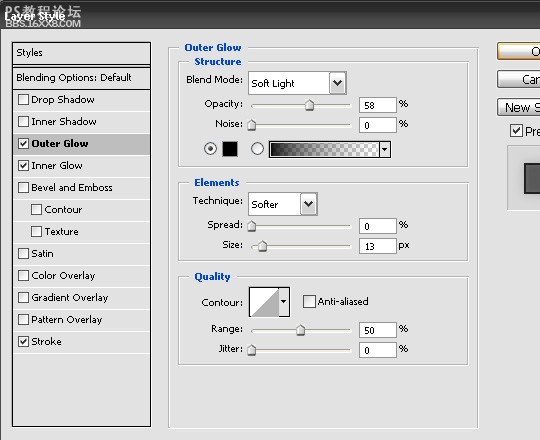
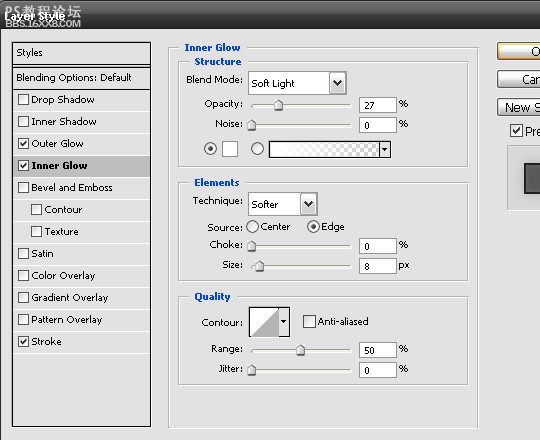
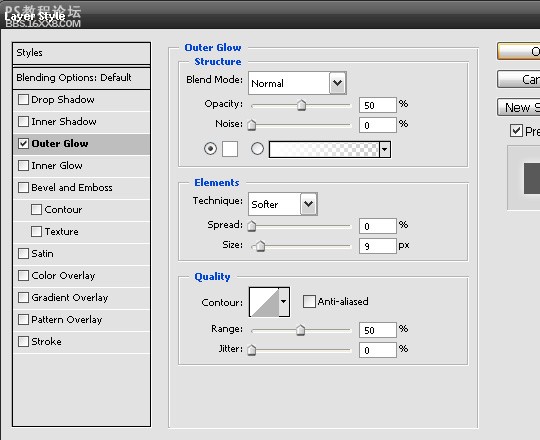
,第十二步:選擇圖層樣式 外發(fā)光(柔光) 內(nèi)發(fā)光 描邊

第十三步:選擇文本工具(快捷鍵T)輸入文字,如圖:
第十四步:新建層,選擇畫(huà)筆(快捷鍵B)創(chuàng)建200x1px細(xì)線,顏色為#292929,如圖:

第十五步:新建層,選擇選區(qū)工具(快捷鍵M),大小為8x3px,填充白色,效果如圖:

第十六步:選擇圖層樣式 外發(fā)光,
以下是詳細(xì)的photoshop教程步驟:
第一步:新建文件,選擇徑向漸變,設(shè)置前景顏色為#b3a773,背景顏色為#877948。效果如圖:
第二步:創(chuàng)建圓角矩形(半徑為10px)大小為220x50px,顏色#212121,如圖:
第三步:選擇圖層樣式 漸變 描邊,效果如圖
,第四步:新建層,選擇選區(qū)工具(快捷鍵M)大小為15x100px,填充白色,效果如圖:
第五步:復(fù)制白色線條層2次(快捷鍵ctrl+J),移動(dòng)20px,合并3個(gè)白線層,效果如圖:
第六步:選擇變換(快捷鍵ctrl+T)
第七步:載入圓角矩形選區(qū)(按ctrl+鼠標(biāo)點(diǎn)擊圓角矩形層),選擇白線層,反選(快捷鍵shift+ctrl+i),刪除多余白線。
第八步:設(shè)置還層不透明為5%
第九步:添加自喜歡的文字和圖標(biāo):
第十步:選擇圓角矩形,半徑為10 px,顏色為#2f2f2f,如圖:
第十一步:調(diào)整圖層的順序。
,第十二步:選擇圖層樣式 外發(fā)光(柔光) 內(nèi)發(fā)光 描邊
第十三步:選擇文本工具(快捷鍵T)輸入文字,如圖:
第十四步:新建層,選擇畫(huà)筆(快捷鍵B)創(chuàng)建200x1px細(xì)線,顏色為#292929,如圖:
第十五步:新建層,選擇選區(qū)工具(快捷鍵M),大小為8x3px,填充白色,效果如圖:
第十六步:選擇圖層樣式 外發(fā)光,
標(biāo)簽(TAG) 網(wǎng)頁(yè)圖片 空來(lái)風(fēng)
相關(guān)推薦

Photoshop制作網(wǎng)站首頁(yè)(3):切割網(wǎng)

photoshop優(yōu)化輸出網(wǎng)頁(yè)圖片的技巧

網(wǎng)頁(yè)圖片,設(shè)計(jì)一個(gè)網(wǎng)頁(yè)登陸框圖片教

Photoshop制作清涼的水中展示網(wǎng)頁(yè)

Photoshop制作大氣的網(wǎng)頁(yè)設(shè)計(jì)主頁(yè)

陰影教程,超詳細(xì)的各種陰影的制作方法

Photoshop制作炫酷的PK類(lèi)網(wǎng)站Banner


