利用PhotoShop制作木紋材質(zhì)
2022-12-26 08:10:08
來源/作者: /
己有:12人學(xué)習(xí)過
利用PhotoShop制作木紋材質(zhì)創(chuàng)建400x300,72 dpi畫布,濾鏡 >> 雜色 >> 添加雜色,并按下圖設(shè)置參數(shù)。
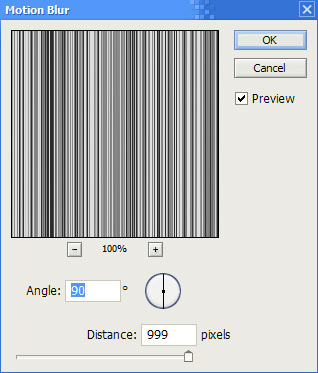
 濾鏡 >> 模糊 >> 動(dòng)感模糊。
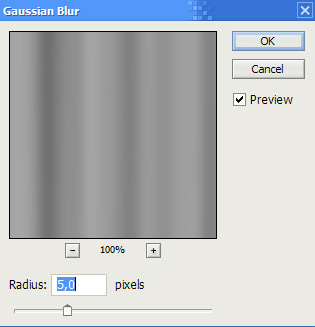
 濾鏡 >> 模糊 >> 高斯模糊。
 濾鏡 >> 素描 >> 鉻黃。
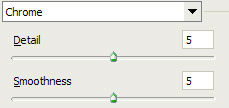 最后,打開色相/飽和度窗口,按下圖設(shè)置參數(shù)。
  為了模仿出逼真的效果,你還需要使用 濾鏡 >> 液化 工具旋轉(zhuǎn)或扭曲畫面。
![]()
濾鏡 >> 模糊 >> 動(dòng)感模糊。濾鏡 >> 模糊 >> 高斯模糊。 濾鏡 >> 素描 >> 鉻黃。最后,打開色相/飽和度窗口,按下圖設(shè)置參數(shù)。 為了模仿出逼真的效果,你還需要使用 濾鏡 >> 液化 工具旋轉(zhuǎn)或扭曲畫面。下一篇:咱也做個(gè)水晶球
相關(guān)推薦

ps 濾鏡《理論講解》

ps筆刷濾鏡工具安裝教程
ps 濾鏡的選擇技巧
ps中濾鏡/樣式的33條技巧

圖片變清晰,使用PS讓模糊圖片變清晰的方法教程

PS調(diào)出晶瑩潔白膚色商業(yè)人像照片效果

PS調(diào)出唯美金黃色樹葉背景甜美女生照片

調(diào)出高清質(zhì)感暗色草原風(fēng)景圖片的PS教程


