利用PhotoShop制作腳印效果
2022-12-26 08:29:57
來源/作者: /
己有:4人學習過
利用PhotoShop制作腳印效果

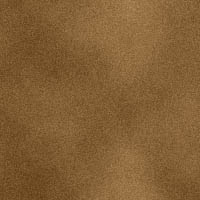
創建500*500畫布,背景設為“白色”。

將前景色設為深褐色,背景色設為淺褐色。


濾鏡 >> 渲染 >> 云


編輯 >> 變換 >> 旋轉,調整到適當的角度。

粘貼(CTRL V)腳趾,并將其移動到另一邊,重復步驟6。

利用橢圓選框工具繪制另一個橢圓,并填充白色。

重復步驟 7,變換角度并復制。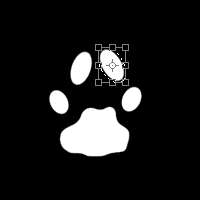

粘貼,編輯 >> 變換 >> 水平翻轉。


復制(CTRL C),粘貼(CTRL V)
圖層 >> 圖層樣式 >> 內陰影,并使用默認設置。
![]()
創建500*500畫布,背景設為“白色”。
將前景色設為深褐色,背景色設為淺褐色。
濾鏡 >> 渲染 >> 云
為背景添加雜色效果
濾鏡 >> 雜色 >> 添加雜色
數量7%,分布“高斯分布”,勾選單色。
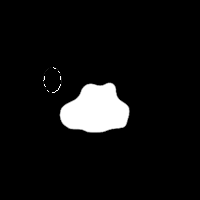
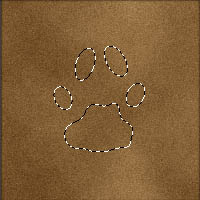
創建新的通道并命名為“腳印”。
使用套索工具( ),創建如左圖所示選區,并用白色填充。
取消選區(CTRL D)。
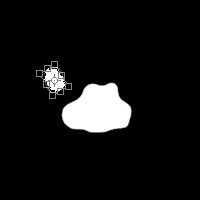
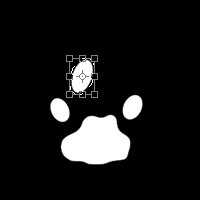
使用橢圓選框工具( )繪制橢圓選區并填充白色,完成一個腳趾的制作,復制腳趾(CTRL C)。
編輯 >> 變換 >> 旋轉,調整到適當的角度。
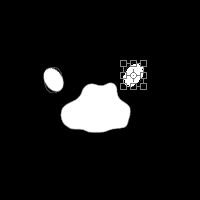
粘貼(CTRL V)腳趾,并將其移動到另一邊,重復步驟6。
利用橢圓選框工具繪制另一個橢圓,并填充白色。
重復步驟 7,變換角度并復制。
粘貼,編輯 >> 變換 >> 水平翻轉。
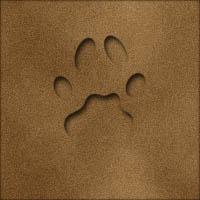
返回圖層面板,載入你所創建的通道(選擇 >> 載入選區)
文檔:當前文件
通道:腳印
操作:新選區
復制(CTRL C),粘貼(CTRL V)
圖層 >> 圖層樣式 >> 內陰影,并使用默認設置。
圖像 >> 調整 >> 亮度/對比度
亮度“-10”
對比度“ 15”
OK,大功告成~~~
相關推薦

ps CS4 工具學習之——
ps CS4 工具學習之——
ps CS4 工具學習之——
ps CS4  工具學習(4

圖片變清晰,使用PS讓模糊圖片變清晰的方法教程

PS調出晶瑩潔白膚色商業人像照片效果

PS調出唯美金黃色樹葉背景甜美女生照片

調出高清質感暗色草原風景圖片的PS教程


