PS教程:Photoshop濾鏡打造絢麗漂亮光線
本教程主要用Photoshop濾鏡簡單打造的夢幻炫彩光線特效,最終效果非常絢麗漂亮,下面讓我們一起來學習吧.
效果圖

關鍵命令:ctrl+T【自由變換】、ctrl+F 【重復執行濾鏡】、【圖層柔光混合】
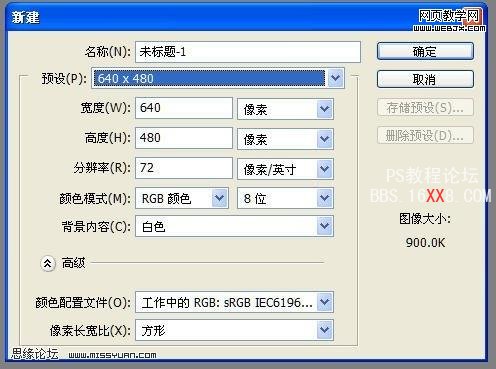
1.創建一個合成文檔。
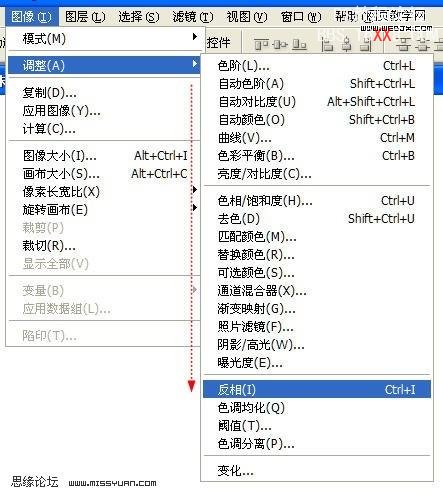
2.把背景圖層填充黑色或者反向成黑色。
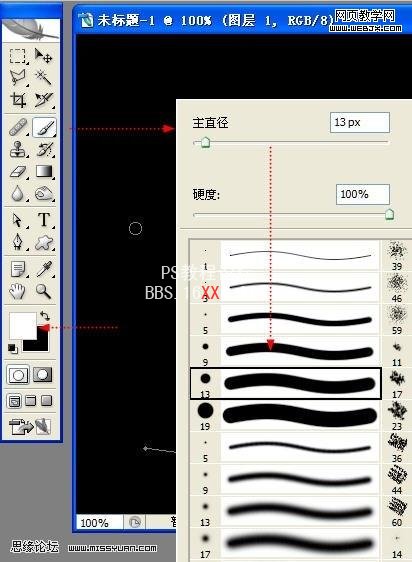
3.ctrl+shift+n【新建一個空圖層】,用【鋼筆工具】繪制一個三點曲線!

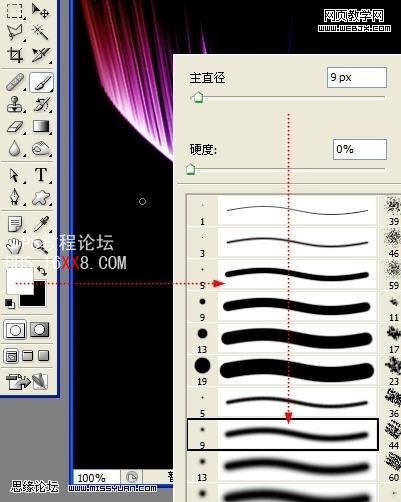
4.先按鍵盤【D】- 回恢復默認前景色背景色,再按鍵盤【X】-更換前景色背景色,最后按下鍵盤【B】,鼠標在圖層中點右鍵,選擇一種比較實的畫筆,不可以有羽化哦。
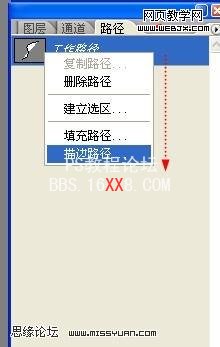
5.進入圖層1的路徑面板,在路徑調板中第一個路徑上點擊鼠標右鍵,選擇【描邊路徑】,并勾選【模擬壓力】。效果如下:

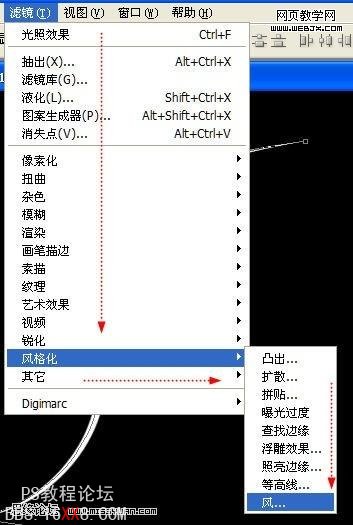
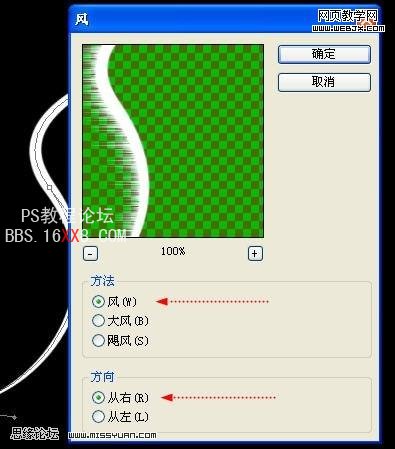
7.選擇【濾鏡】-【風格化】-【風】
保持默認參數。
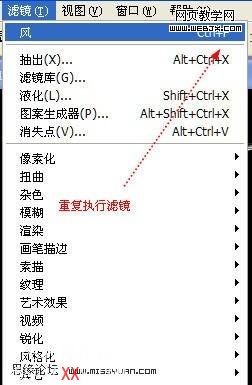
Ctrl+F重復操作三次
效果如下:

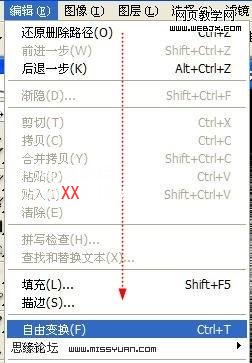
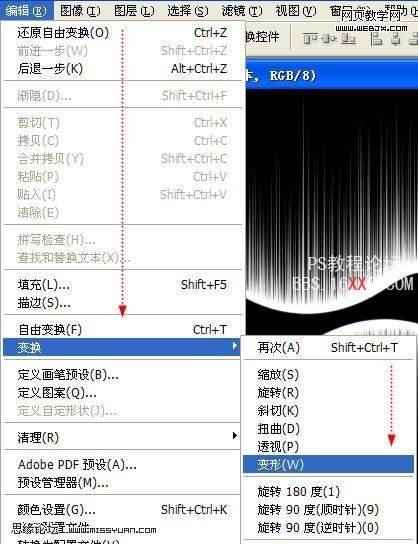
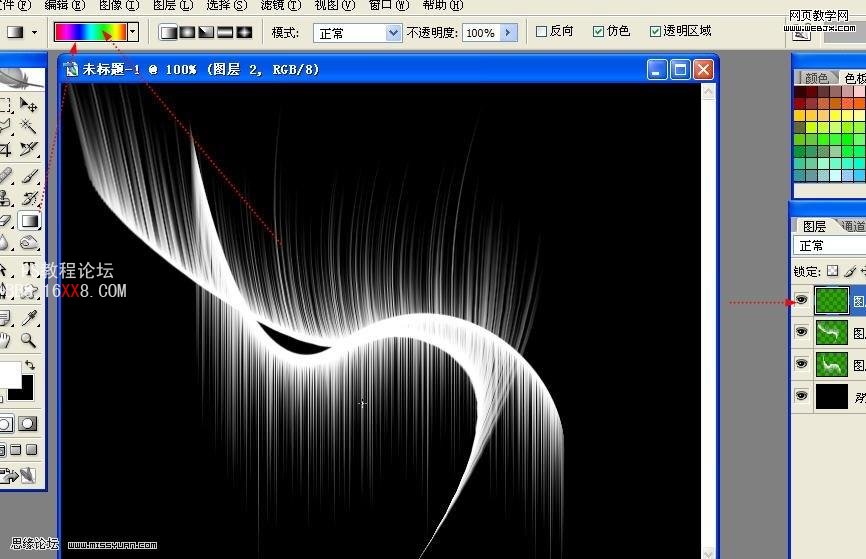
9.【Ctrl+J】拷貝圖層子到新圖層。執行【ctrl+T自由變換】。
此時的圖層1副本會出現一個帶有控制節點的矩形框。OK,在框中點鼠標右鍵,選擇【水平翻轉】 再次執行,選擇【垂直翻轉】。并回車完成操作。
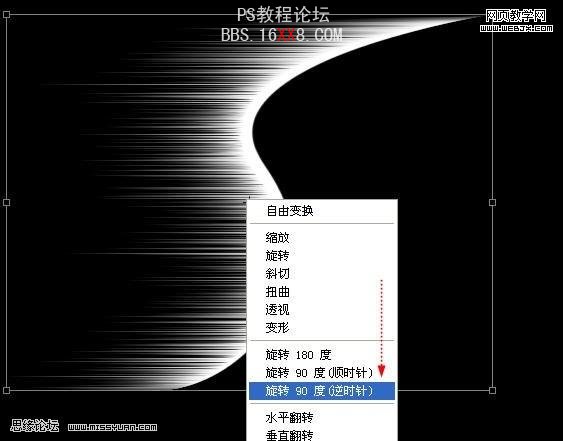
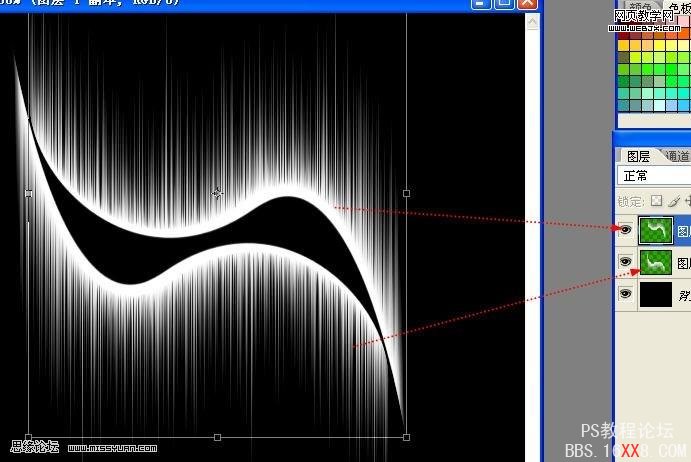
10.再次對圖層1副本做變換操作。

11.完成上步驟。新建一個空白圖層,使用【色譜漸變】制作漸變圖層。

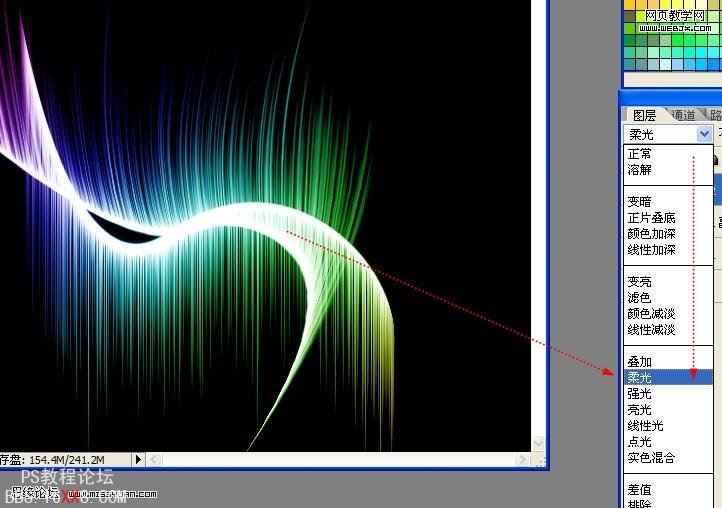
12.把彩色漸變圖層更改為【柔光】的圖層混合模式。
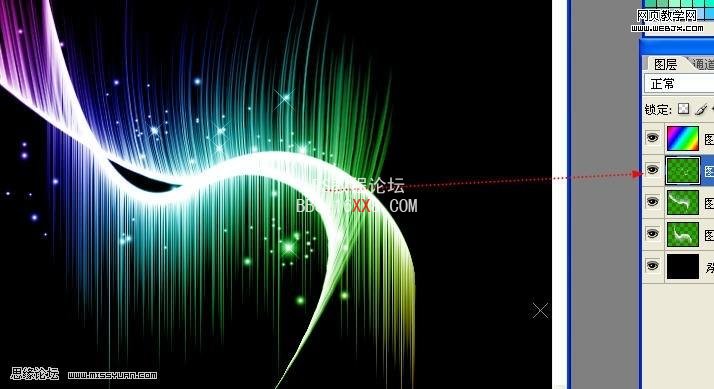
13。新建一個空白圖層,拖放在彩色漸變的下方。用帶羽化的畫筆點綴一些星光,“[”“ ]”符號可以縮放畫筆。
14.如果覺得顏色不夠亮麗,可以選擇漸變圖層,【ctrl+U】打開【色相飽和度】調整,調整它的色相。

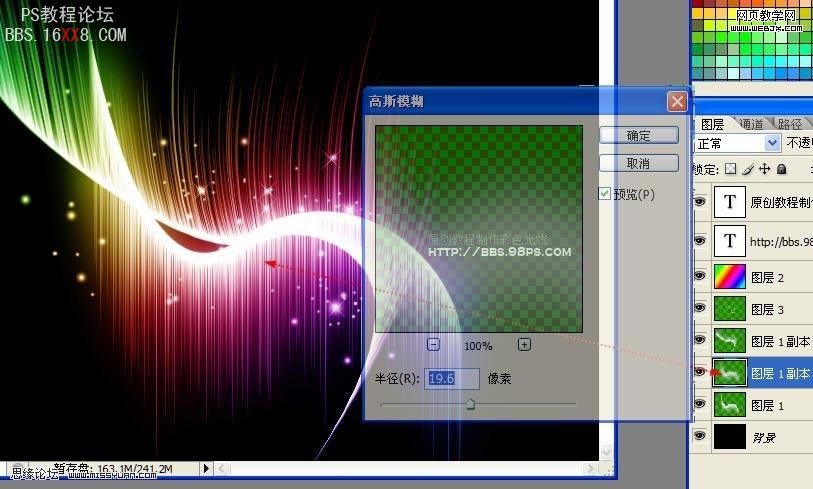
15.如果覺得光線的色彩不夠亮,可以選擇圖層1,ctrl+J一次,執行【高斯模糊】。
16.最后添加文字修飾,添加幾條圓潤的自由線,讓他們使圖像更具美感和構成意識。
標簽(TAG) 制作實例
相關推薦

簡易畫貓頭鷹的步驟 畫貓頭鷹的簡

幼兒簡筆畫烏鴉的畫法 教你如何畫

如何簡單的畫一條魚 5步畫魚簡筆畫

快捷鍵,2015photoshop cc快捷鍵大全

圖片變清晰,使用PS讓模糊圖片變清晰的方法教程

PS調出晶瑩潔白膚色商業人像照片效果

PS調出唯美金黃色樹葉背景甜美女生照片

調出高清質感暗色草原風景圖片的PS教程


