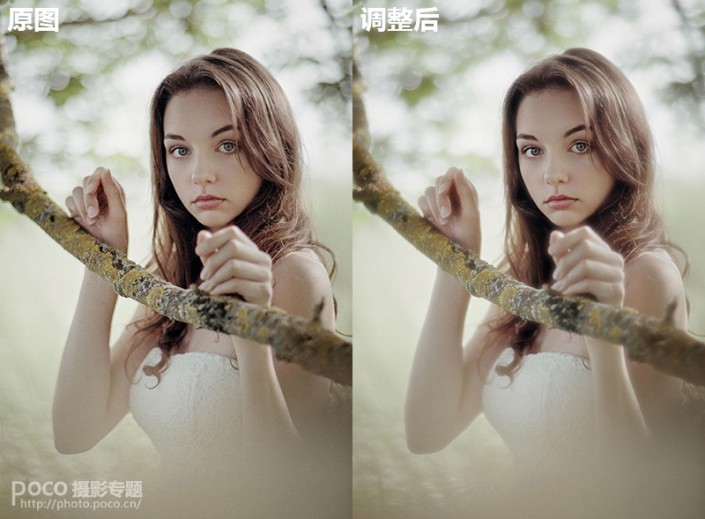
柔光效果,教你快速制作柔光效果
2022-12-25 21:14:43
來源/作者: /
己有:218人學習過
前期拍攝可以通過在鏡頭前套塑料袋、網紗、涂凡士林等,實現柔光的效果。如果你前期沒有做這些準備,其實后期只要兩步就可以輕松搞定。
<點圖片看大圖>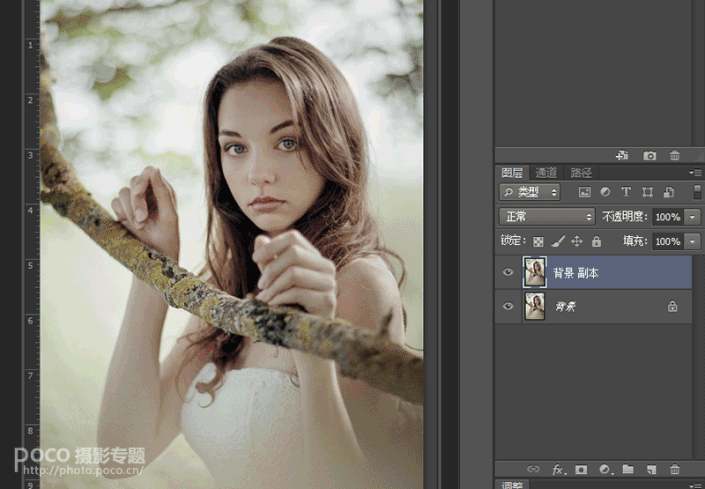
<點圖片看大圖>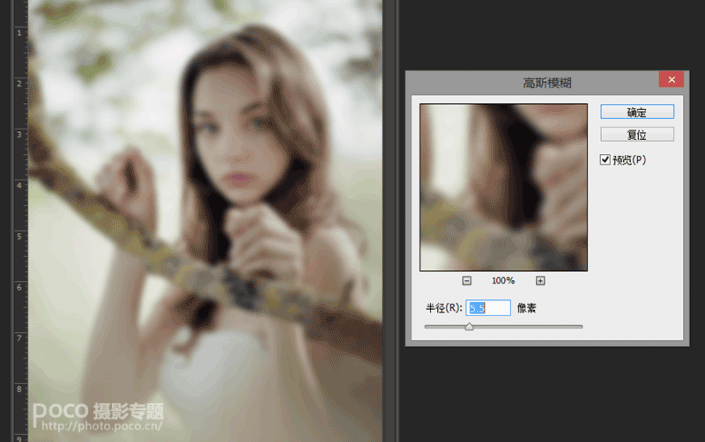
<點圖片看大圖>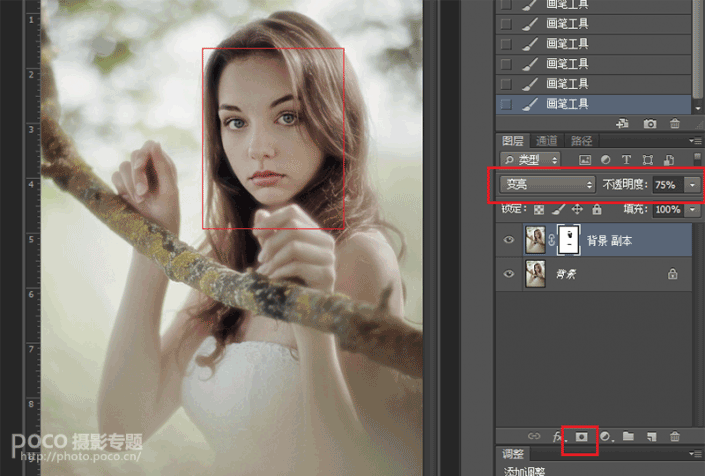
<點圖片看大圖>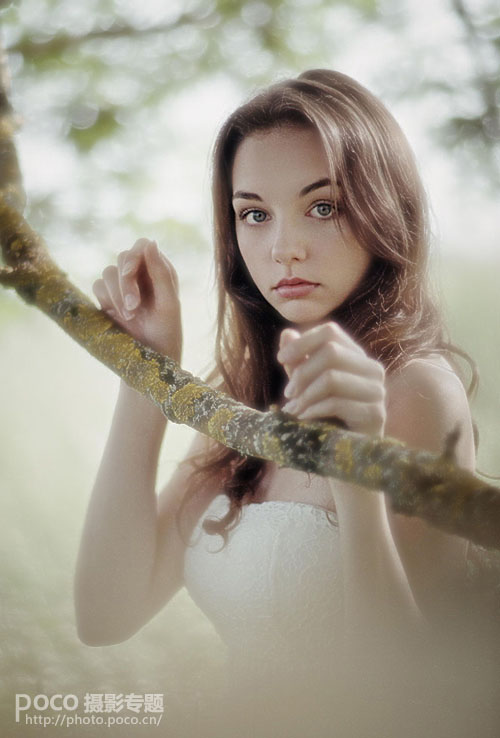
<點圖片看大圖>
首先,復制背景圖層。
<點圖片看大圖>
第一步:選擇濾鏡>模糊>高斯模糊,如圖,數值不用太大,有模糊的效果即可。
<點圖片看大圖>
第二步:圖層模式設置為“變亮”,降低不透明度,使其過渡得更自然。添加圖層蒙版,擦除臉部、五官部分。柔光效果就實現了。
<點圖片看大圖>
成圖
相關推薦

ps新手教程:創建模糊的背景
新手教程!簡單隨意制作背景教程

ps合成繽紛潮流的時尚人像效果

Photoshop新手教程:USM銳化濾鏡讓

如何用PS把渾濁的風景照片調出通透清晰

PS商業修圖師對人物頭發進行精修教程

如何用PS打造出明亮而有神的眼睛效果

PS商業修圖給人像增強光影質感的方法介紹


