利用Photoshop筆刷打造夢幻蝴蝶仙子
2022-12-25 18:53:21
來源/作者: /
己有:13人學習過
利用Photoshop筆刷打造夢幻蝴蝶仙子
 1.gif (112.98 KB)
2007-8-12 15:11
素材工具:
1蝴蝶筆刷
2星光筆刷
將下載的筆刷工具載入Photoshop。
具體步驟:
1、打開素材圖像
 2.gif (70.54 KB)
2007-8-12 15:11
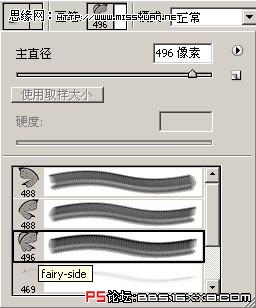
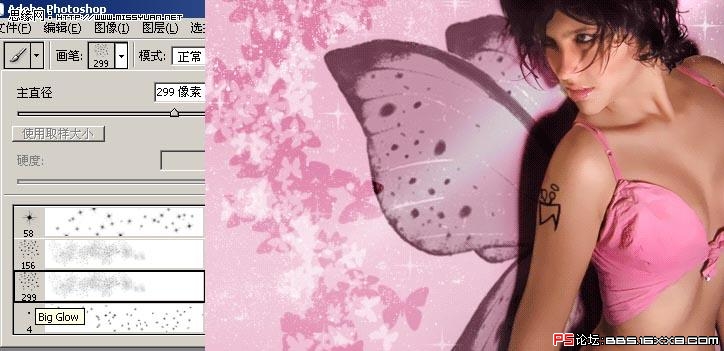
2、選擇筆刷工具。
 3.jpg (26.35 KB)
2007-8-12 15:11
根據需要選擇如下筆刷
 4.jpg (44.86 KB)
2007-8-12 15:11
創建新圖層(CTRL SHIFT N ),并命名為“翅膀”。
 1547054.jpg (41.75 KB)
2007-8-12 15:11
設置前景色為#6c3d4e,利用筆刷在翅膀層繪制如下效果。
 1547055.gif (83.07 KB)
2007-8-12 15:11
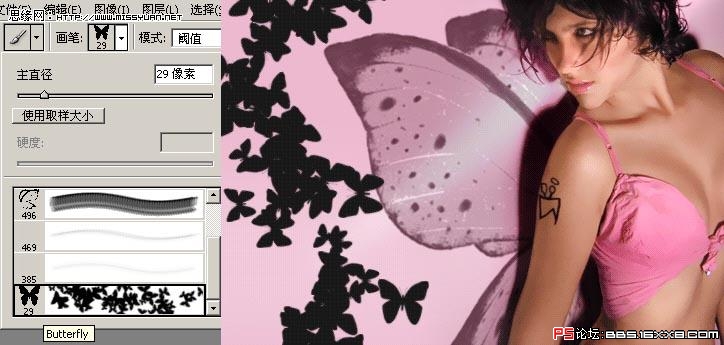
選擇橡皮擦工具,擦除覆蓋于人像上方的翅膀部分。
 1547056.gif (83.52 KB)
2007-8-12 15:11
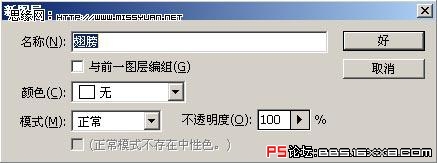
3、創建新圖層(CTRL SHIFT N ),并命名為“蝴蝶”。
變換筆刷形狀在新建圖層中繪制如下效果(前景色設為“黑色”):
 1547057.jpg (131.55 KB)
2007-8-12 15:11
將蝴蝶層的圖層混合模式改為“疊加”,得到如下效果:
 1547058.gif (92.23 KB)
2007-8-12 15:11
創建新圖層(CTRL SHIFT N)并命名為“小蝴蝶”,減小筆刷大小并將前景色設為白色繪制如下效果。
 1547059.gif (98.6 KB)
2007-8-12 15:11
將“小蝴蝶”層的圖層混合模式改為“柔光”,得到如下效果:
 15470510.gif (99.33 KB)
2007-8-12 15:11
4、創建新圖層(CTRL SHIFT N)并命名為“閃光”,選擇星光筆刷繪制如下效果。
 15470511.jpg (137.73 KB)
2007-8-12 15:11
在衣飾上添加更多的細節就得到最終效果。
 1547050.gif (112.98 KB)
2007-8-12 15:11
1.gif (112.98 KB)2007-8-12 15:11
素材工具:
1蝴蝶筆刷
2星光筆刷
將下載的筆刷工具載入Photoshop。
具體步驟:
1、打開素材圖像
2.gif (70.54 KB)2007-8-12 15:11
2、選擇筆刷工具。
3.jpg (26.35 KB)2007-8-12 15:11
根據需要選擇如下筆刷
4.jpg (44.86 KB)2007-8-12 15:11
創建新圖層(CTRL SHIFT N ),并命名為“翅膀”。
1547054.jpg (41.75 KB)2007-8-12 15:11
設置前景色為#6c3d4e,利用筆刷在翅膀層繪制如下效果。
1547055.gif (83.07 KB)2007-8-12 15:11
選擇橡皮擦工具,擦除覆蓋于人像上方的翅膀部分。
1547056.gif (83.52 KB)2007-8-12 15:11
3、創建新圖層(CTRL SHIFT N ),并命名為“蝴蝶”。
變換筆刷形狀在新建圖層中繪制如下效果(前景色設為“黑色”):
1547057.jpg (131.55 KB)2007-8-12 15:11
將蝴蝶層的圖層混合模式改為“疊加”,得到如下效果:
1547058.gif (92.23 KB)2007-8-12 15:11
創建新圖層(CTRL SHIFT N)并命名為“小蝴蝶”,減小筆刷大小并將前景色設為白色繪制如下效果。
1547059.gif (98.6 KB)2007-8-12 15:11
將“小蝴蝶”層的圖層混合模式改為“柔光”,得到如下效果:
15470510.gif (99.33 KB)2007-8-12 15:11
4、創建新圖層(CTRL SHIFT N)并命名為“閃光”,選擇星光筆刷繪制如下效果。
15470511.jpg (137.73 KB)2007-8-12 15:11
在衣飾上添加更多的細節就得到最終效果。
1547050.gif (112.98 KB)2007-8-12 15:11
相關推薦

ps利用曲線修正灰蒙蒙花朵圖片

photoshop利用通道還原照片細節

photoshop教程:利用選擇工具去除殘

利用Photoshop高反差保留濾鏡把照

如何用PS把渾濁的風景照片調出通透清晰

PS商業修圖師對人物頭發進行精修教程

如何用PS打造出明亮而有神的眼睛效果

PS商業修圖給人像增強光影質感的方法介紹


