Photoshop濾鏡為畫面增添浪漫雪花
2022-12-25 16:30:35
來源/作者: /
己有:10人學習過
Photoshop濾鏡為畫面增添浪漫雪花
我們用Photoshop濾鏡為這幅美麗的畫面增添浪漫的雪花……
原圖:
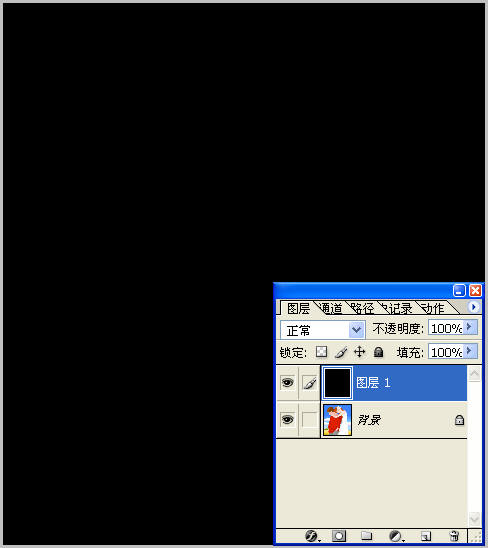
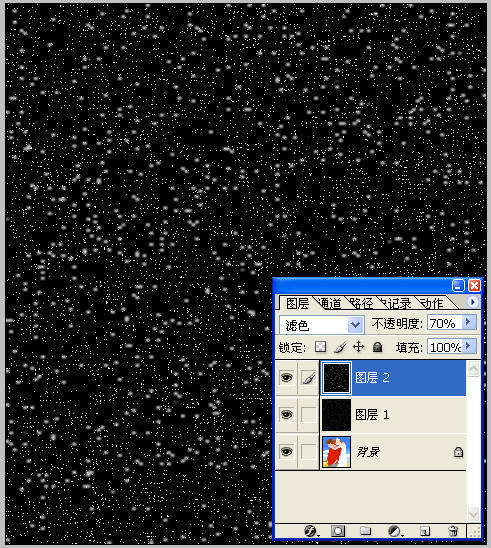
 1、在phtoshop中打開原圖,新建立一圖層,填充為黑色。
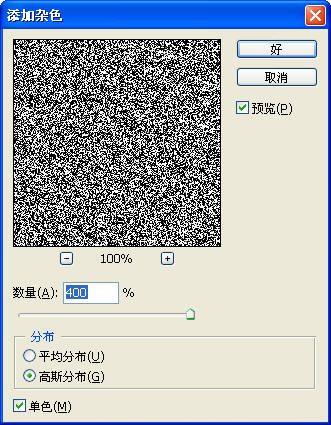
 2、“濾鏡”-“雜色”-“添加雜色”
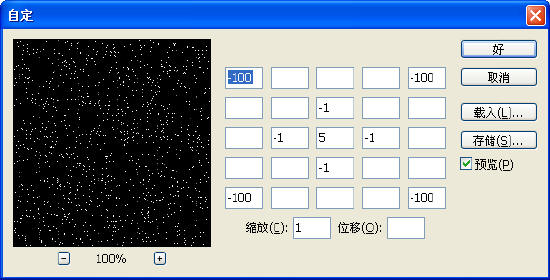
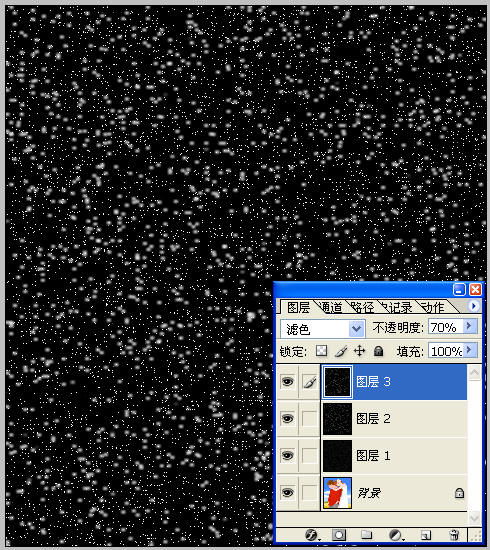
3、“濾鏡”-“其他”-“自定”
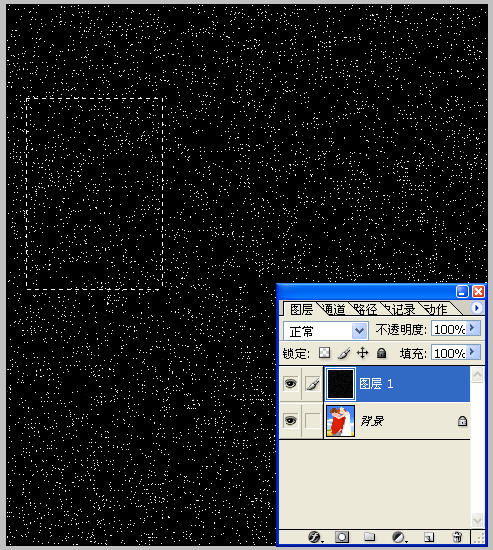
 4、用矩形工具選擇一個區(qū)域,按Ctrl C復制,按Ctrl V粘貼
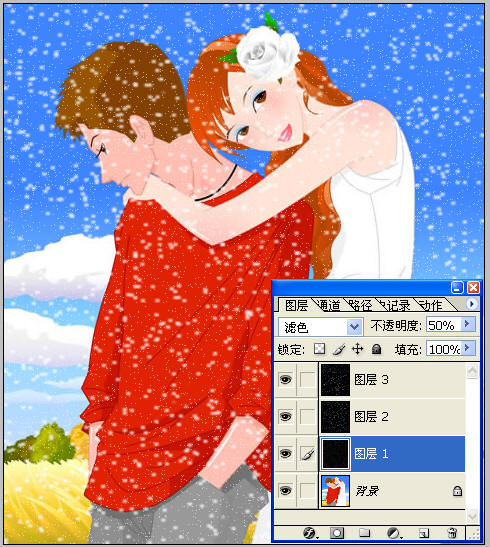
5、“編輯”-“自由變換”,調整到圖象大小一樣,設置模式和透明度
 6、重復4,5兩步
7、關掉圖層1的顯示標志
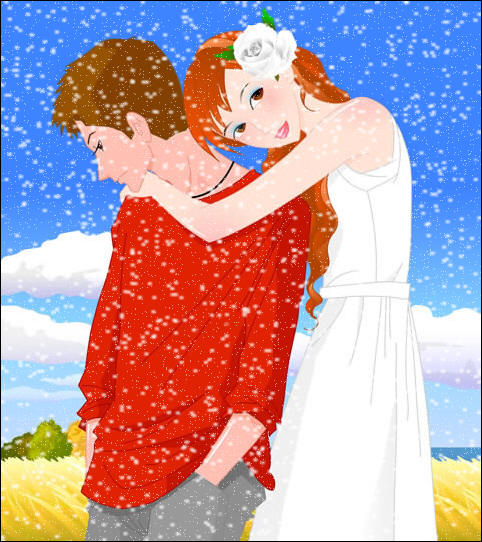
 8、拼合圖層,去掉隱藏的層的效果1如下:

9、也可以把圖層1的模式更改:
 10、拼合圖層,效果2如下:
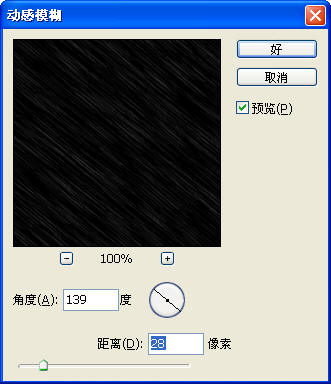
 11、還可以對圖層1進行動感模糊:
12、更改模式和透明度:
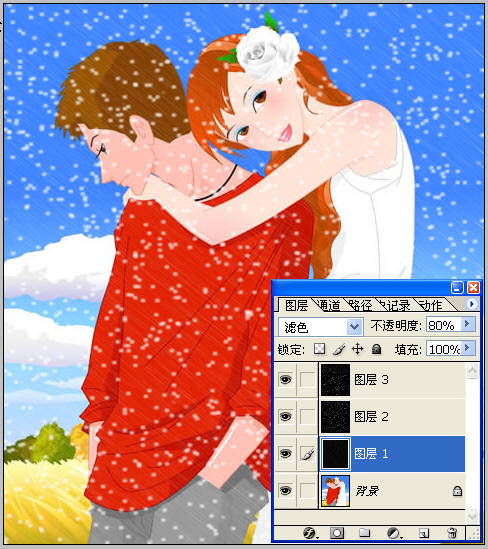 13、拼合圖層后的效果3:

我們用Photoshop濾鏡為這幅美麗的畫面增添浪漫的雪花……
原圖:
1、在phtoshop中打開原圖,新建立一圖層,填充為黑色。 2、“濾鏡”-“雜色”-“添加雜色” 3、“濾鏡”-“其他”-“自定”
4、用矩形工具選擇一個區(qū)域,按Ctrl C復制,按Ctrl V粘貼 5、“編輯”-“自由變換”,調整到圖象大小一樣,設置模式和透明度
6、重復4,5兩步 7、關掉圖層1的顯示標志
8、拼合圖層,去掉隱藏的層的效果1如下: 9、也可以把圖層1的模式更改:
10、拼合圖層,效果2如下: 11、還可以對圖層1進行動感模糊: 12、更改模式和透明度:
13、拼合圖層后的效果3: 搜索更多相關主題的帖子:Photoshop 雪花 濾鏡 畫面
簡單的,我們教你,深奧的,你來分享上一篇:ps給樹林圖片加上高清的投射光束
下一篇:動漫--《獨》
相關推薦

Photoshop快速修復強光照射的非主

Photoshop通道修復偏藍照片的方法

祁連山教你四種用photoshop優(yōu)化模

卒仔:用photoshop還原真實顔色...

如何用PS把渾濁的風景照片調出通透清晰

PS商業(yè)修圖師對人物頭發(fā)進行精修教程

如何用PS打造出明亮而有神的眼睛效果

PS商業(yè)修圖給人像增強光影質感的方法介紹


