photoshop怎樣讓磨皮更有質(zhì)感
2022-12-25 12:48:54
來(lái)源/作者: /
己有:13人學(xué)習(xí)過(guò)
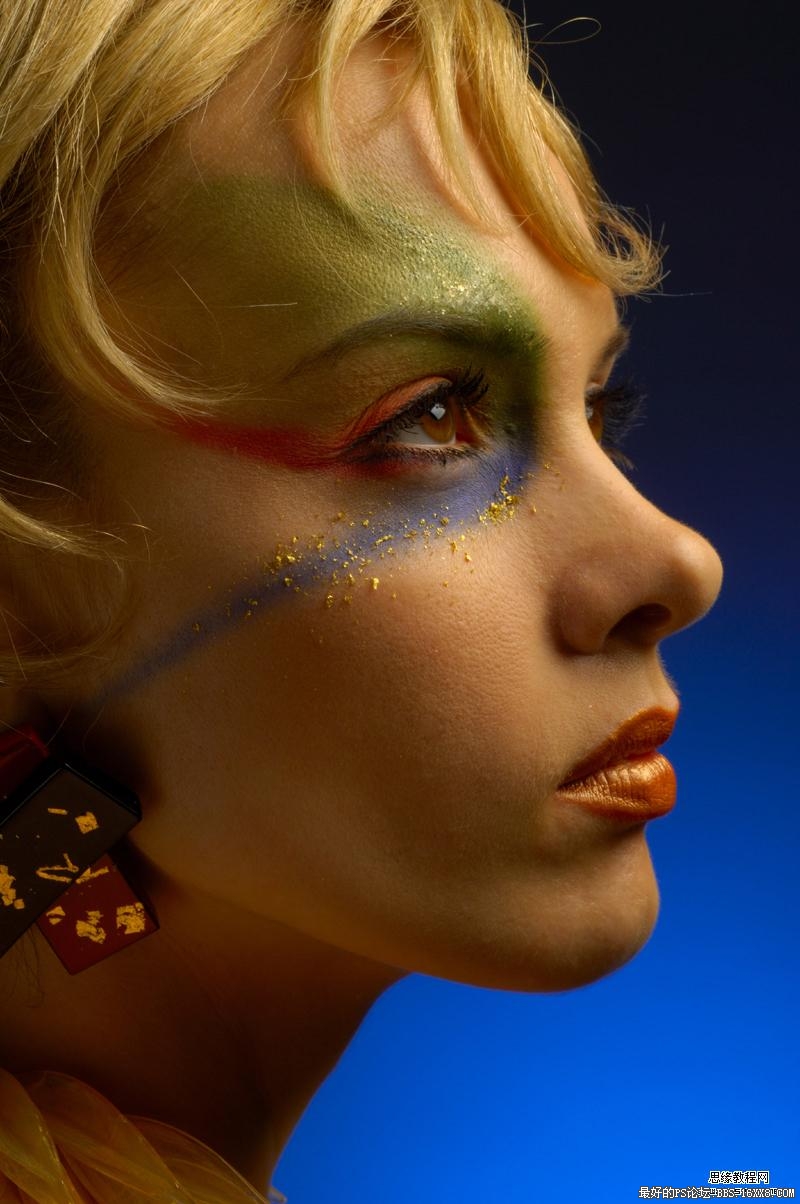
原圖:
效果:

,
教程:
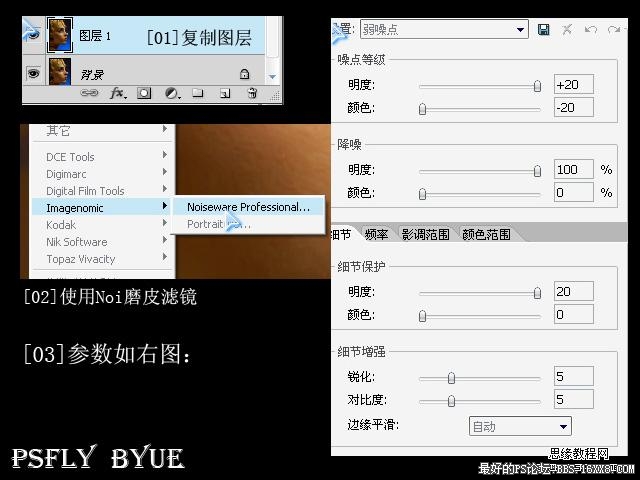
,
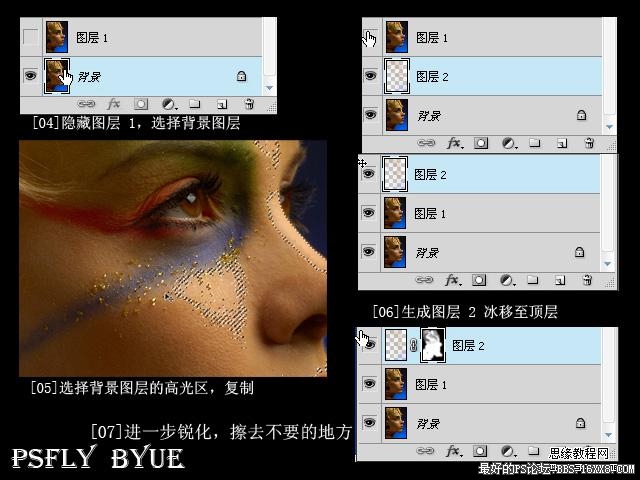
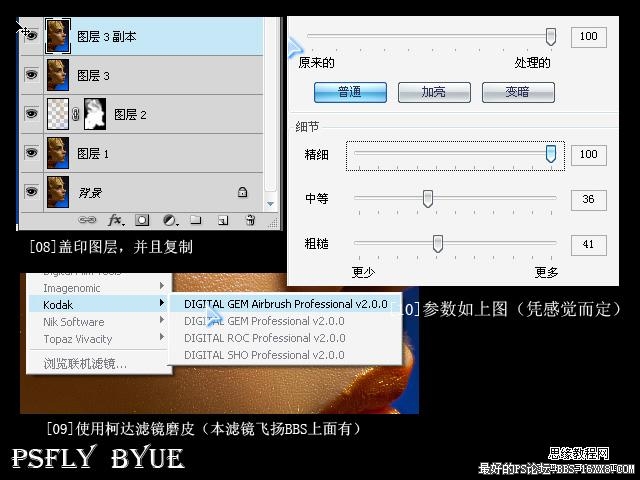
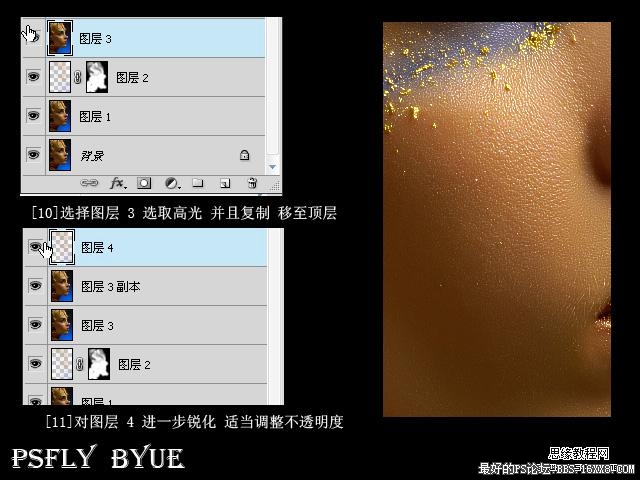
第七步:改一下 對(duì)圖層 2進(jìn)行兩次 進(jìn)一步銳化(反正達(dá)到自己想要的效果就行了,不必要跟著教程走~~)

效果:
效果:
,
教程:
,
第七步:改一下 對(duì)圖層 2進(jìn)行兩次 進(jìn)一步銳化(反正達(dá)到自己想要的效果就行了,不必要跟著教程走~~)
效果:
標(biāo)簽(TAG) 磨皮教程 學(xué)photoshop
上一篇:彩妝教程,人像后期彩虹妝面教程
相關(guān)推薦

Photoshop磨皮教程:體現(xiàn)皮膚的質(zhì)感

Neat Image外掛濾鏡磨皮教程

Photoshop磨皮教程:臉部磨皮美容

PS磨皮教程:保留膚色質(zhì)感的面部修

如何用PS把渾濁的風(fēng)景照片調(diào)出通透清晰

PS商業(yè)修圖師對(duì)人物頭發(fā)進(jìn)行精修教程

如何用PS打造出明亮而有神的眼睛效果

PS商業(yè)修圖給人像增強(qiáng)光影質(zhì)感的方法介紹


