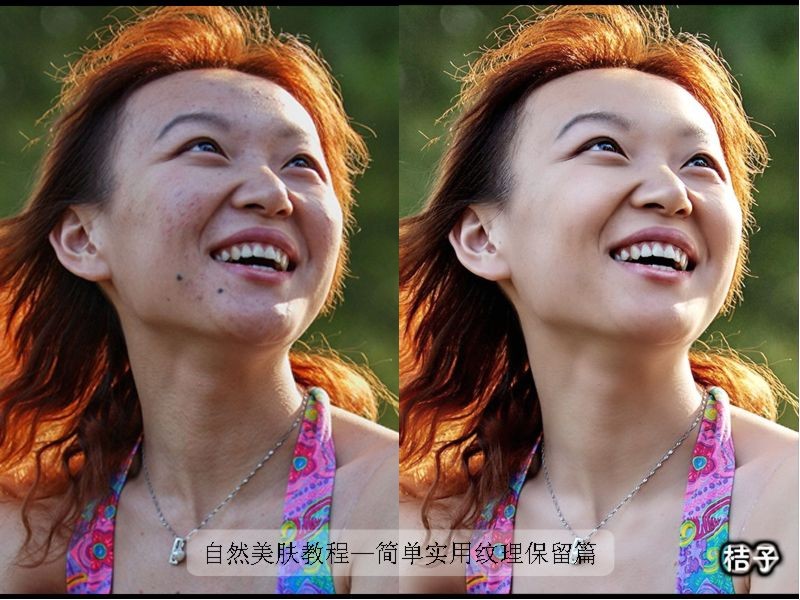
桔子自然美膚教程—簡單實用紋理保留篇
2022-12-25 11:33:06
來源/作者: /
己有:6人學習過
桔子自然美膚教程—簡單實用紋理保留篇作者:桔子香水 來源:Photoshop天空

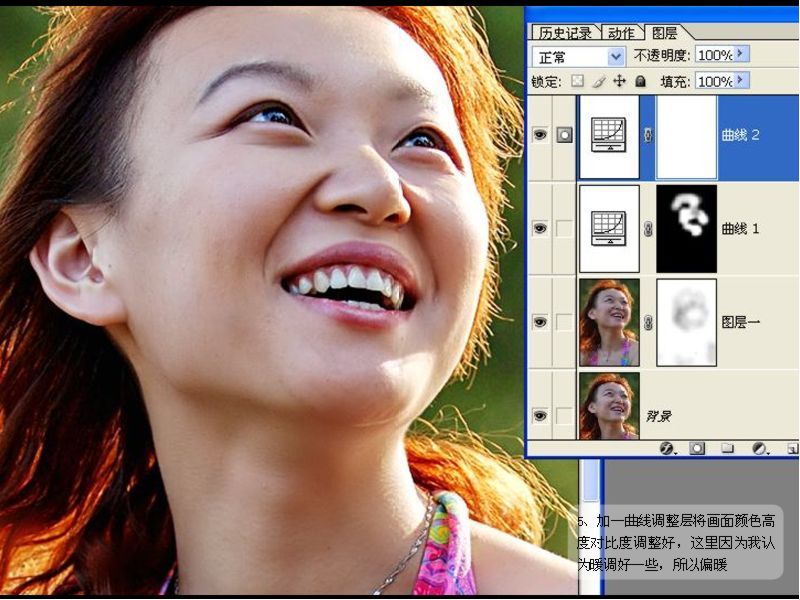
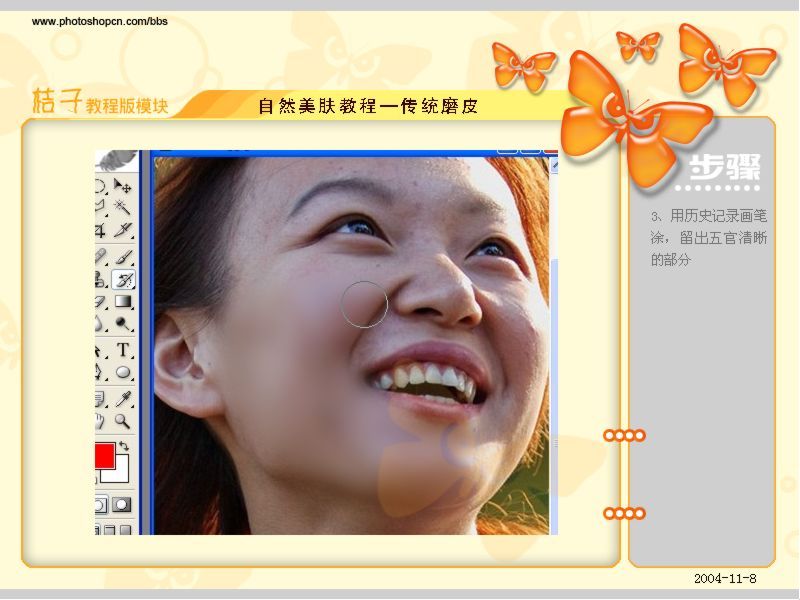
補充在第四步之前:將圖層一(即磨皮層)的填充設置為80%左右,就可以露出下面銳化層的紋理了。由于這位MM臉上的皮膚和脖子上的粗糙程度不同,所以為圖層一添加一個圖層蒙版,用黑色畫筆工具,不透明度降低一些,在面部輕涂,使皮膚和脖子的粗糙程度統一。


以下是補充前面略掉的磨皮部分


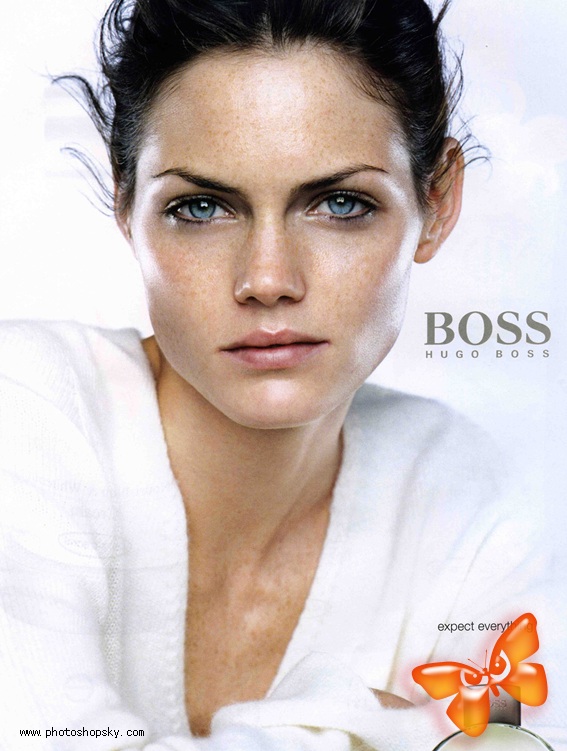
參考:
 簡單的,我們教你,深奧的,你來分享
補充在第四步之前:將圖層一(即磨皮層)的填充設置為80%左右,就可以露出下面銳化層的紋理了。由于這位MM臉上的皮膚和脖子上的粗糙程度不同,所以為圖層一添加一個圖層蒙版,用黑色畫筆工具,不透明度降低一些,在面部輕涂,使皮膚和脖子的粗糙程度統一。
以下是補充前面略掉的磨皮部分
參考:
簡單的,我們教你,深奧的,你來分享下一篇:ps去油光教程
相關推薦

PSCS3教程:皮膚柔化除斑磨皮方法

磨皮方法,Photoshop處理MM冰清玉潔

唇妝教程,教你制作圣羅蘭漸變唇彩教

ps眼睛處理詳細教程

如何用PS把渾濁的風景照片調出通透清晰

PS商業修圖師對人物頭發進行精修教程

如何用PS打造出明亮而有神的眼睛效果

PS商業修圖給人像增強光影質感的方法介紹


