羽毛教程,運用PS制作羽毛效果
![點擊查看大圖 羽毛教程,運用PS制作羽毛效果](https://img.lvups.com/d/file/bigpic/2023/02/02/c2p14ux13dc.jpg)
點擊濾鏡—扭曲—極坐標—極坐標平面坐標—確定
![羽毛教程,運用PS制作羽毛效果](https://img.lvups.com/d/file/bigpic/2023/02/02/vo1ei0konh0.jpg)
矩形選框工具選出羽毛一半如下圖,添加蒙版http:///tags/38847/
![羽毛教程,運用PS制作羽毛效果](https://img.lvups.com/d/file/bigpic/2023/02/02/zildmrqwhwz.jpg)
使其框選出形狀添加蒙版后的圖形為圖中所示
![羽毛教程,運用PS制作羽毛效果](https://img.lvups.com/d/file/bigpic/2023/02/02/m5bmi3a3iew.jpg)
選中圖層一后復制圖層
![羽毛教程,運用PS制作羽毛效果](https://img.lvups.com/d/file/bigpic/2023/02/02/d0odqjg21m4.jpg)
選中復制的圖層,水平翻轉
![羽毛教程,運用PS制作羽毛效果](https://img.lvups.com/d/file/bigpic/2023/02/02/sb24us00qh5.jpg)
移動水平翻轉后的圖層,使其大抵展現為羽毛的形狀
![羽毛教程,運用PS制作羽毛效果](https://img.lvups.com/d/file/bigpic/2023/02/02/wkl4pfcghyd.jpg)
新建圖層,運用畫筆工具,畫出羽毛羽根
![羽毛教程,運用PS制作羽毛效果](https://img.lvups.com/d/file/bigpic/2023/02/02/n5ccbv4ikz4.jpg)
將圖層一圖層二圖層三合并為一個圖層
![羽毛教程,運用PS制作羽毛效果](https://img.lvups.com/d/file/bigpic/2023/02/02/d5fdyrozwxm.jpg)
運用橡皮擦工具擦除多余部分,修剪羽毛邊緣
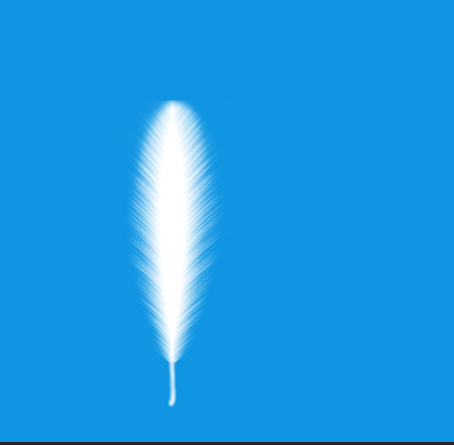
![羽毛教程,運用PS制作羽毛效果](https://img.lvups.com/d/file/bigpic/2023/02/02/sghb51ew32l.jpg)
最后填充喜歡的顏色,羽毛就制作完成了
![羽毛教程,運用PS制作羽毛效果](https://img.lvups.com/d/file/bigpic/2023/02/02/ycp5kaaeo3x.jpg)
將圖層一圖層二圖層三合并為一個圖層
下一篇:圖形繪制,制作這樣色彩豐富的花朵