ps閃圖教程
2022-12-25 10:54:23
來源/作者: /
己有:25人學習過
此教程使用的版本是CS3,CS2 9.0以下的版本是沒有動畫的,只有IR。
很多同學制作好后不會保存,現在特意說明一下保存的時候一定要保存為GIF格式圖片才會動。點擊“文件”--“存儲為WEB和設備所用方式”,或者按快捷鍵Shift+Ctrl+Alt+S
效果圖
![](https://img.lvups.com/d/file/bigpic/2022/12/25/wftcjshztl3.gif)
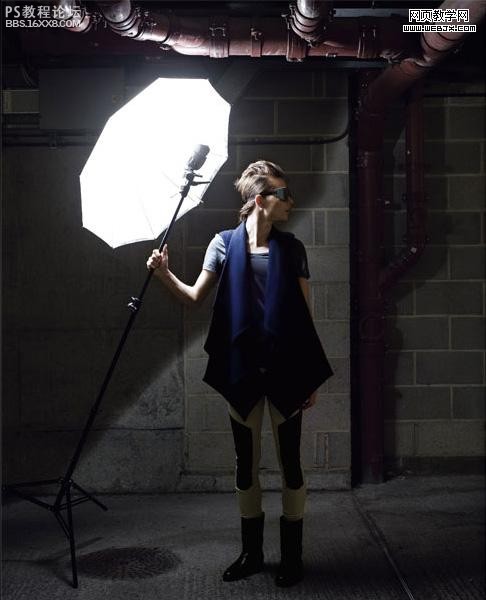
原圖
![](https://img.lvups.com/d/file/bigpic/2022/12/25/5ptnea4fk1l.jpg)
首先、在PS中 打開一張圖片,然后按 Ctrl+J 復制圖層
![](https://img.lvups.com/d/file/bigpic/2022/12/25/e3jzk3ctca2.jpg)
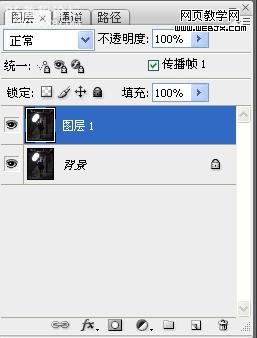
接著把圖層1模式改成濾色
![](https://img.lvups.com/d/file/bigpic/2022/12/25/xj1milpi4kc.jpg)
打開窗口選項中的動畫(窗口--動畫)
![](https://img.lvups.com/d/file/bigpic/2022/12/25/nmy4elcjgm2.jpg)
點下面的按鈕復制幀
![](https://img.lvups.com/d/file/bigpic/2022/12/25/ludpw5wcqyq.jpg)
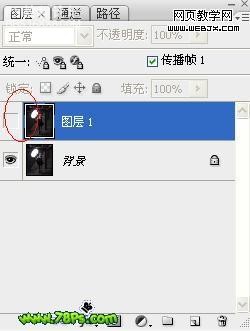
把圖層1前面的小眼睛去掉
![](https://img.lvups.com/d/file/bigpic/2022/12/25/3n3y5hyk1zm.jpg)
設置幀延遲、選0.1秒
![](https://img.lvups.com/d/file/bigpic/2022/12/25/tspskwffd5v.jpg)
點播放鍵(向右的小三角)可查看效果
最后點文件選項里的存儲為WEB和設備所用方式
也可直接使用快捷鍵 Shift+Ctrl+Alt+S
![](https://img.lvups.com/d/file/bigpic/2022/12/25/lg2z1poatrd.jpg)
按存儲,結束
, 補充下利用濾鏡作出更多風格的閃圖
![](https://img.lvups.com/d/file/bigpic/2022/12/25/244hzykdq3s.jpg)
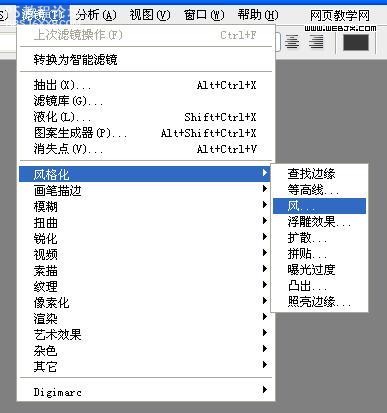
點濾鏡——風格化——風
![](https://img.lvups.com/d/file/bigpic/2022/12/25/quntnhst4mp.gif)
濾鏡 ——扭曲——擠壓
![](https://img.lvups.com/d/file/bigpic/2022/12/25/sqr2ho30gjf.gif)
濾鏡——模糊——動感模糊
![](https://img.lvups.com/d/file/bigpic/2022/12/25/thqtwi1vvtu.gif)
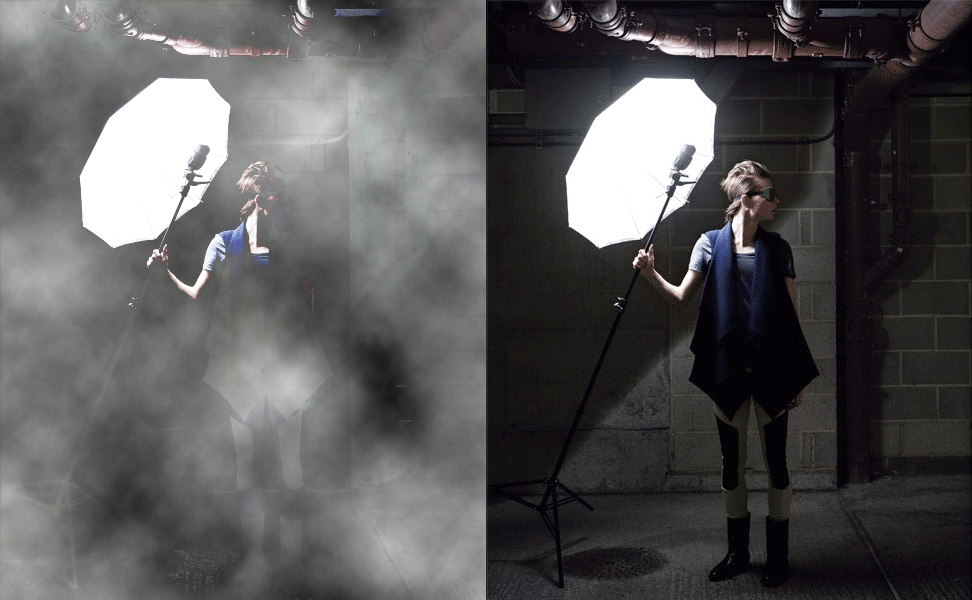
濾鏡——渲染——分層云彩
![](https://img.lvups.com/d/file/bigpic/2022/12/25/qzqtqih5ial.gif)
來源:U9U8游戲論壇
很多同學制作好后不會保存,現在特意說明一下保存的時候一定要保存為GIF格式圖片才會動。點擊“文件”--“存儲為WEB和設備所用方式”,或者按快捷鍵Shift+Ctrl+Alt+S
效果圖
![](https://img.lvups.com/d/file/bigpic/2022/12/25/wftcjshztl3.gif)
原圖
![](https://img.lvups.com/d/file/bigpic/2022/12/25/5ptnea4fk1l.jpg)
首先、在PS中 打開一張圖片,然后按 Ctrl+J 復制圖層
![](https://img.lvups.com/d/file/bigpic/2022/12/25/e3jzk3ctca2.jpg)
接著把圖層1模式改成濾色
![](https://img.lvups.com/d/file/bigpic/2022/12/25/xj1milpi4kc.jpg)
打開窗口選項中的動畫(窗口--動畫)
![](https://img.lvups.com/d/file/bigpic/2022/12/25/nmy4elcjgm2.jpg)
點下面的按鈕復制幀
![](https://img.lvups.com/d/file/bigpic/2022/12/25/ludpw5wcqyq.jpg)
把圖層1前面的小眼睛去掉
![](https://img.lvups.com/d/file/bigpic/2022/12/25/3n3y5hyk1zm.jpg)
設置幀延遲、選0.1秒
![](https://img.lvups.com/d/file/bigpic/2022/12/25/tspskwffd5v.jpg)
點播放鍵(向右的小三角)可查看效果
最后點文件選項里的存儲為WEB和設備所用方式
也可直接使用快捷鍵 Shift+Ctrl+Alt+S
![](https://img.lvups.com/d/file/bigpic/2022/12/25/lg2z1poatrd.jpg)
按存儲,結束
, 補充下利用濾鏡作出更多風格的閃圖
![](https://img.lvups.com/d/file/bigpic/2022/12/25/244hzykdq3s.jpg)
點濾鏡——風格化——風
![](https://img.lvups.com/d/file/bigpic/2022/12/25/quntnhst4mp.gif)
濾鏡 ——扭曲——擠壓
![](https://img.lvups.com/d/file/bigpic/2022/12/25/sqr2ho30gjf.gif)
濾鏡——模糊——動感模糊
![](https://img.lvups.com/d/file/bigpic/2022/12/25/thqtwi1vvtu.gif)
濾鏡——渲染——分層云彩
![](https://img.lvups.com/d/file/bigpic/2022/12/25/qzqtqih5ial.gif)
來源:U9U8游戲論壇
上一篇:用濾鏡制作揉卷的絲綢特效