Photoshop圖片創(chuàng)意合成教程:思想者
今天我們介紹一篇極有創(chuàng)意的合成教程,這個(gè)效果圖其實(shí)早就出來了,但是一直懶得整理教程。風(fēng)格不是大家都比較能接受的,但是還是希望大家喜歡。(思想者)教程重點(diǎn)在于創(chuàng)意,方法比較簡(jiǎn)單,大家可以自由發(fā)揮。
云層素材和熱氣球還有泥土素材,在電腦里面找不到了,請(qǐng)大家自己準(zhǔn)備。到百度一搜就有了。
思想者

局部3

局部1

局部2

教程步驟:

1,新建畫布,大小200*285mm,分辨率300.

2,導(dǎo)入云層素材,執(zhí)行圖像-調(diào)整-去色。

3,導(dǎo)入已經(jīng)摳出的人物圖,并調(diào)整好位置和大小。

4,對(duì)人物圖層執(zhí)行去色。

5,導(dǎo)入裂痕素材,調(diào)整好大小,模式改為正片疊底。

6,用魔棒工具在人物圖層空白處點(diǎn)擊,然后回到裂痕層,將選區(qū)裂痕清除

7,ctrl+L彈出色階對(duì)話框,調(diào)整色階(數(shù)值如圖),使裂痕對(duì)比度更明顯。

8,對(duì)云層圖層添加蒙版,用黑色畫筆覆蓋不需要的地方。

9,導(dǎo)入破洞素材,模式為疊加

10,多邊形選取工具不規(guī)則地選區(qū)出一塊破洞,然后移動(dòng)。

11,結(jié)合復(fù)制,粘貼,以達(dá)到分散效果。

12,載入泥土素材,將泥土移到人物頭部,并用橡皮擦將不需要的地方擦除。

13,打開樹素材,用通道摳圖方法將樹木摳出來。

14,將摳出來的樹木導(dǎo)入(思想者)里面,然后調(diào)整好大小和位置。

15,將飛機(jī)和熱氣球分別摳出來,然后放置到合適位置。

16,新建光線圖層,然后用鋼筆工具畫出弧線,并使用模擬壓力描邊,描邊像素自定。

17,新建光暈圖層,用畫筆沿著弧線周圍隨意涂抹。

18,對(duì)光暈圖層執(zhí)行-濾鏡-模糊-高斯模糊,數(shù)值如圖。

19,繼續(xù)用鋼筆畫弧線,像素自行調(diào)整。

20,新建星光圖層,設(shè)置散布畫筆,沿著弧線畫上星光。

21,再次畫出幾條弧線,用黃色描邊,描邊像素略小。

22,對(duì)人物圖層添加蒙版,用黑色畫筆將人物最底下覆蓋起來。

23,對(duì)樹木圖層執(zhí)行色相飽和度,數(shù)值如圖

24,導(dǎo)入苔蘚素材,將素材移動(dòng)到合適位置,疊加模式改為柔光,將其他不需要的地方擦除。

25,最后一步回到泥土圖層,彈出曲線窗口,降低曲線。
最后的最后當(dāng)然是綜合調(diào)整圖片,用加深減淡工具擦出一些光感,保存就完成了。
素材


標(biāo)簽(TAG) 照片合成
相關(guān)推薦
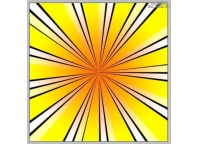
ps放射線背景

PS漸變紋理背景
ps設(shè)計(jì)幾何組合背景
海報(bào)制作,用PS制作一款人物穿插在字

合成行駛在夢(mèng)幻森林中火車照片的PS教程

合成恐怖靈異雙重曝光頭像照片的PS教程

PS合成明亮夜色下的天使白狼場(chǎng)景圖片

戰(zhàn)爭(zhēng)海報(bào),PS合成戰(zhàn)爭(zhēng)電影主題海報(bào)圖片設(shè)計(jì)教程


