photoshop合成教程:合成比武場面
2022-12-26 00:54:51
來源/作者: /
己有:27人學習過
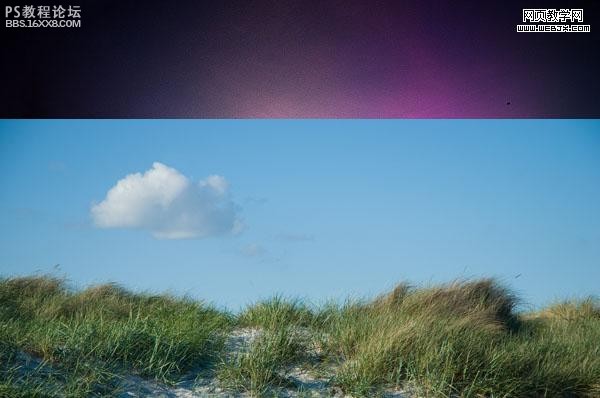
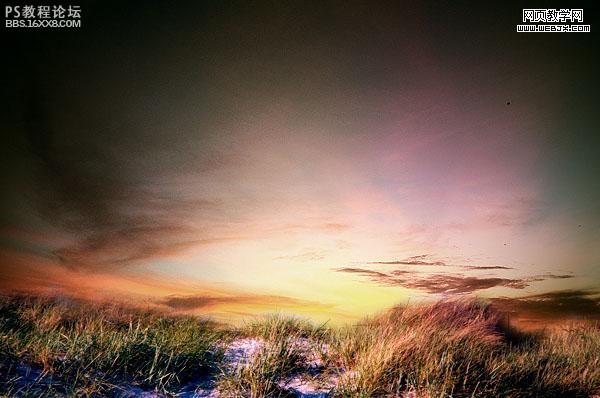
最終效果

以下是詳細的photoshop教程步驟:
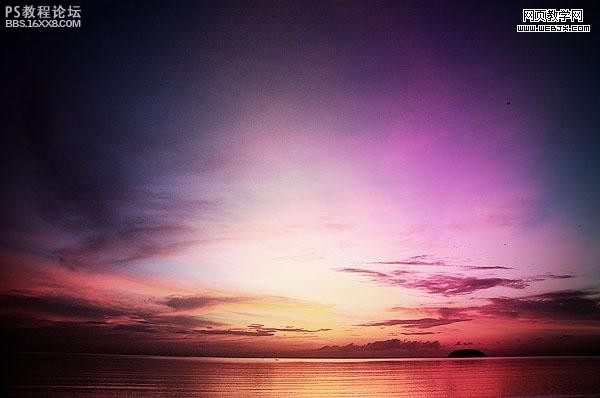
新建一個文檔,然后粘貼過一個夕陽天空圖片,命名圖層為sky。
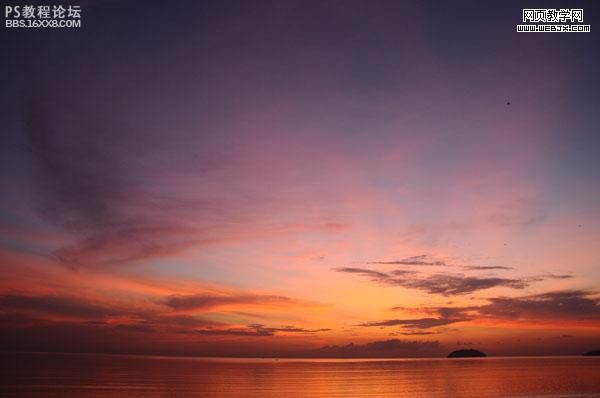
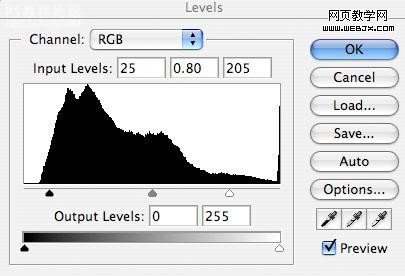
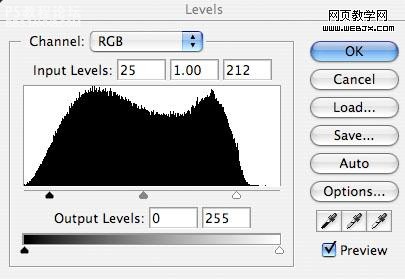
然后我們執行銳化濾鏡,得到更多細節部分。之后調整色階,設置如下。
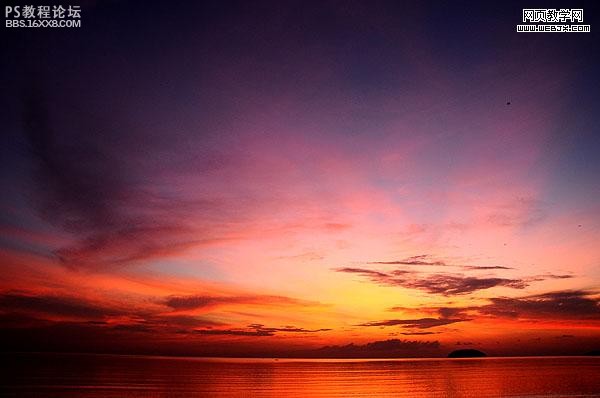
,調整色相和飽和度。

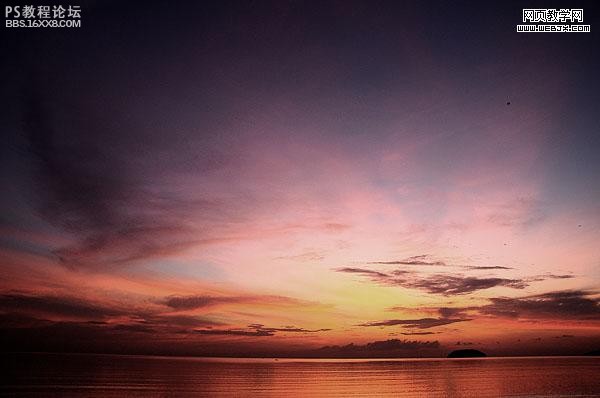
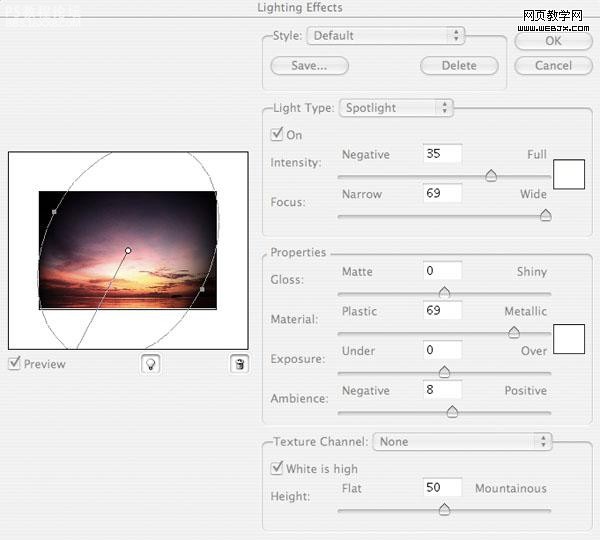
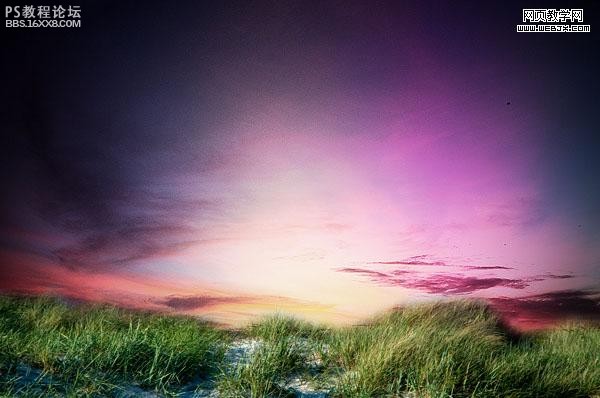
復制sky圖層,然后命名為sky light,然后執行光效濾鏡,設置如下。
然后執行銳化濾鏡,降低圖層透明度到40%。

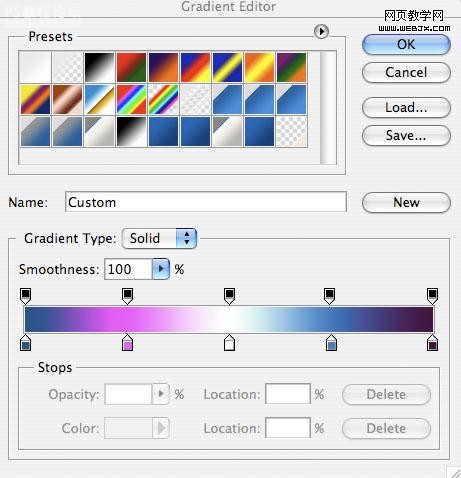
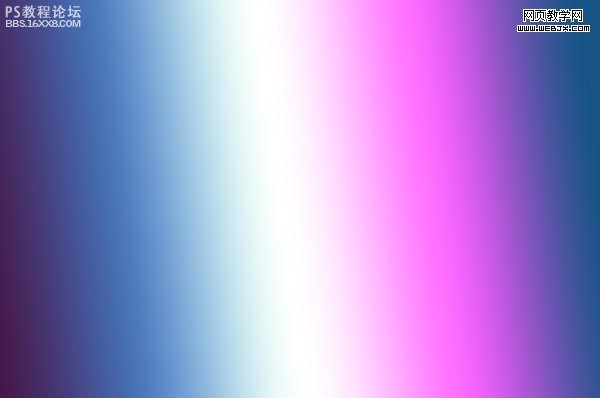
,創建一個新圖層sky gradient overlay,然后設置漸變效果,填充畫布,然后降低圖層透明度到50%,改變圖層模式為疊加,效果如下。
,然后粘貼一幅草地和天空的圖片,調整大小,然后使用橡皮擦工具擦除天空部分,使兩幅圖片融合。

然后調整色階。
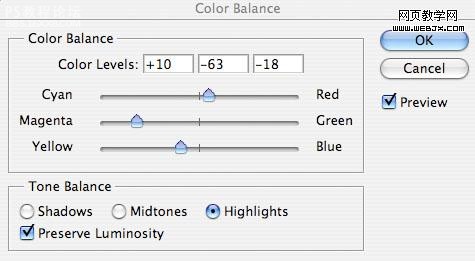
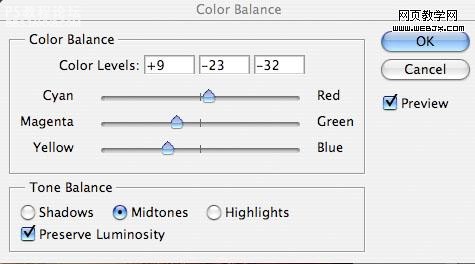
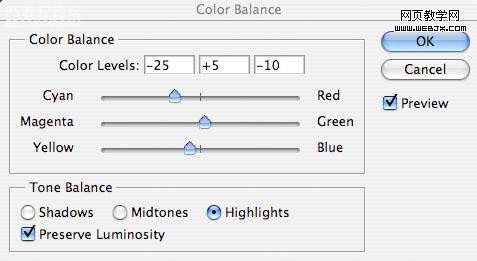
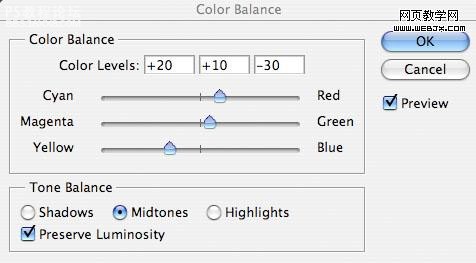
,為了使天空和草地更好融合,我們調整色彩平衡,設置如下。
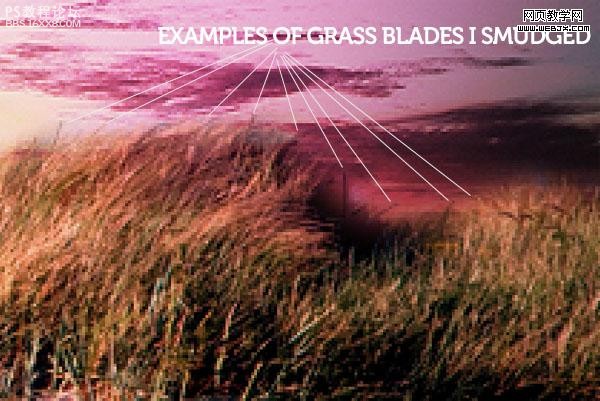
放大圖片,為了使天空和草地更好融合,我們修飾細節部分,使用橡皮擦去掉融合的白色邊緣,然后使用涂抹工具使之結合的更加好。
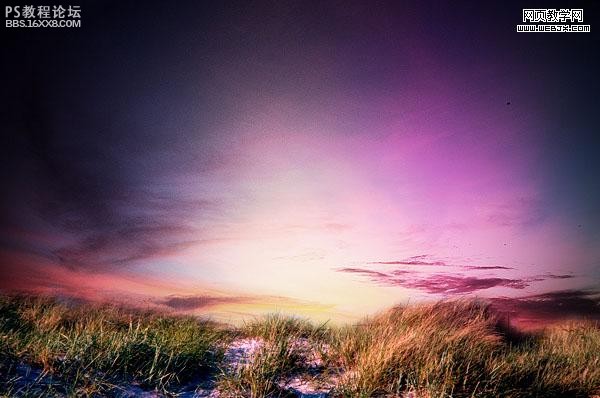
,然后我們創建一個圖層,命名為grass highlight,我們在草地中部創建一個高光部分,使用白色的柔筆刷涂抹,然后把圖層模式設置為疊加,不透明度設為20%。
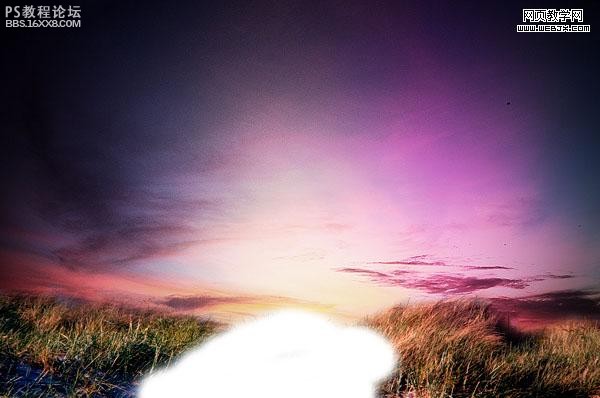

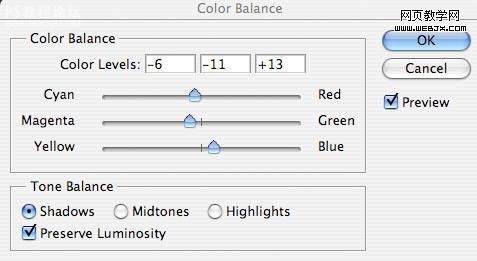
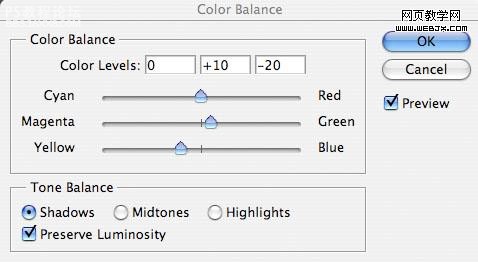
選擇原始的sky然后調整色彩平衡,然后降低sky gradient overlay’圖層的不透明度從50%到20%。
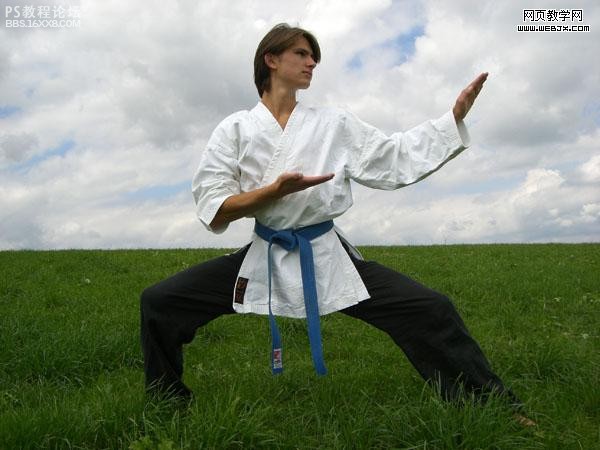
,現在我們的主要背景制作好了,拼合所有圖層當作背景。然后打開一個練武的人物照片。之后我們用摳圖方法摳出人物,這里大家可以參考網的photoshop摳圖教程專題。

以下是詳細的photoshop教程步驟:
新建一個文檔,然后粘貼過一個夕陽天空圖片,命名圖層為sky。
然后我們執行銳化濾鏡,得到更多細節部分。之后調整色階,設置如下。
,調整色相和飽和度。
復制sky圖層,然后命名為sky light,然后執行光效濾鏡,設置如下。
然后執行銳化濾鏡,降低圖層透明度到40%。
,創建一個新圖層sky gradient overlay,然后設置漸變效果,填充畫布,然后降低圖層透明度到50%,改變圖層模式為疊加,效果如下。
,然后粘貼一幅草地和天空的圖片,調整大小,然后使用橡皮擦工具擦除天空部分,使兩幅圖片融合。
然后調整色階。
,為了使天空和草地更好融合,我們調整色彩平衡,設置如下。
放大圖片,為了使天空和草地更好融合,我們修飾細節部分,使用橡皮擦去掉融合的白色邊緣,然后使用涂抹工具使之結合的更加好。
,然后我們創建一個圖層,命名為grass highlight,我們在草地中部創建一個高光部分,使用白色的柔筆刷涂抹,然后把圖層模式設置為疊加,不透明度設為20%。
選擇原始的sky然后調整色彩平衡,然后降低sky gradient overlay’圖層的不透明度從50%到20%。
,現在我們的主要背景制作好了,拼合所有圖層當作背景。然后打開一個練武的人物照片。之后我們用摳圖方法摳出人物,這里大家可以參考網的photoshop摳圖教程專題。
上一篇:ps cs6合成城中戰場場景教程
下一篇:教你怎樣用漸變映射合成圖片
相關推薦

PS照片合成火焰天使圖片

ps照片合成三個炮筒的坦克車

PS照片合成童話場景

ps照片合成山谷中小村場景

合成行駛在夢幻森林中火車照片的PS教程

合成恐怖靈異雙重曝光頭像照片的PS教程

PS合成明亮夜色下的天使白狼場景圖片

戰爭海報,PS合成戰爭電影主題海報圖片設計教程


