Photoshop調出外景婚片甜美的粉褐色
2022-12-26 01:08:38
來源/作者: /
己有:17人學習過
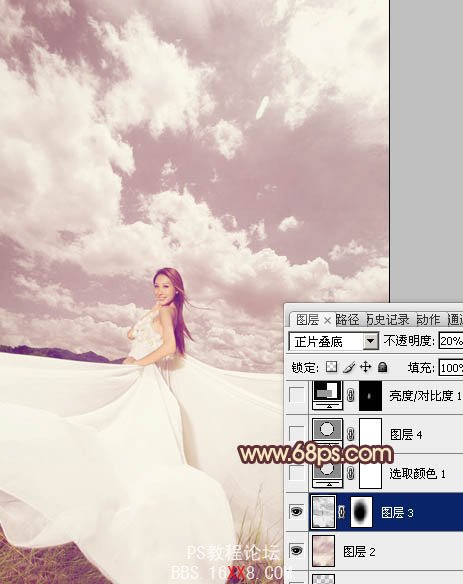
6、新建一個圖層,蓋印圖層。按Ctrl + Shift + U 去色,混合模式改為“正片疊底”,不透明度改為:20%,加上圖層蒙版,用黑色畫筆把中間部分擦出來,效果如下圖。
![](https://img.lvups.com/d/file/bigpic/2022/12/26/kvyyhg4z2ht.jpg)
<圖11>
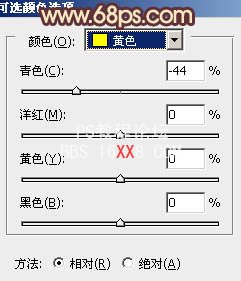
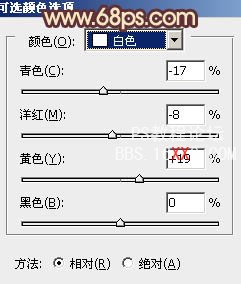
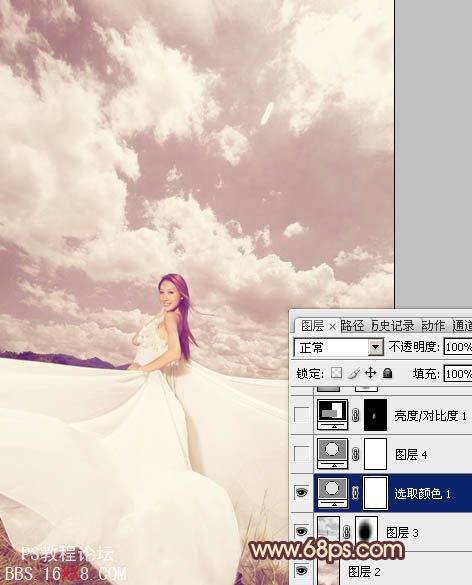
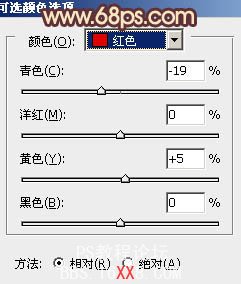
7、創建可選顏色調整圖層,對紅,黃,白進行調整,參數設置如圖12 - 14,效果如圖15。
![](https://img.lvups.com/d/file/bigpic/2022/12/26/yyvj2uwgxgg.jpg)
<圖12>
![](https://img.lvups.com/d/file/bigpic/2022/12/26/lrxxlp4y0tx.jpg)
<圖13>
![](https://img.lvups.com/d/file/bigpic/2022/12/26/jtqhjhxojgd.jpg)
<圖14>
![](https://img.lvups.com/d/file/bigpic/2022/12/26/htnio1grbvn.jpg)
<圖15>
![](https://img.lvups.com/d/file/bigpic/2022/12/26/kvyyhg4z2ht.jpg)
<圖11>
7、創建可選顏色調整圖層,對紅,黃,白進行調整,參數設置如圖12 - 14,效果如圖15。
![](https://img.lvups.com/d/file/bigpic/2022/12/26/yyvj2uwgxgg.jpg)
<圖12>
![](https://img.lvups.com/d/file/bigpic/2022/12/26/lrxxlp4y0tx.jpg)
<圖13>
![](https://img.lvups.com/d/file/bigpic/2022/12/26/jtqhjhxojgd.jpg)
<圖14>
![](https://img.lvups.com/d/file/bigpic/2022/12/26/htnio1grbvn.jpg)
<圖15>
標簽(TAG) 人物調色
下一篇:ps鐵軌上的清新可愛美女教程