PS調色教程調出兒童照溫馨暖色調
2022-12-25 23:02:20
來源/作者: /
己有:38人學習過
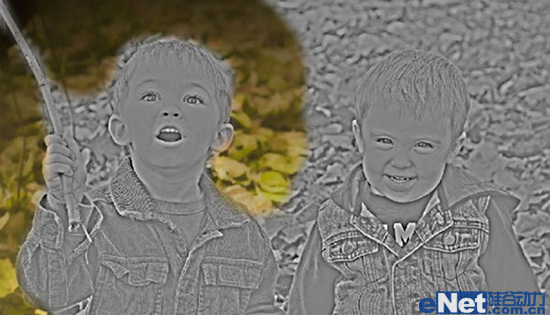
9、復制層執(zhí)行圖像>調整>去色操作,應用濾鏡>通道,并且再次用橡皮擦擦出層與背景區(qū)域,更改圖像混合模式為疊加。

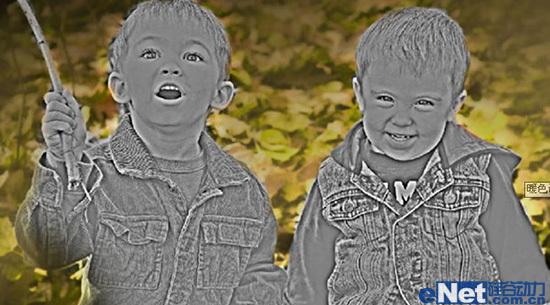
10、最后更改圖層混合模式,降低不透明度,細節(jié)調整,得到最終效果。


相關推薦

PS調色教程:給嚴重偏黃色的貓咪校

PS調色教程:修復嚴重偏紅色人物照

ps調色教程:把美女調成古銅色皮膚

PS調色教程:調出外景黃黃的懷舊歐美

ps調出高級復古歐美色調教程

PS夜景美化:調出唯美藍色夜景燈光照片效果

調出絢麗藍天白云山水風景圖片的PS教程

調出金色晨曦森林兒童背影照片的PS教程


