ps調出室內MM圖片淡雅的黃綠色
2022-12-25 23:33:46
來源/作者: /
己有:8人學習過
2、按Ctrl + J 把當前可選顏色調整圖層復制一次,不透明度改為:50%,效果如下圖。

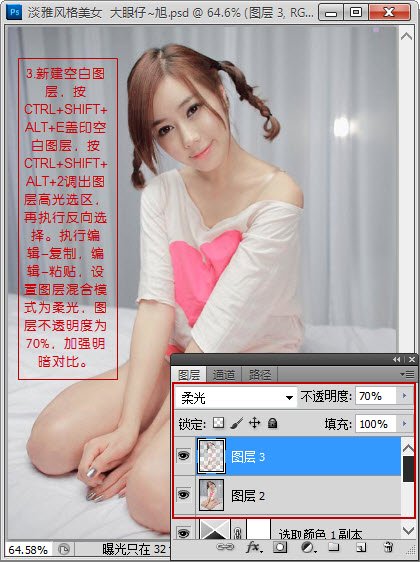
3、新建一個圖層,按Ctrl + Alt + Shift + E 蓋印圖層。按Ctrl + Shift + Alt + 2調出高光選區,按Ctrl + Shift + I 反選,按Ctrl + J 把選區部分的圖像復制到新的圖層,混合模式改為“柔光”,不透明度改為:70%,效果如下圖。

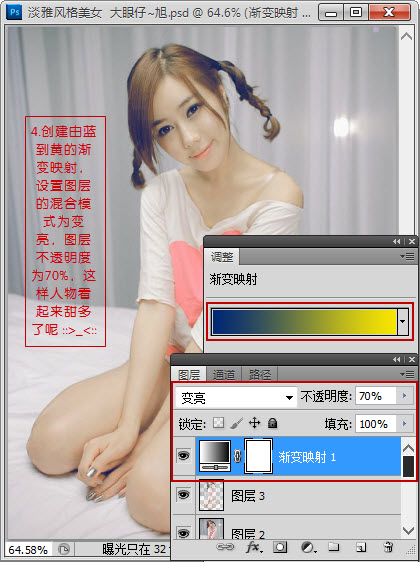
4、創建漸變映射調整圖層,顏色設置如下圖。確定后把圖層混合模式改為“變亮”,不透明度改為:70%,效果如下圖。

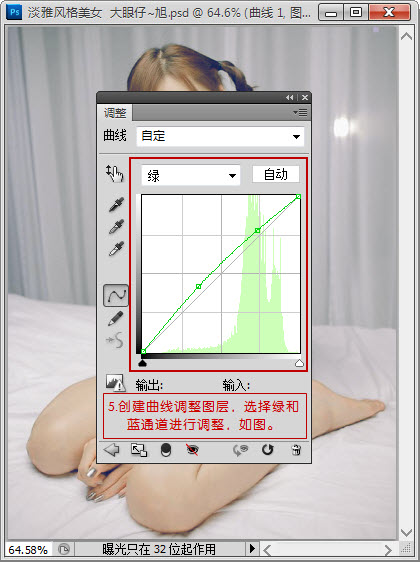
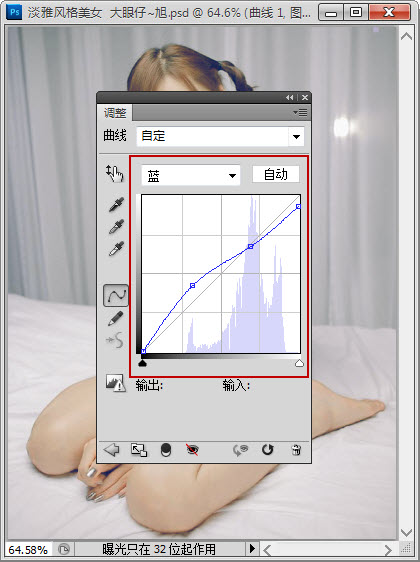
5、創建曲線調整圖層,對綠色和藍色進行調整,參數及效果如下圖。


上一篇:ps調非主流橙紅色
下一篇:PS調出純白天空教程


