photoshop調出淡淡的人物照片暖色調
2022-12-25 20:09:25
來源/作者: /
己有:12人學習過
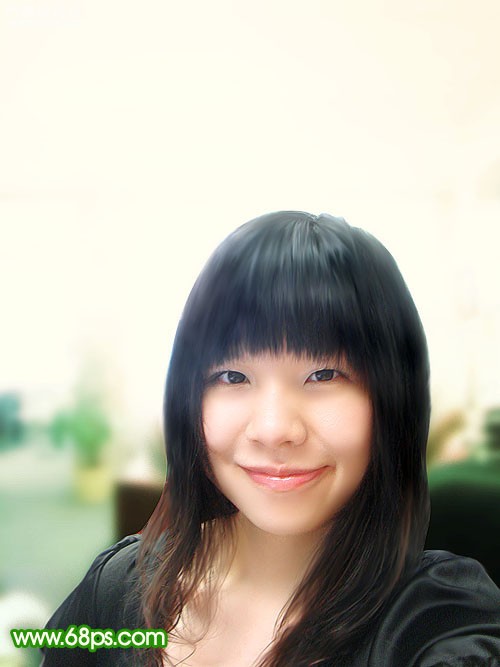
效果圖如下:
![](https://img.lvups.com/d/file/bigpic/2022/12/25/5lhvnbduhao.jpg)
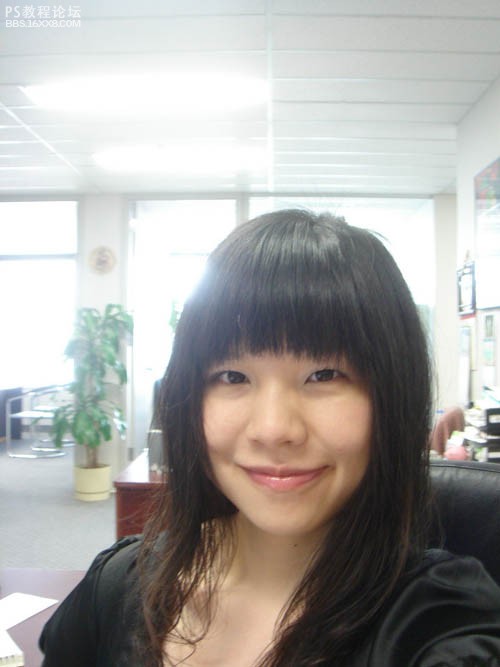
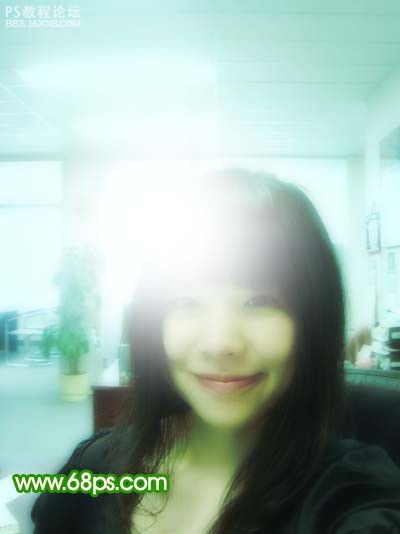
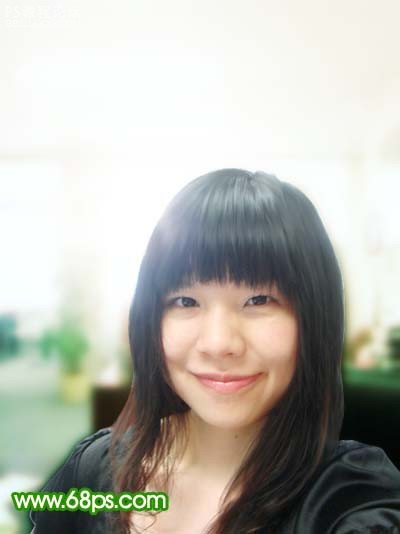
原圖片:
![](https://img.lvups.com/d/file/bigpic/2022/12/25/3izhk0lhh5p.jpg)
具體步驟如下:
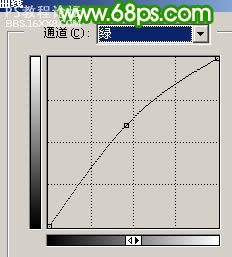
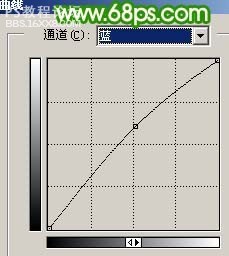
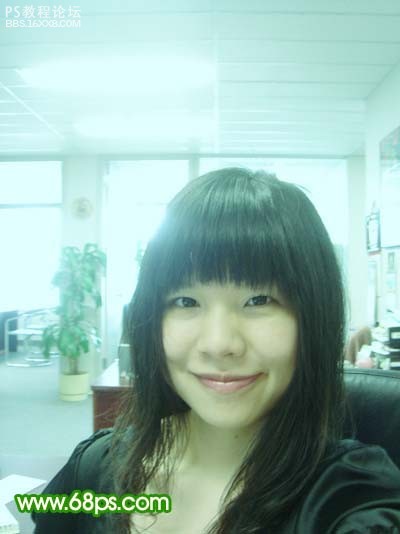
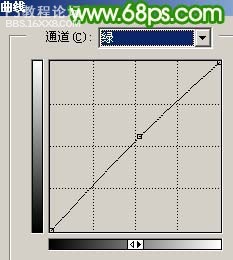
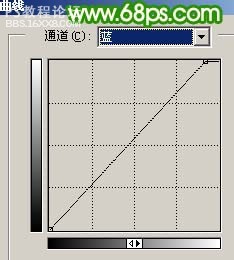
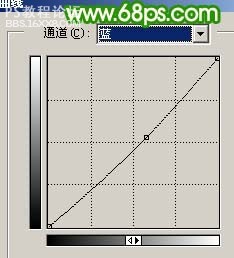
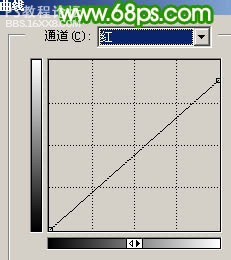
1、打開原圖素材,創建曲線調整圖層,參數設置如圖1-3,效果如圖4。
![](https://img.lvups.com/d/file/bigpic/2022/12/25/eaj5uilx30d.jpg)
圖1
![](https://img.lvups.com/d/file/bigpic/2022/12/25/cpiithulunc.jpg)
圖2
![](https://img.lvups.com/d/file/bigpic/2022/12/25/gzxs4qjvfia.jpg)
圖3
![](https://img.lvups.com/d/file/bigpic/2022/12/25/e5uphr1goet.jpg)
圖4
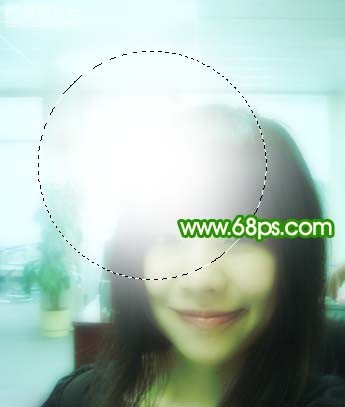
2、新建一個圖層,按Ctrl + Alt + Shift + E 蓋印圖層,執行:濾鏡 模糊 高斯模糊,數值為5,確定后把圖層不透明度改為:50%,按Ctrl + M適當調暗一點。然后新建一個圖層用橢圓選框工具拉出下圖所示的正圓選區,按Ctrl + Alt + D 羽化50個像素,然后填充白色,效果如圖6。
![](https://img.lvups.com/d/file/bigpic/2022/12/25/l5pmh0bslcb.jpg)
圖5
![](https://img.lvups.com/d/file/bigpic/2022/12/25/ugf5vrdrgtk.jpg)
圖6
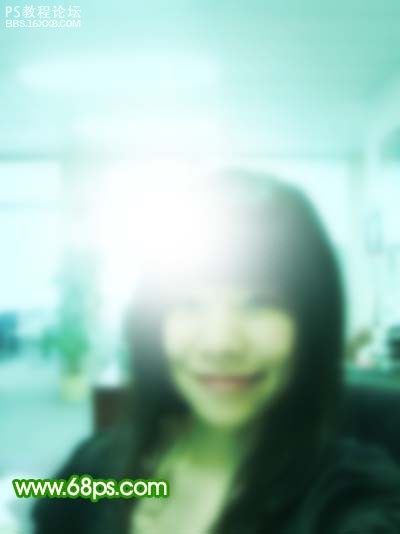
3、新建一個圖層,蓋印圖層,執行:濾鏡 模糊 高斯模糊,數值為3,效果如下圖。
![](https://img.lvups.com/d/file/bigpic/2022/12/25/1514puuhef2.jpg)
圖7
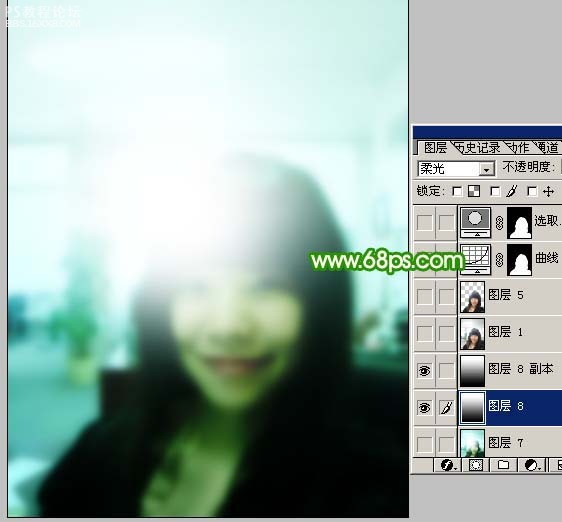
4、新建一個圖層,選擇黑白漸變拉出上白下黑的線性漸變,確定后把圖層混合模式改為“柔光”,按Ctrl + J 把當前圖層復制一層,圖層混合模式為“柔光”不變。,圖層不透明度改為:50%,效果如下圖。
![](https://img.lvups.com/d/file/bigpic/2022/12/25/kbeydc4nw1g.jpg)
圖8
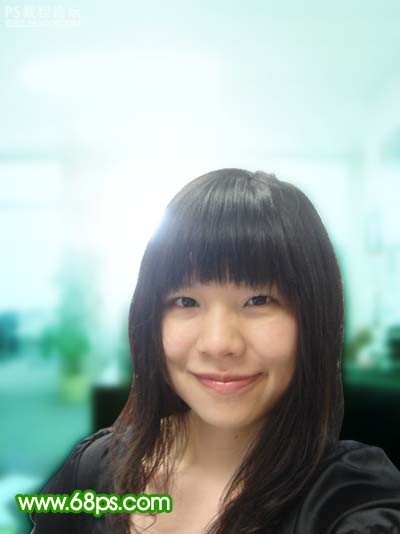
5、把背景圖層復制一層,按Ctrl + Shift + ] 置頂,用鋼筆工具把人物部分摳出來,復制到新的圖層,把背景副本圖層隱藏,效果如下圖。
![](https://img.lvups.com/d/file/bigpic/2022/12/25/4gleg5cb5qa.jpg)
圖9
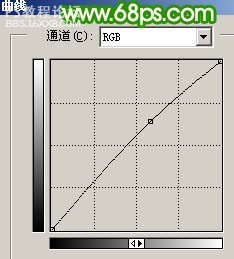
6、按Ctrl + M 對摳出的人物調整曲線,參數設置如圖10-12。
![](https://img.lvups.com/d/file/bigpic/2022/12/25/ku2f4wce4wc.jpg)
圖10
![](https://img.lvups.com/d/file/bigpic/2022/12/25/dqxtl3fstkn.jpg)
圖11
![](https://img.lvups.com/d/file/bigpic/2022/12/25/swpgdnofog4.jpg)
圖12
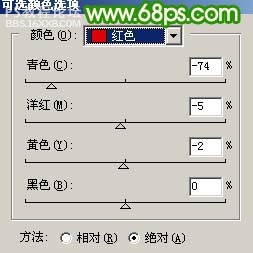
7、執行:圖像 調整 可選顏色,對紅色進行調整,參數設置如圖13,效果如圖14。
![](https://img.lvups.com/d/file/bigpic/2022/12/25/lliyxiswmaq.jpg)
圖13
![](https://img.lvups.com/d/file/bigpic/2022/12/25/h1mygoxm5tb.jpg)
圖14
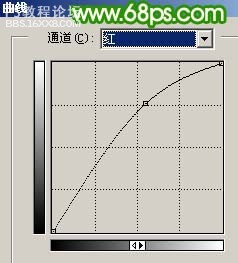
8、創建曲線調整圖層,對紅色及藍色進行調整,參數設置如圖15,16,確定后用黑色畫筆在蒙版上把人物部分擦出來,效果如圖17。
![](https://img.lvups.com/d/file/bigpic/2022/12/25/jipdjlkj3rv.jpg)
圖15
![](https://img.lvups.com/d/file/bigpic/2022/12/25/ntvnvjgtmv1.jpg)
圖16
![](https://img.lvups.com/d/file/bigpic/2022/12/25/fhoonctxnpv.jpg)
圖17
9、新建一個圖層蓋印圖層,用涂抹工具稍微把頭發部分涂順暢一點,再適當給人物磨下皮,效果如下圖。
![](https://img.lvups.com/d/file/bigpic/2022/12/25/ddgwexczr5p.jpg)
圖18
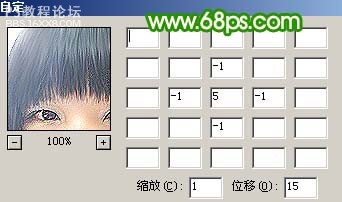
10、新建一個圖層蓋印圖層,執行:濾鏡 其它 自定,參數設置如圖19,確定后把圖層不透明度改為:45%,效果如圖20。
![](https://img.lvups.com/d/file/bigpic/2022/12/25/fno2y0okh0q.jpg)
圖19
![](https://img.lvups.com/d/file/bigpic/2022/12/25/5lhvnbduhao.jpg)
原圖片:
![](https://img.lvups.com/d/file/bigpic/2022/12/25/3izhk0lhh5p.jpg)
具體步驟如下:
1、打開原圖素材,創建曲線調整圖層,參數設置如圖1-3,效果如圖4。
![](https://img.lvups.com/d/file/bigpic/2022/12/25/eaj5uilx30d.jpg)
圖1
![](https://img.lvups.com/d/file/bigpic/2022/12/25/cpiithulunc.jpg)
圖2
![](https://img.lvups.com/d/file/bigpic/2022/12/25/gzxs4qjvfia.jpg)
圖3
![](https://img.lvups.com/d/file/bigpic/2022/12/25/e5uphr1goet.jpg)
圖4
2、新建一個圖層,按Ctrl + Alt + Shift + E 蓋印圖層,執行:濾鏡 模糊 高斯模糊,數值為5,確定后把圖層不透明度改為:50%,按Ctrl + M適當調暗一點。然后新建一個圖層用橢圓選框工具拉出下圖所示的正圓選區,按Ctrl + Alt + D 羽化50個像素,然后填充白色,效果如圖6。
![](https://img.lvups.com/d/file/bigpic/2022/12/25/l5pmh0bslcb.jpg)
圖5
![](https://img.lvups.com/d/file/bigpic/2022/12/25/ugf5vrdrgtk.jpg)
圖6
3、新建一個圖層,蓋印圖層,執行:濾鏡 模糊 高斯模糊,數值為3,效果如下圖。
![](https://img.lvups.com/d/file/bigpic/2022/12/25/1514puuhef2.jpg)
圖7
4、新建一個圖層,選擇黑白漸變拉出上白下黑的線性漸變,確定后把圖層混合模式改為“柔光”,按Ctrl + J 把當前圖層復制一層,圖層混合模式為“柔光”不變。,圖層不透明度改為:50%,效果如下圖。
![](https://img.lvups.com/d/file/bigpic/2022/12/25/kbeydc4nw1g.jpg)
圖8
5、把背景圖層復制一層,按Ctrl + Shift + ] 置頂,用鋼筆工具把人物部分摳出來,復制到新的圖層,把背景副本圖層隱藏,效果如下圖。
![](https://img.lvups.com/d/file/bigpic/2022/12/25/4gleg5cb5qa.jpg)
圖9
6、按Ctrl + M 對摳出的人物調整曲線,參數設置如圖10-12。
![](https://img.lvups.com/d/file/bigpic/2022/12/25/ku2f4wce4wc.jpg)
圖10
![](https://img.lvups.com/d/file/bigpic/2022/12/25/dqxtl3fstkn.jpg)
圖11
![](https://img.lvups.com/d/file/bigpic/2022/12/25/swpgdnofog4.jpg)
圖12
7、執行:圖像 調整 可選顏色,對紅色進行調整,參數設置如圖13,效果如圖14。
![](https://img.lvups.com/d/file/bigpic/2022/12/25/lliyxiswmaq.jpg)
圖13
![](https://img.lvups.com/d/file/bigpic/2022/12/25/h1mygoxm5tb.jpg)
圖14
8、創建曲線調整圖層,對紅色及藍色進行調整,參數設置如圖15,16,確定后用黑色畫筆在蒙版上把人物部分擦出來,效果如圖17。
![](https://img.lvups.com/d/file/bigpic/2022/12/25/jipdjlkj3rv.jpg)
圖15
![](https://img.lvups.com/d/file/bigpic/2022/12/25/ntvnvjgtmv1.jpg)
圖16
![](https://img.lvups.com/d/file/bigpic/2022/12/25/fhoonctxnpv.jpg)
圖17
9、新建一個圖層蓋印圖層,用涂抹工具稍微把頭發部分涂順暢一點,再適當給人物磨下皮,效果如下圖。
![](https://img.lvups.com/d/file/bigpic/2022/12/25/ddgwexczr5p.jpg)
圖18
10、新建一個圖層蓋印圖層,執行:濾鏡 其它 自定,參數設置如圖19,確定后把圖層不透明度改為:45%,效果如圖20。
![](https://img.lvups.com/d/file/bigpic/2022/12/25/fno2y0okh0q.jpg)
圖19
上一篇:ps cc調出高級灰色調
下一篇:調出照片電影感色調教程